My wife captured this slightly embarrassing video of me choreographing a fight sequence for TAR in the back yard. I was using the lid to one of her pots as a shield, which made for an even more ridiculous situation when the neighbor came out to walk his dog….
Have you noticed that the “look” of big budget animated movies has become homogenized? However beautiful those globally illuminated, sub-surface scattered, realistically simulated CG worlds have become, there is a common look to them…. I think it is because the artists and the tools are the same from studio to studio…
From what I understand about the industry, artists move from film to film, studio to studio, as each project ends (self described “pixel gypsies”)… The tools are similar between studios, the feature orgy in 3D software pushing in a Darwinian way towards a synthetic hyper realism.
The last animation that I posted suffered from this same look, and I had to stop and think about why…. I think there is an unconscious bias towards that style, because our tools favor it, and there is an expectation that for it to be accepted it has to have that look.
I am just one guy. Even if I thought that this homogenous CG look was great–there are hundreds of people involved in creating it–and if my work attempts to emulated it, then it will rightly be compared to it. The animation, the particles and effects, the lighting–everything has to be at Hollywood level…If it is not, then rather than being immersed in the story with the characters, the viewer is going to be distracted….
Realizing I needed to stylize the look–Dig a little deeper than what the tools want to give me–make them give me what I want, I started looking at my influences for TAR of Zandoria to see what it was that I liked (and figure out how to make the computer render it).
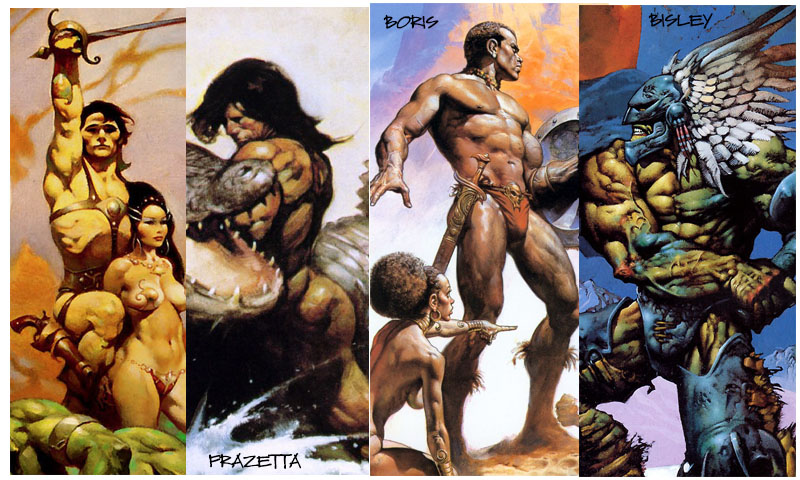
Frank Frazetta, Boris Vallejo, and Simon Bisley are my favorite fantasy artists. So I started looking at their paintings for stylistic cues that I could try to emulate–since that genre is the inspiration for TAR, if I could make it come to life that would be more satisfying….
The first thing that jumped out at me is the strong contrast between light and dark–It is called chiaroscuro in painting. The defined contours in Frazetta’s and Bisley’s work also stood out–I think this comes from their background in comics before they started painting…
The backgrounds are painted of course, and since I was already using a matte painting approach to creating my backgrounds for TAR, this is an easy shift–Even running a Photoshop filter was an improvement over the realistic matte painting…
I added toon shading to the edges of my objects, and I relighted the scene with a key light and a couple of fill lights. I think I am also going to tweak something with the diffuse falloff at the edges, to get a look for like my airbrushed version of TAR.
I was watching some behind the scenes shots from the Blue Sky film “Epic”, and saw a lot of reference footage that was acted-out by the animators and used as a reference. I thought that the motion and timing was very naturalistic, and if a big studio can do it, then why not me?
So I opened up the iPad and filmed a couple of takes of me taking off my shield/hat and flipping my staff around to use as a club, as storyboarded.
Dropping the footage into Animation:Master as a rotoscope, I was able to step forward in the timeline and see myself acting out the shot. The timing and spacing was already worked out–I just stepped to where I needed to set keyframes and posed TAR to match….
One thing that had struck me as odd on the Blue Sky example is that the reference shot matched the finished shot exactly for the camera angle…. To me, I had thought of myself as TAR, standing looking into the shadows at Ninja Pass–preparing to charge into a fight! The best camera angle came after I had dropped TAR into the Choreography.
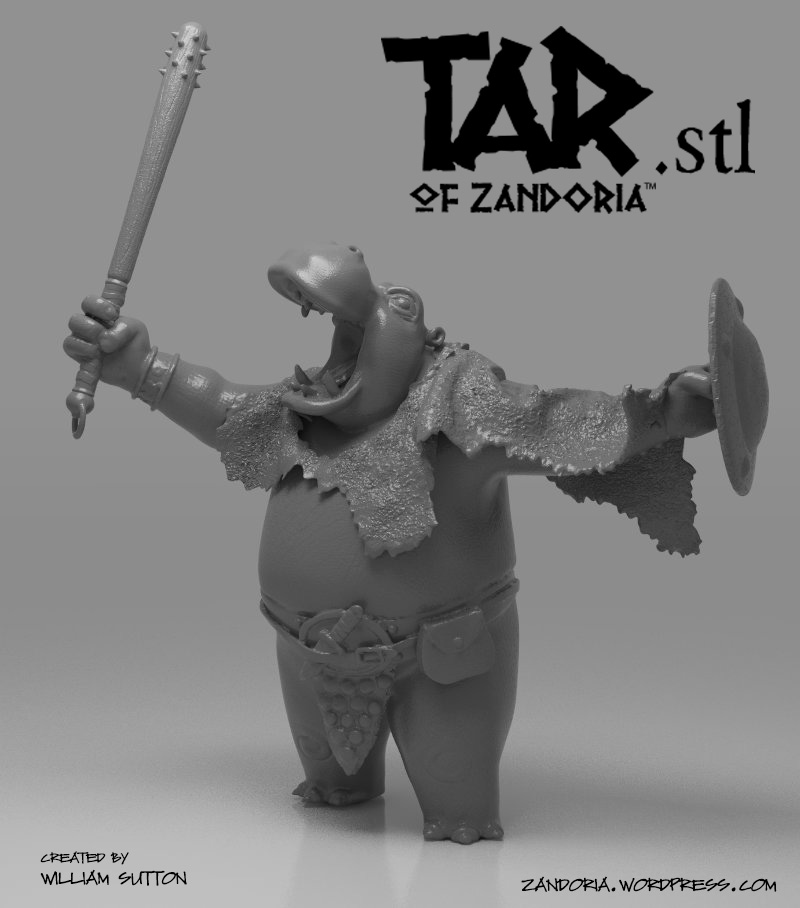
That is going to help spread awareness of this project, and the cost of the .stl will help me keep the lights on 😉
Pierre at Cults3D invited me to upload my sculptures to their new 3D model marketplace where people can buy print-ready models to build on their 3D printers. It seems like a great idea–I imagine that there are only so many Stanford bunnies and Yoda heads that a person needs… As 3D printers become ubiquitous there is a need for high quality sculpts to fill the build platforms.
I foresee that there is going to be a market for commission work too, so if you need a little help bringing your idea to life, please give me a shout. Here it is on Thingiverse
I have been a little torn between using somewhat realistic CG landscapes or digital paintings for this project. After doing a number of tests each way, I felt that a hybrid matte painted look was going to be better for the introduction of this character…
I started with a Digital Elevation Map (DEM) and exported a greyscale image from MicroDEM. The DEM files and software are available for free here.
Using the greyscale values, it is pretty simple to generate a terrain mesh. In this case, I used Zbrush to generate the geometry, but I exported it to Sculptris to work on the detail and textures. The reason I wanted to use Sculptris is that I could use the Reduction brush to simplify the geometry in the distance. The detailed rocks in the pass is where the main action of the scene is, so I figured that I could just drop the landscape in as a PROP and render everything in A:M…
Unfortunately, the maximum texture resolution in Sculptris was too pixelated when rendering up close. So I decided to render the landscape by itself to get the lighting, and retouch it in Photoshop to create matte paintings to use as background rotoscopes in A:M.
I added the dunes in the distance, and the sky, as layers underneath the rendering. Then I added extra detail of the rocks and scrub as an overlay layer.
I set the ground plane to Front Projection Target and Flat Shaded.
Now the only object in the shot is TAR. The dust particles are Sprites emitted with each step, and are drifting off to the right as though blown by the wind (actually there is a fan Force Emitter creating the wind).
I started rendering the shot (in HD, 1280 x 720), The first couple of frames took over 1-1/2 hours! With over 400 frames in just this shot, that was way too long…I knew that I was going to have to make some compromises…. I eliminated global illumination, ambient occlusion, and multipass–relighted the scene with Z-buffered shadows instead of ray-tracing. The new render time was only 2 minutes per frame!
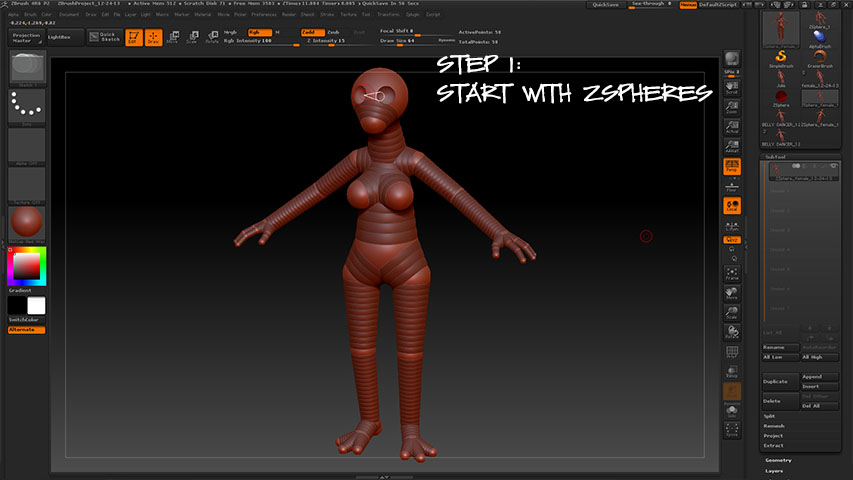
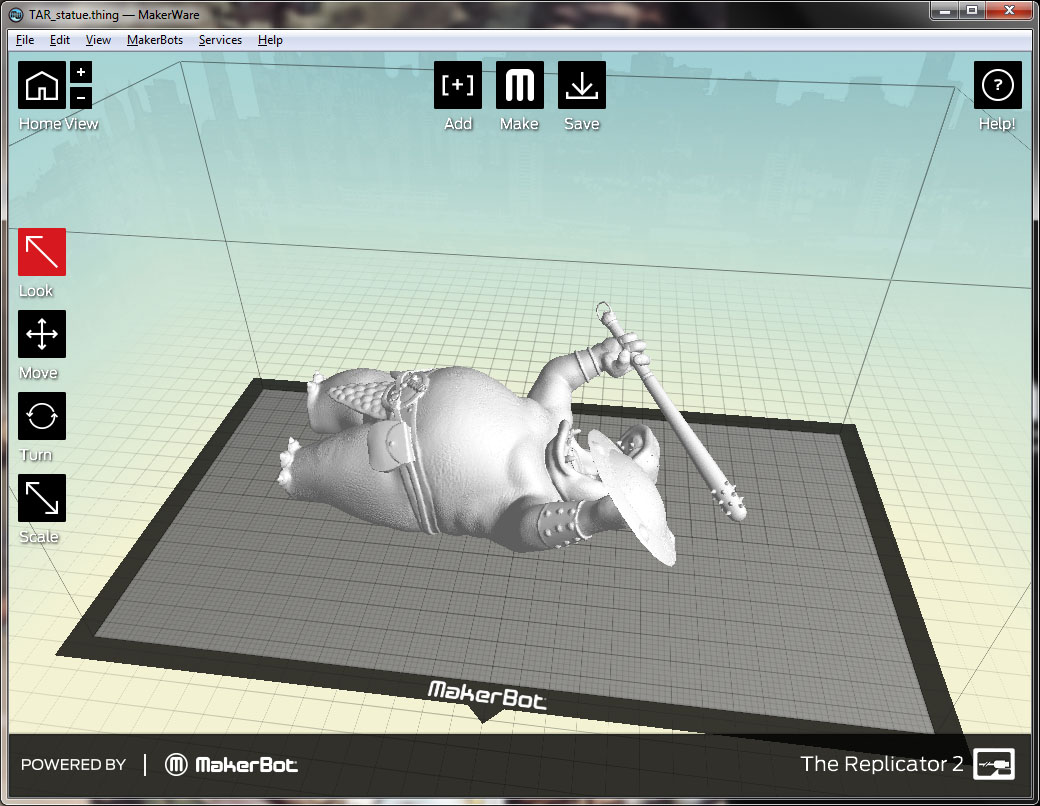
I’ve been learning to digitally sculpt in Zbrush, but that doesn’t mean that I’ve abandoned Animation:Master. I need to be able to take the sculpture back into my animation program to rig it and animate.
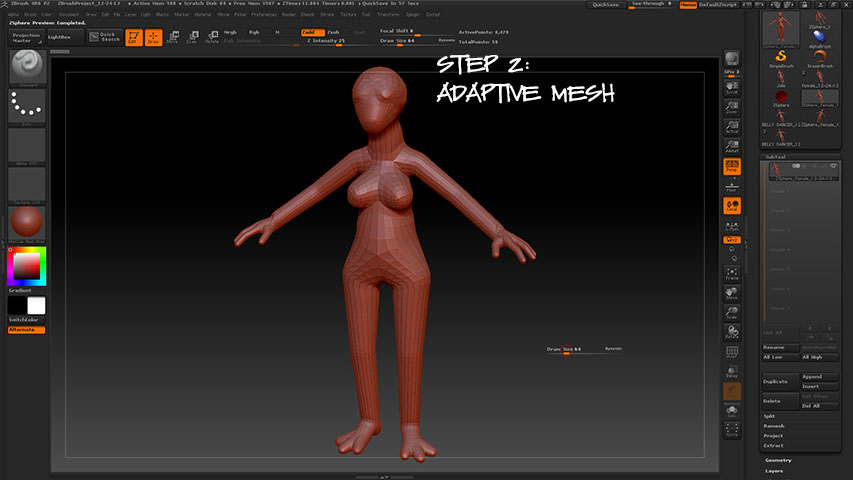
I’m still learning my way around Zbrush, but thought it might be helpful to some if I documented the steps to get a model from Zbrush to A:M:
The Zremesher is really awesome–I went from almost 1/2 million polygons to a little over 6,000 patches! There are some retopology tools that I’m going to explore too (looks like I can manually redraw sections of the mesh if I don’t like the automatic results…)
I was overwhelmed to open the January issue of Animation Magazine this week–this coming year is the 15 year anniversary of Zandoria Studios, and they included a half-page bio on me and my project!
It was very sweet and made my week! I had just resigned some of my responsibilities at SMP Instore Marketing (my day job), in order to work part time from home and focus on my art…I was pretty nervous about the decision. Reading this tribute brought tears to my eyes–it was a real Godsend. I felt affirmed that I was on the right path
I’ve been doing some 3D printing at work using a Makerbot Replicator 2 and I’m really excited by the technology. The ability for an artist or designer to create something digitally and then turn it into an actual object is a paradigm shift in manufacturing. It is something that is on my mind every day…
Zbrush is the perfect tool for this, so I’ve decided that it is something that I need to master. I exported my Animation:Master model of TAR as an .obj as well as his shield and club and, using Dynamesh, merged them into one Ztool. Then I sculpted some more detail into the body (I’m not finished yet, this is only a couple of hours work…).
There are some really cool features in this program that make me think that it might be easier to create characters from scratch in Zbrush and then export to an animation program. A lot of studios use Zbrush, so might be a better workflow for doing freelance too.
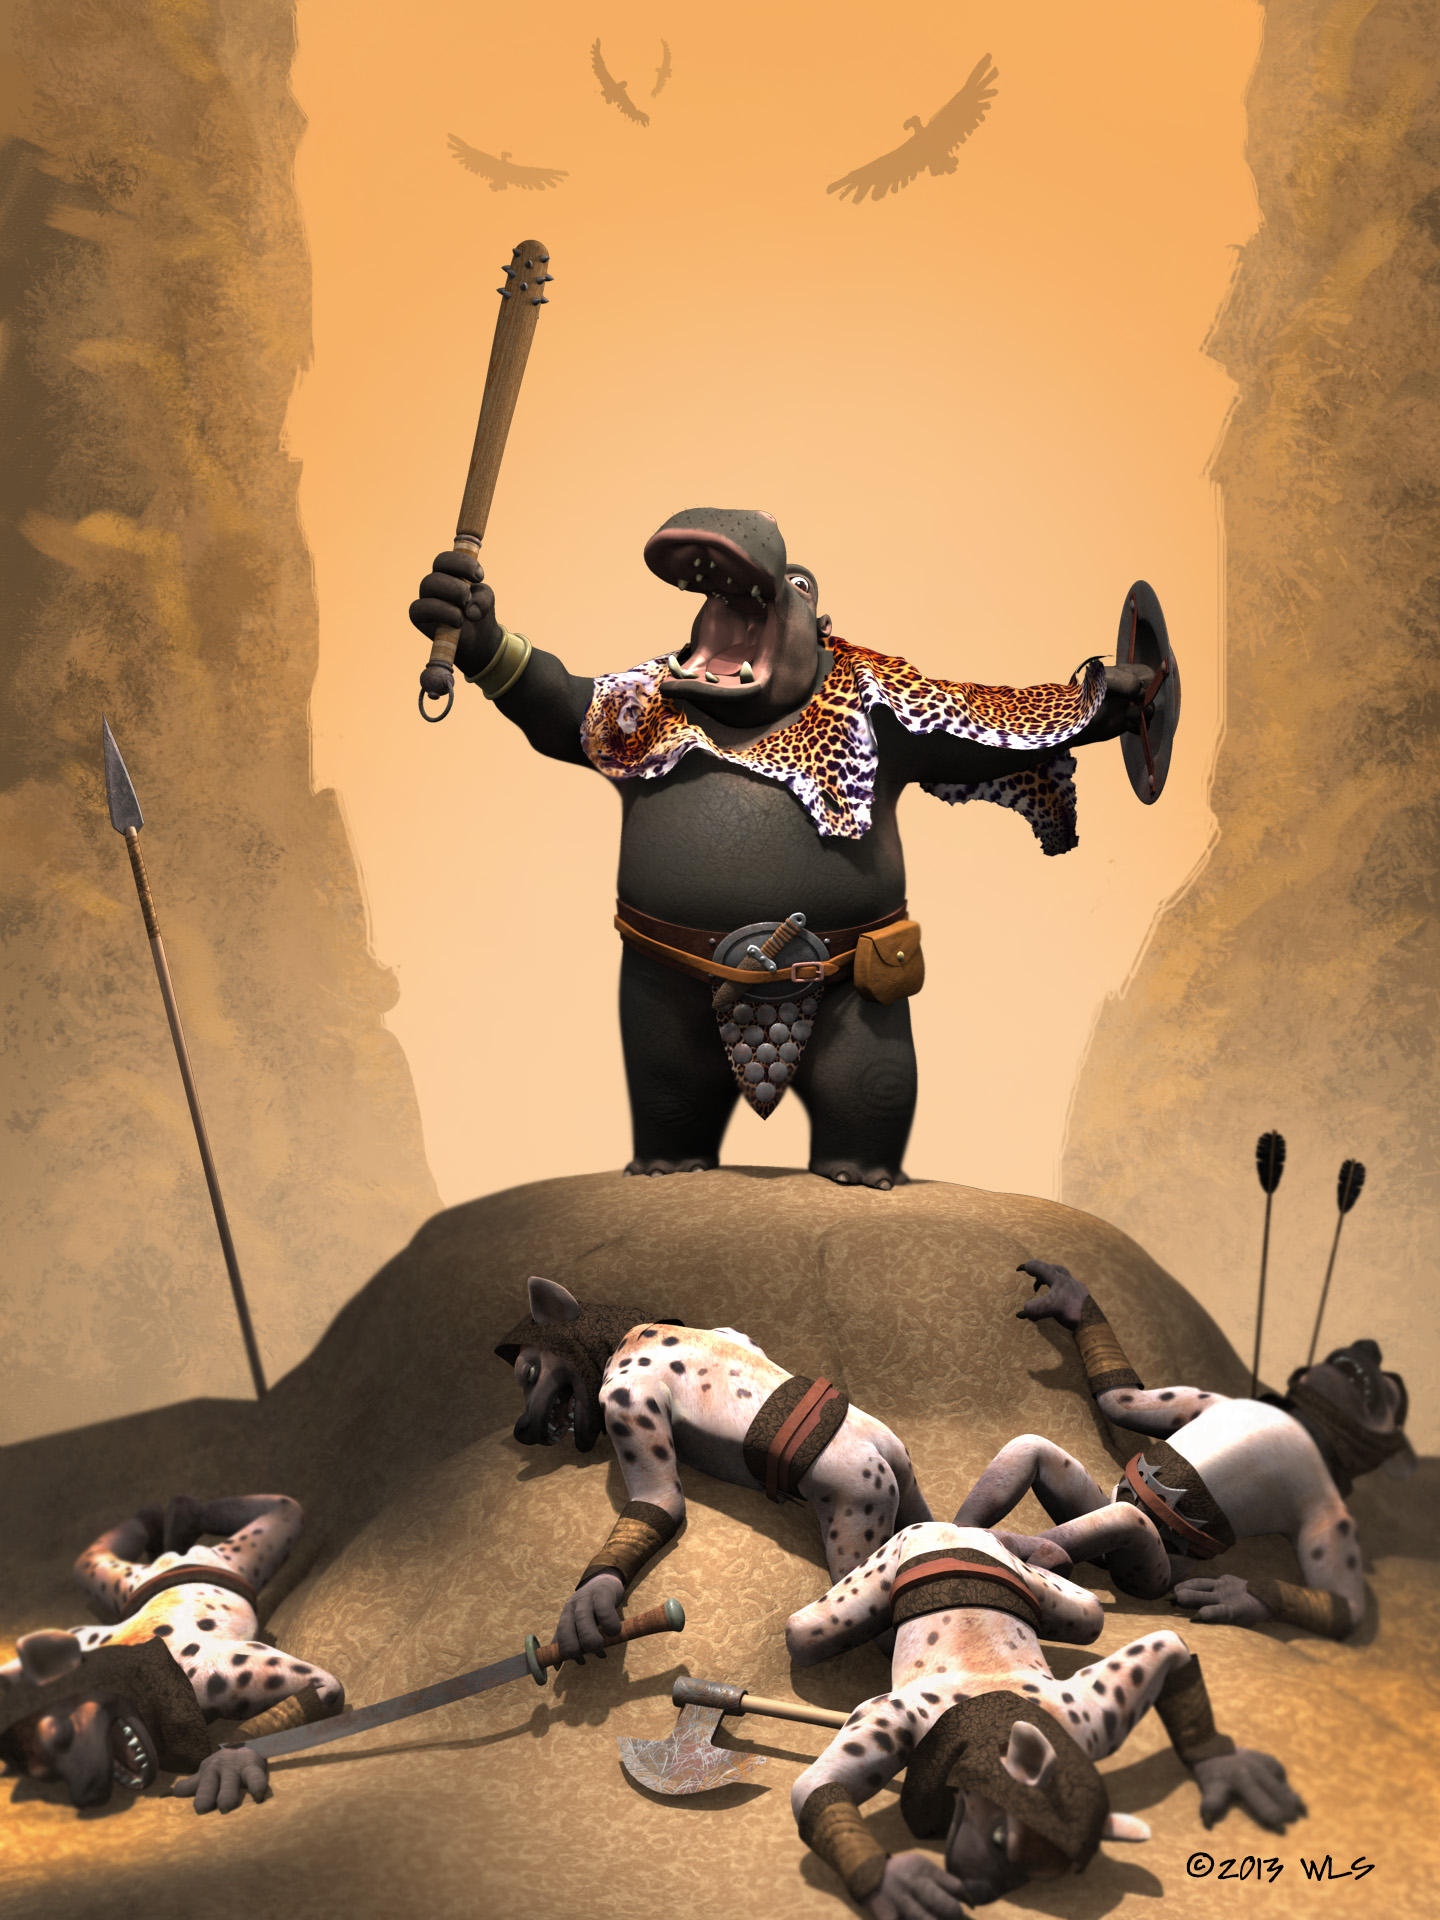
Just finished this entry for the Hash Mascot contest for V18. I don’t know that a character has ever won twice–but I just think TAR is an awesome character, and deserves to be on the splash screen every time I boot up A:M!
The background is a quick digital painting in Photoshop (that is how all of the backgrounds for this series are going to be done). the textures are a mix between decals and DarkTrees.
I lit this with just klieg lights and a little global illumination, to try to get that feel that the battle happened in a narrow pass with just some narrow spots of direct light.
In the studio this morning..ready for the Muse. I just re read Stephen Pressfield’s “the WAR of ART” and I can’t recommend it enough–It is very inspiring. But remember the most important thing is to show up and work.
Pablo Picasso – “Inspiration exists, but it has to find you working.”