Dungeon Vibes, Miniature Painting

When I painted my PuzzleLock Dungeon, I simulated torchlight with drybrushed oranges and yellows. In the same way, I wanted to give a “dungeon vibe” to these minis by painting an undercoat to simulate torchlight. This is a variation on zenithal highlighting.

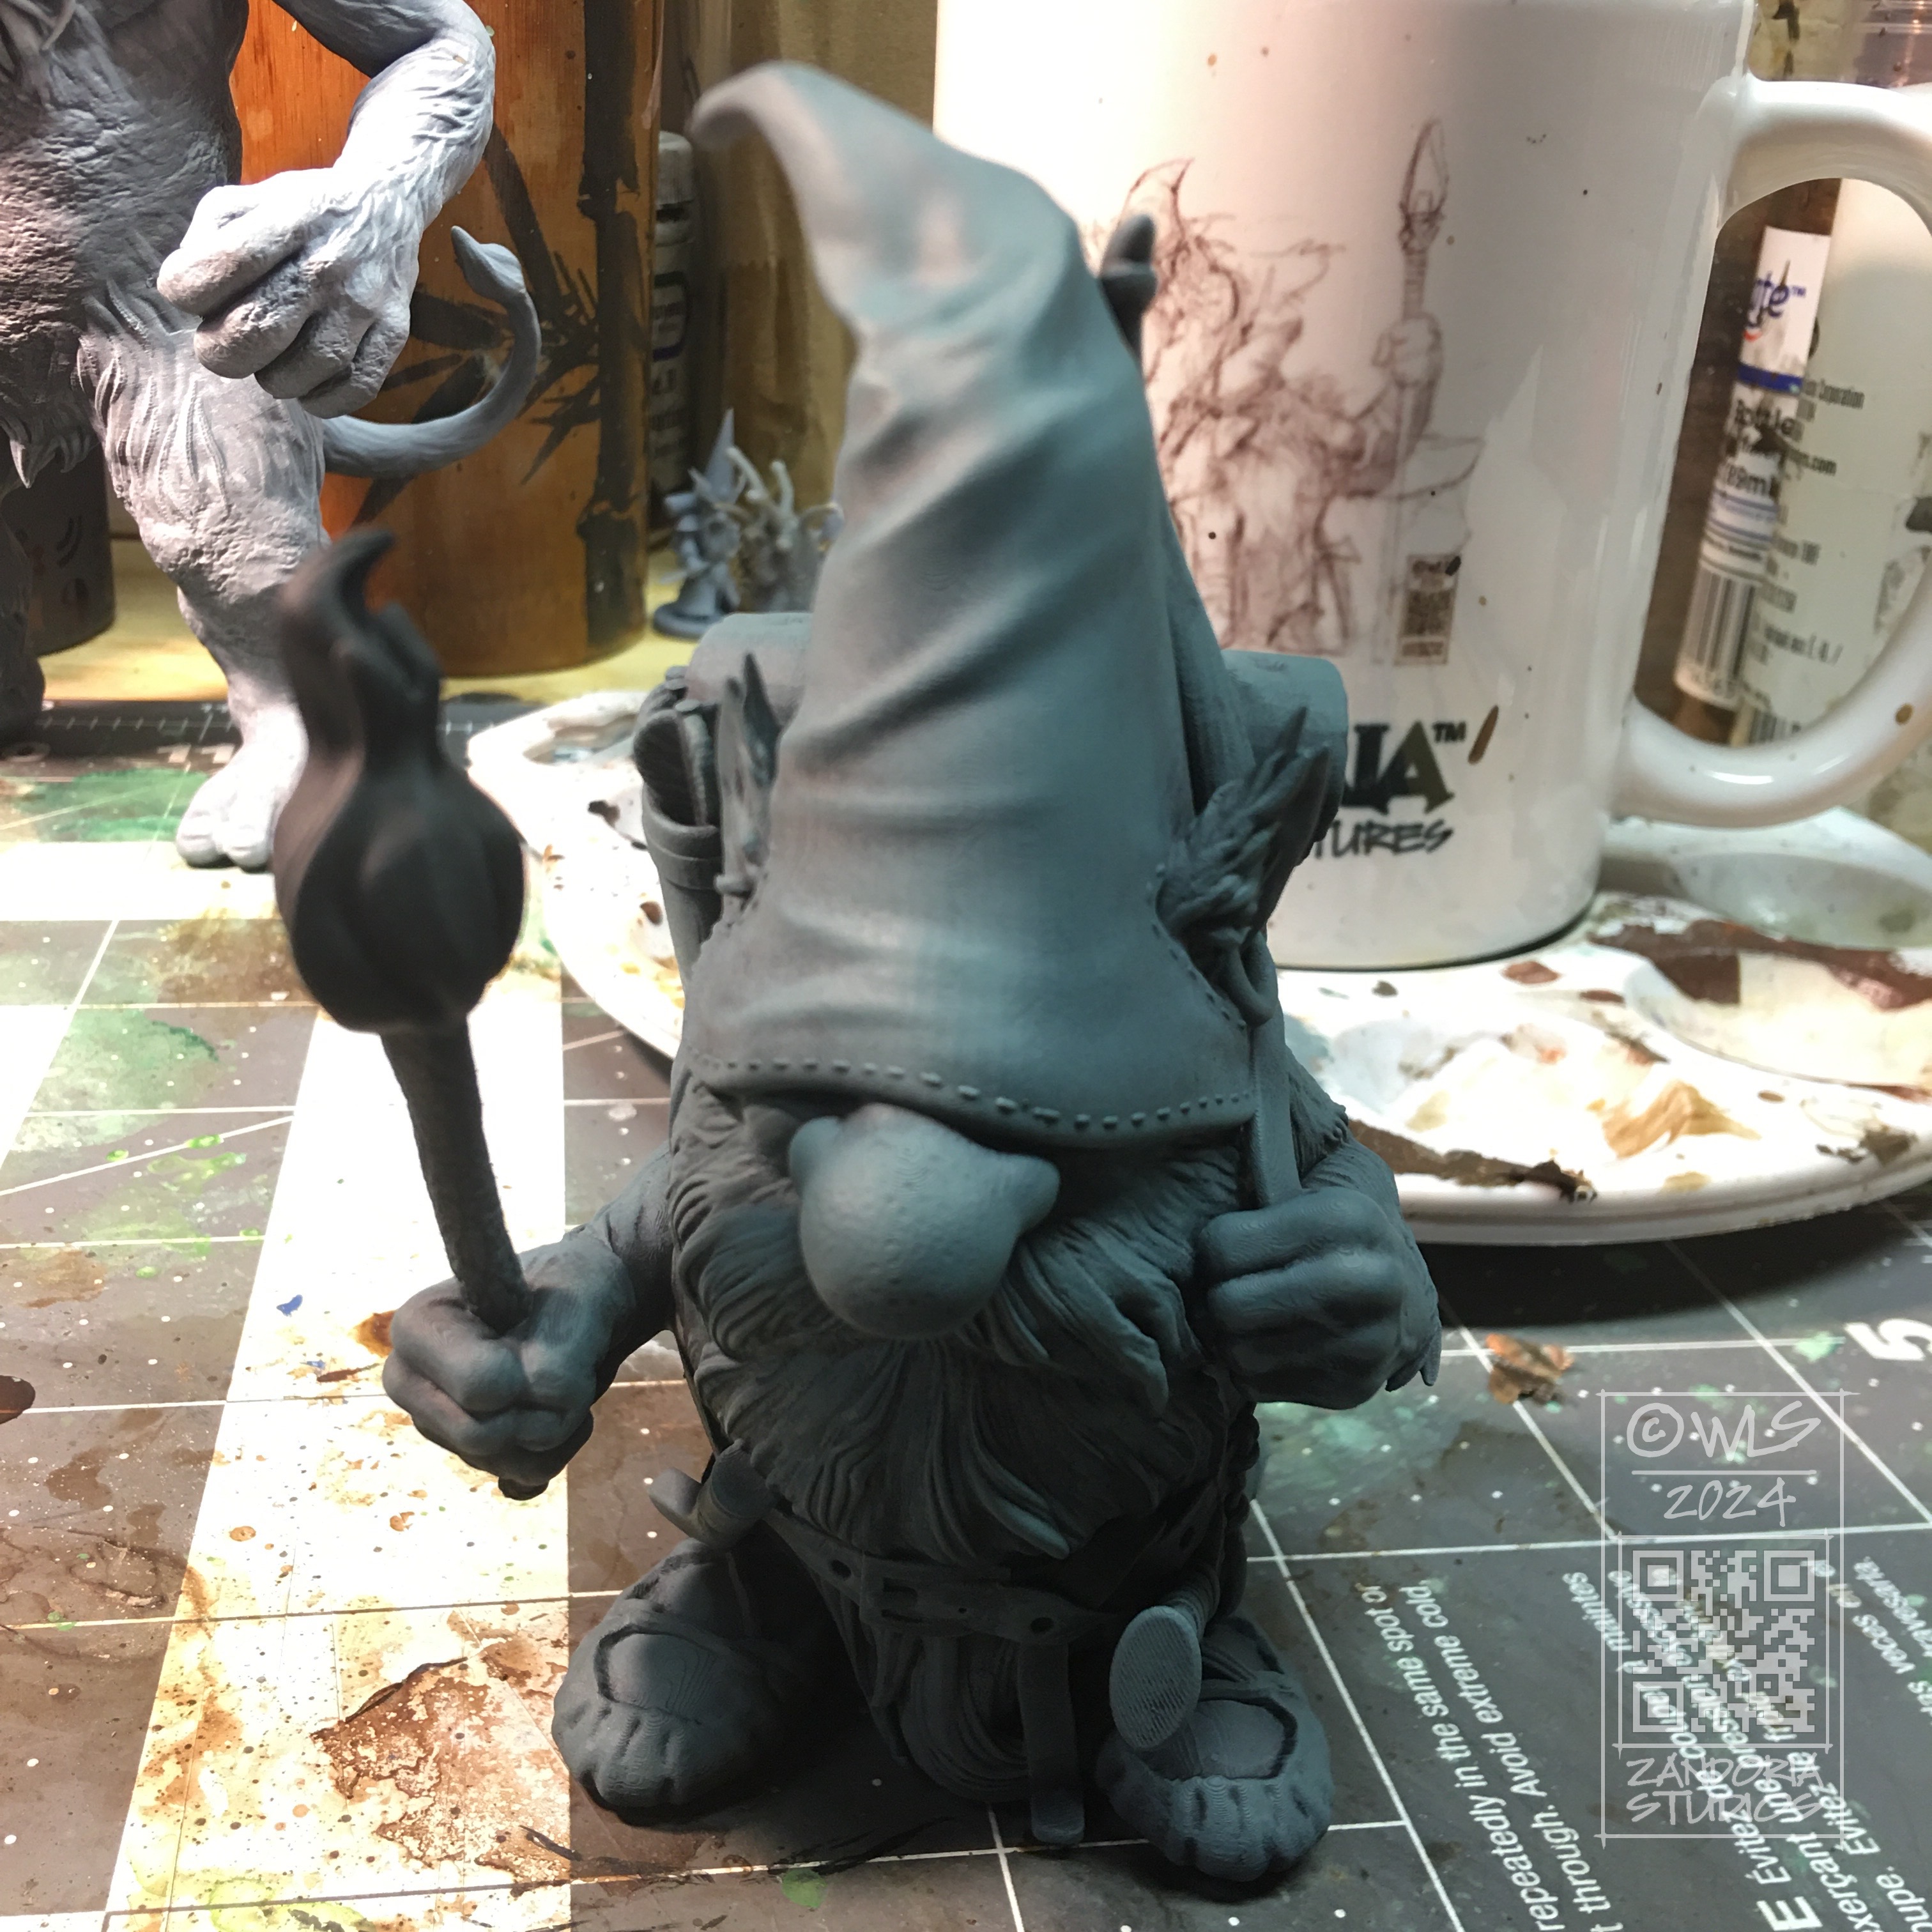
Starting with a black primer over the entire mini, then came back with a blue-gray ambient light which is drybrushed on top. Since the idea is to give it an ambient occlusion, I payed attention to the angle of my brush, leaving the underside and recessed areas black.

Next I used some oranges to start simulating the torchlight. I chose one side/direction for the mini which would be accented with torchlight, and carefully drybrushed the areas that would be hit by this light. Using the handle of the brush as the direction of the light, I was able to see where the light would hit, and where it would falloff.

I started with a pretty deep orange, and then added a little yellow to it as I went back over the areas that would be closest to the light. When I painted the actual torch, I went another shade lighter by adding more yellow, and finally white.

I painted the colors in thin layers, allowing the underneath colors to influence it. The only place the color is almost the pure hue is on the bright side closest to the torchlight. The colors on the far side end up a bit muted and darker.

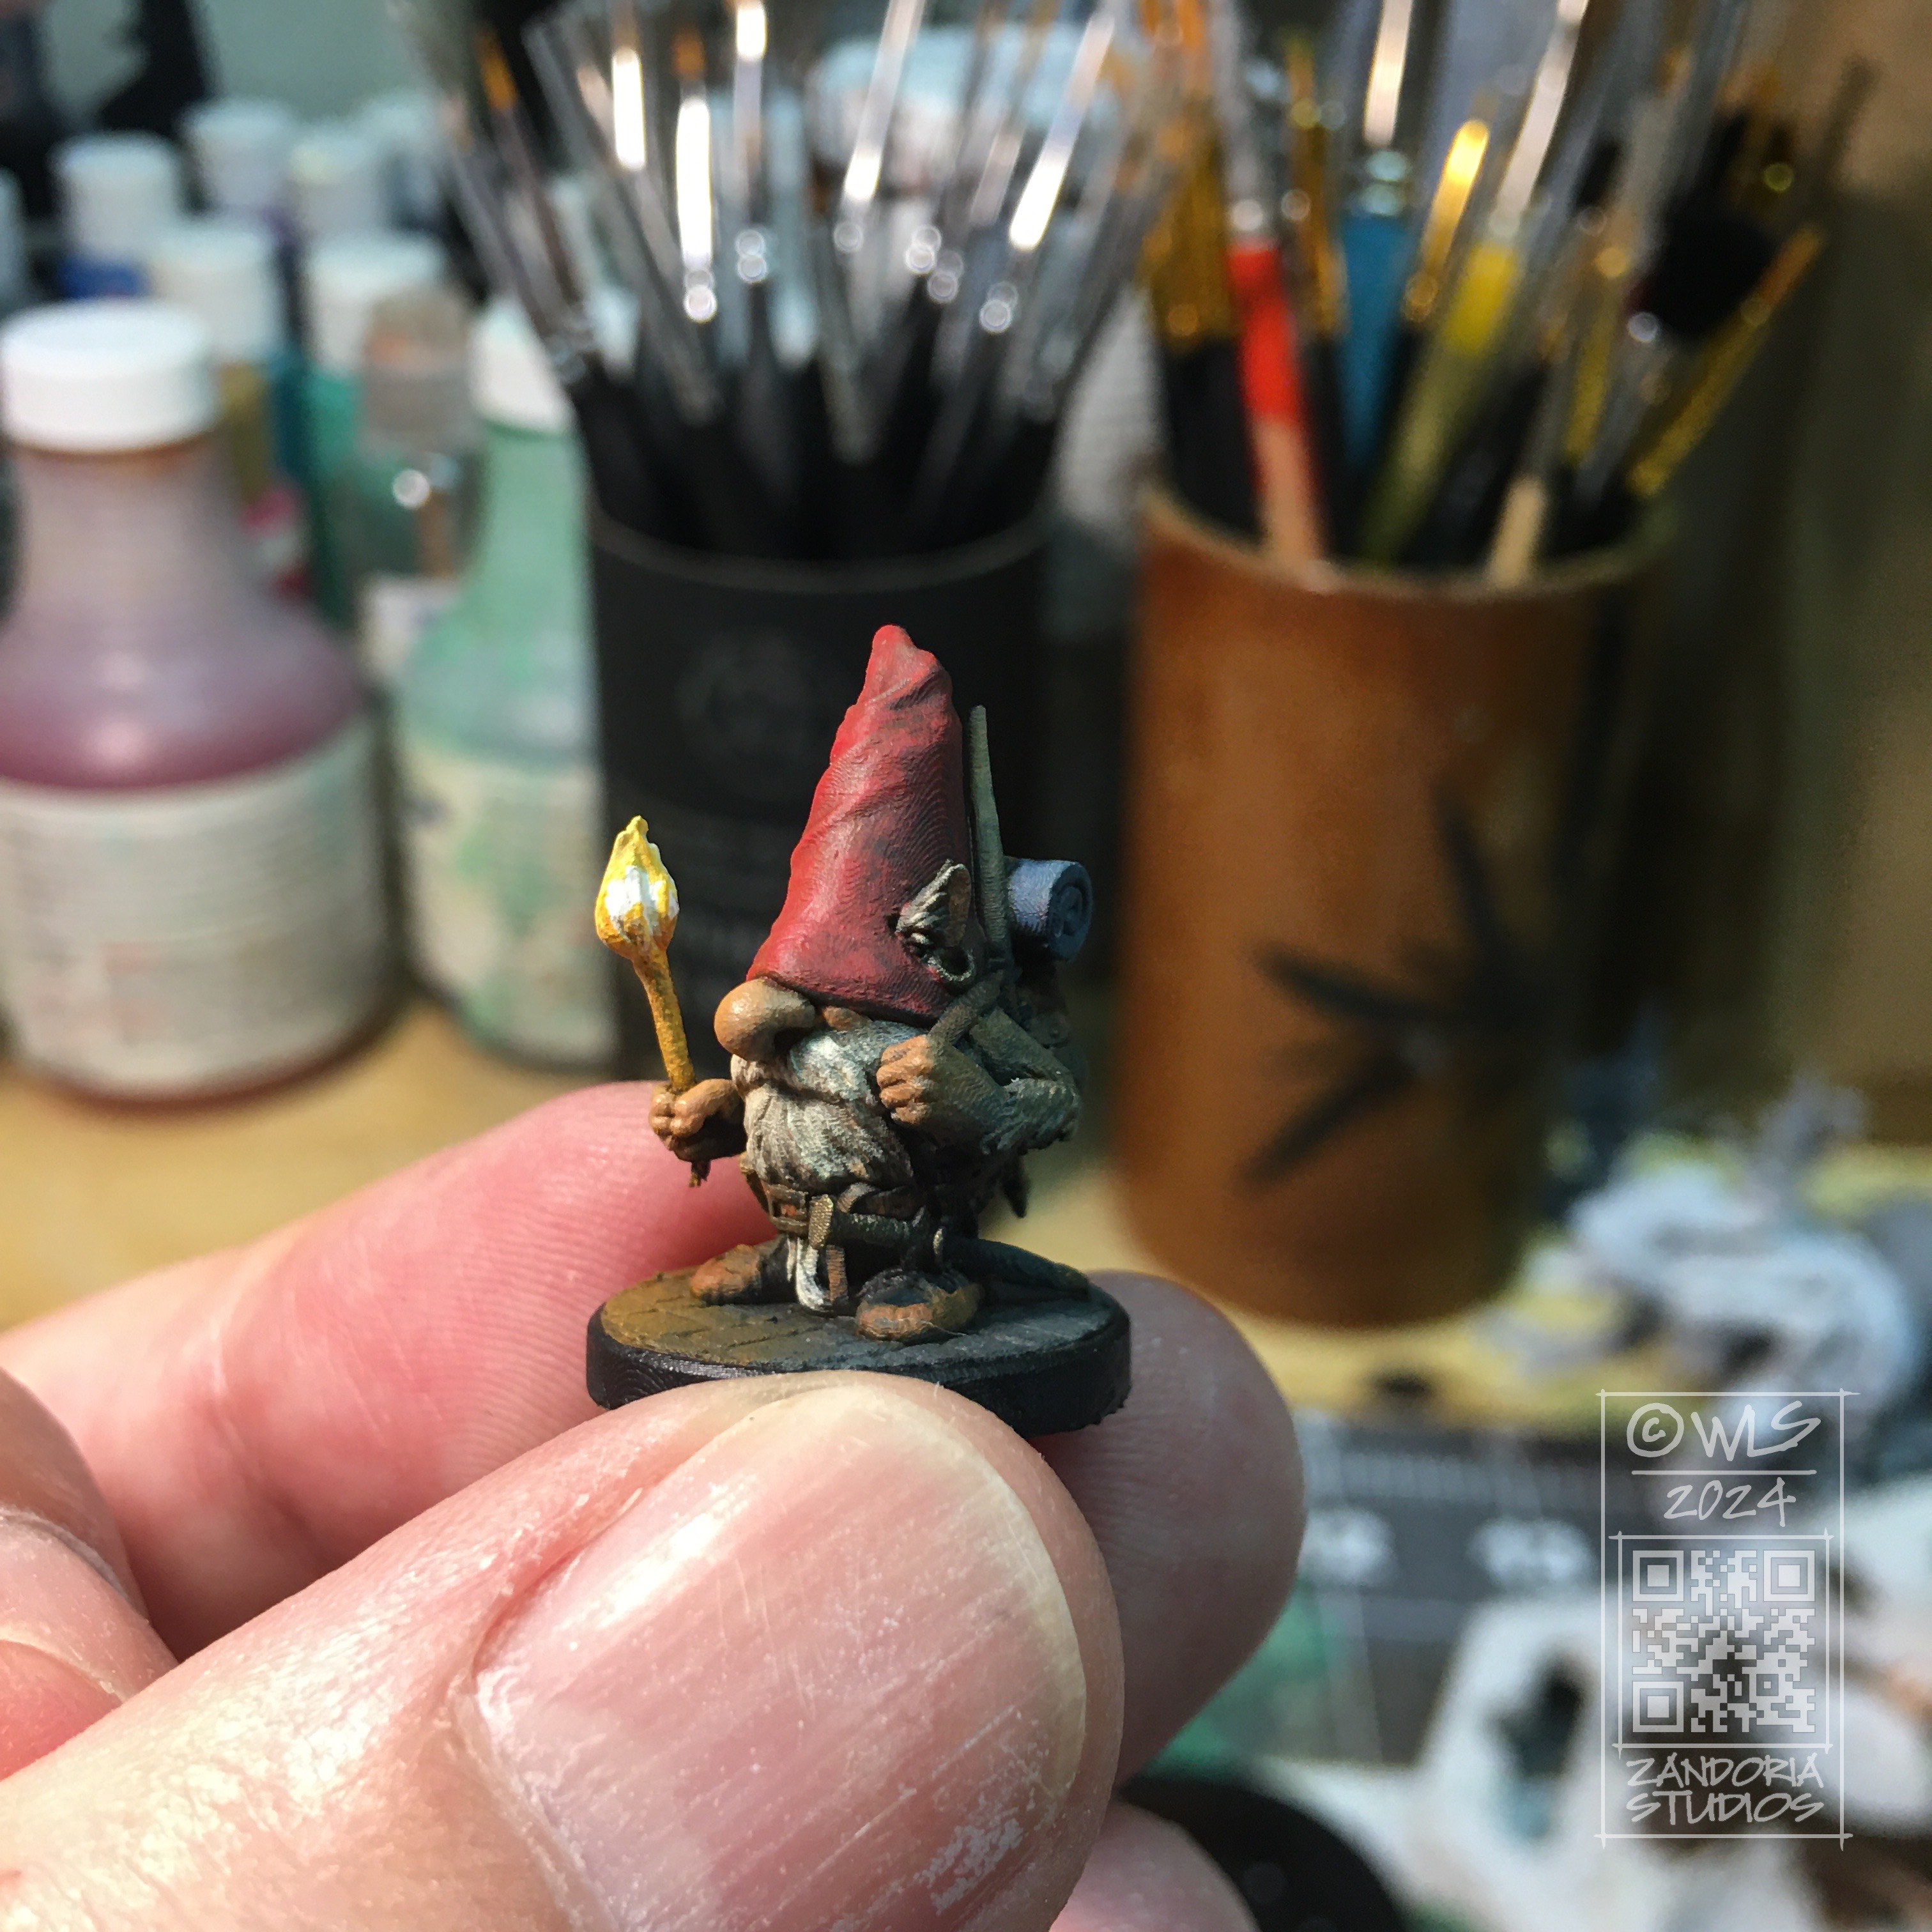
I used a wash of Army Painter Soft Tone over the paint job, which darkened the colors even more in the recessed areas.

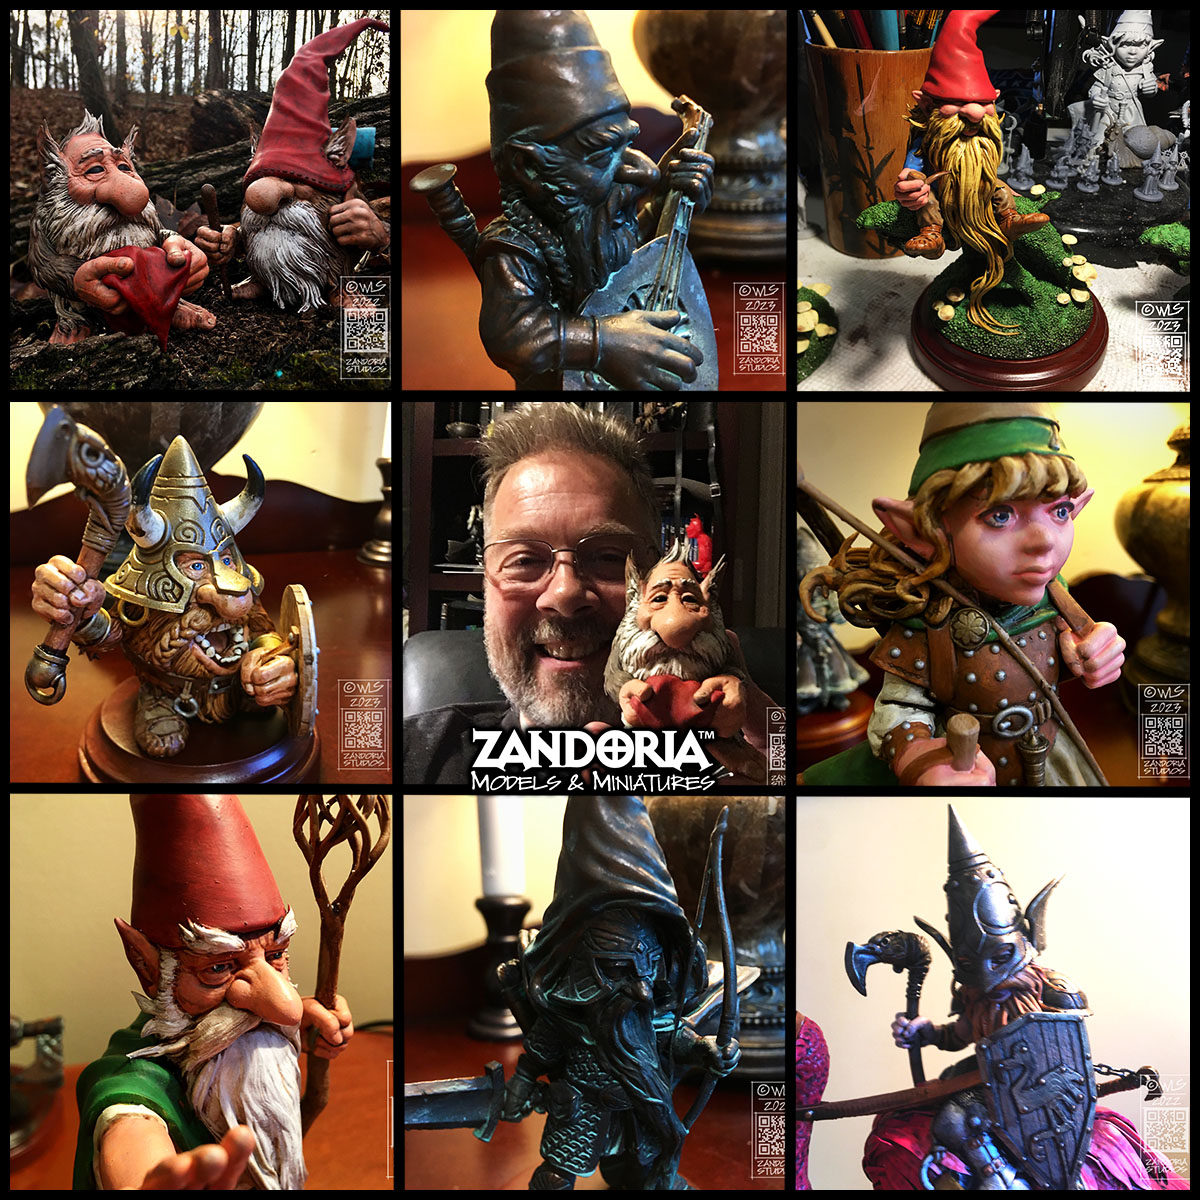
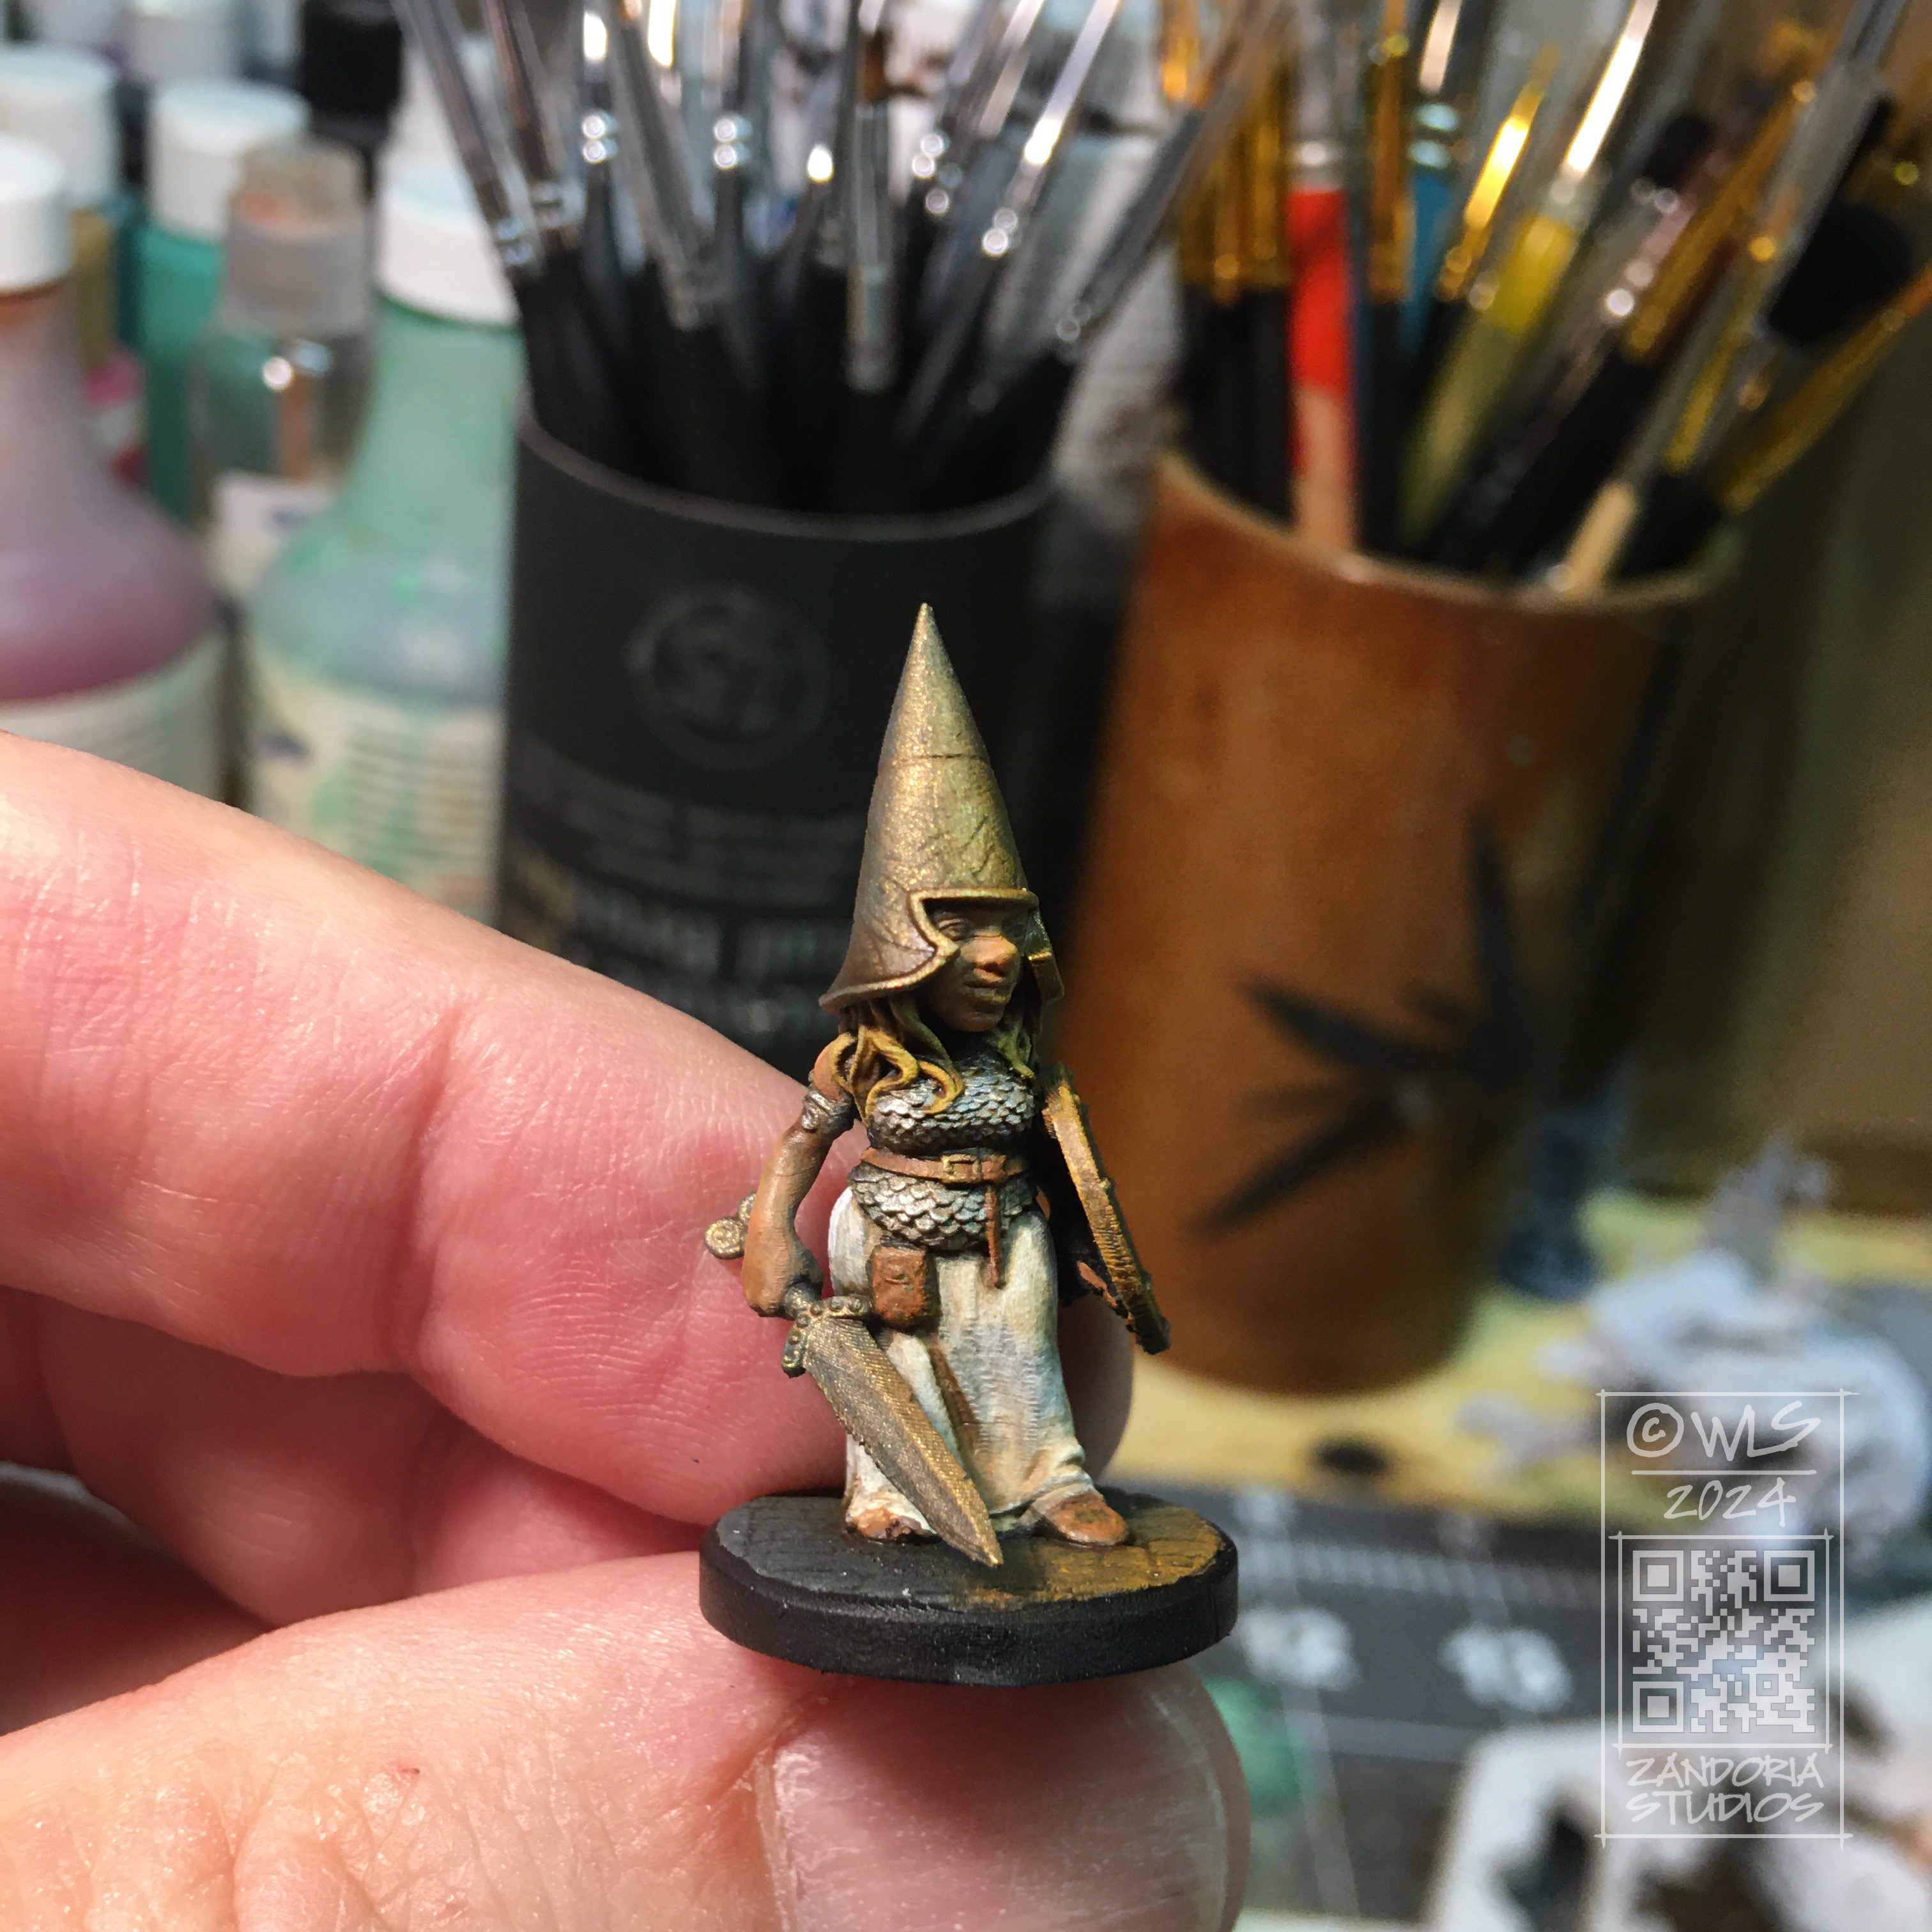
Overall I am happy with the way it turned out. Even the minis not carrying a torch have one side accented with the torchlight, and they all fit together naturally as the under painted lighting ties them all together.

Give this a try on your next group of adventurers! Let me know what you think in the comments.

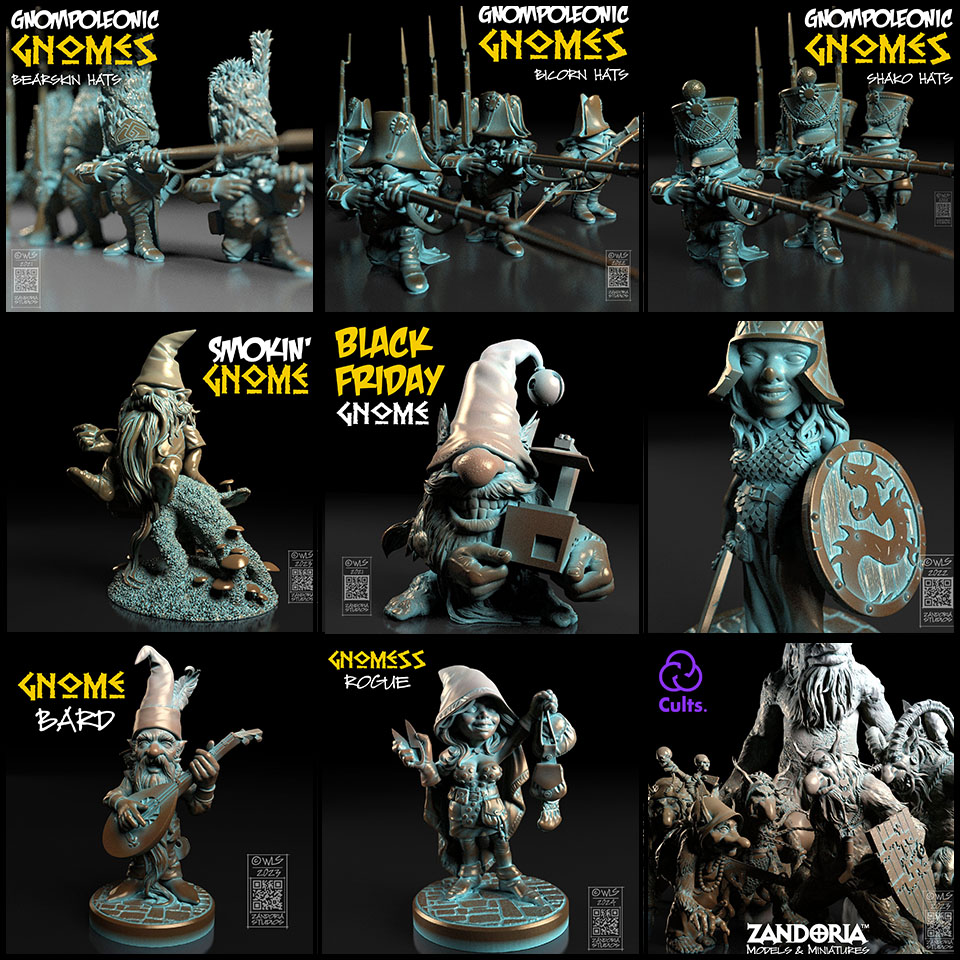
These minis and figurines are available in my Etsy shop. If you would like to 3Dprint them yourself, the STL files are available at Cults3D.

Hand-Painting and Size Options added to my Etsy shop!

Now when you buy one of my Gnome miniatures on Etsy, you can choose between 3 size options, and whether you would like it unpainted, or hand-painted!

  • 28mm (D&D)
  • 10cm (4″), Display
  • 20cm (8″), Garden

There are a lot of different designs available, and I’m always adding more. So whether you are looking for a mini for your Dungeons & Dragons character, or you want to make a badass fairy garden, there is a gnome for you!

Smokin’ Gnome

I was sitting on the edge of the woods, smoking my pipe. listening to the wind in the trees and watching a couple of squirrels. I had work that I needed to do, but I decided that I also needed a break.

That became my inspiration for a new gnome. I did a few doodles and came up with a pose that I liked. I also wanted to have him on a mossy log or branch, so I adjusted the sketch until I had a final concept.

The first thing that I did in ZBrush was to rough in where the gnome would be sitting, and also match the diameter of the base with a 3″ wood base that I planned to use.

I exported my sketch from Procreate with a transparent background as a .PNG file. This allows me to load the image into Spotlight inside of ZBrush and float it above my workspace as a reference, without the background obscuring my viewport. The Stump is drawn with Zspheres to match the sketch.

After converting it into a mesh, I sculpted the wood and extracted some bark. then once that was ready, I masked and extracted the areas that I wanted to be covered with moss. To create the moss texture, I used surface noise and inflate.

I started blocking in the gnome with two spheres and a cone. I used the curve tube brush to draw the legs and arms (you can see the right arm in this screenshot is still just a tube). Those simple shapes are subdivided and dynameshed so that the details can be sculpted. the beard area is just roughed in, because I know I will be building it later.

Here is a closeup of that arm. The arm and hand are finished, holding the pipe. I’ve extracted geometry to make the sleeve. I will use the cloth move brush to shape it before sculpting the details and stitching…

The beard is made using the Alpha curve brush. Each lock of hair is drawn as a curve, with an irregular shaped black and white image defining the cross-section of the lock of hair as it is extruded along the curve. The lock is tapered at one end, and because the stroke is a curve, you can manipulate it, twist it and move it into place before you commit to it.

Here is the model, 3Dprinted in resin. I was very pleased that all of my mushrooms printed and nothing broke off! Printed with Mighty4K using 3DRS Hard Grey resin.

Using an airbrush, I primed the model in black. Then I used grey primer at a downward angle to simulate ambient lighting. The “zenithal” priming brings out the details and will enhance the painting, even though it will be covered.

I have made a step-by-step tutorial, if you are wanting to paint your own gnomes–Here is the link

Here is the finished gnome, enjoying his pipe!

I hope that you enjoyed this look at the process. If you are into 3Dprinting, you can get the STL to print your own on my Patreon. If you would like to just buy the finished figurine, I have them available (unpainted, bronze, hand-painted) on my Etsy shop.