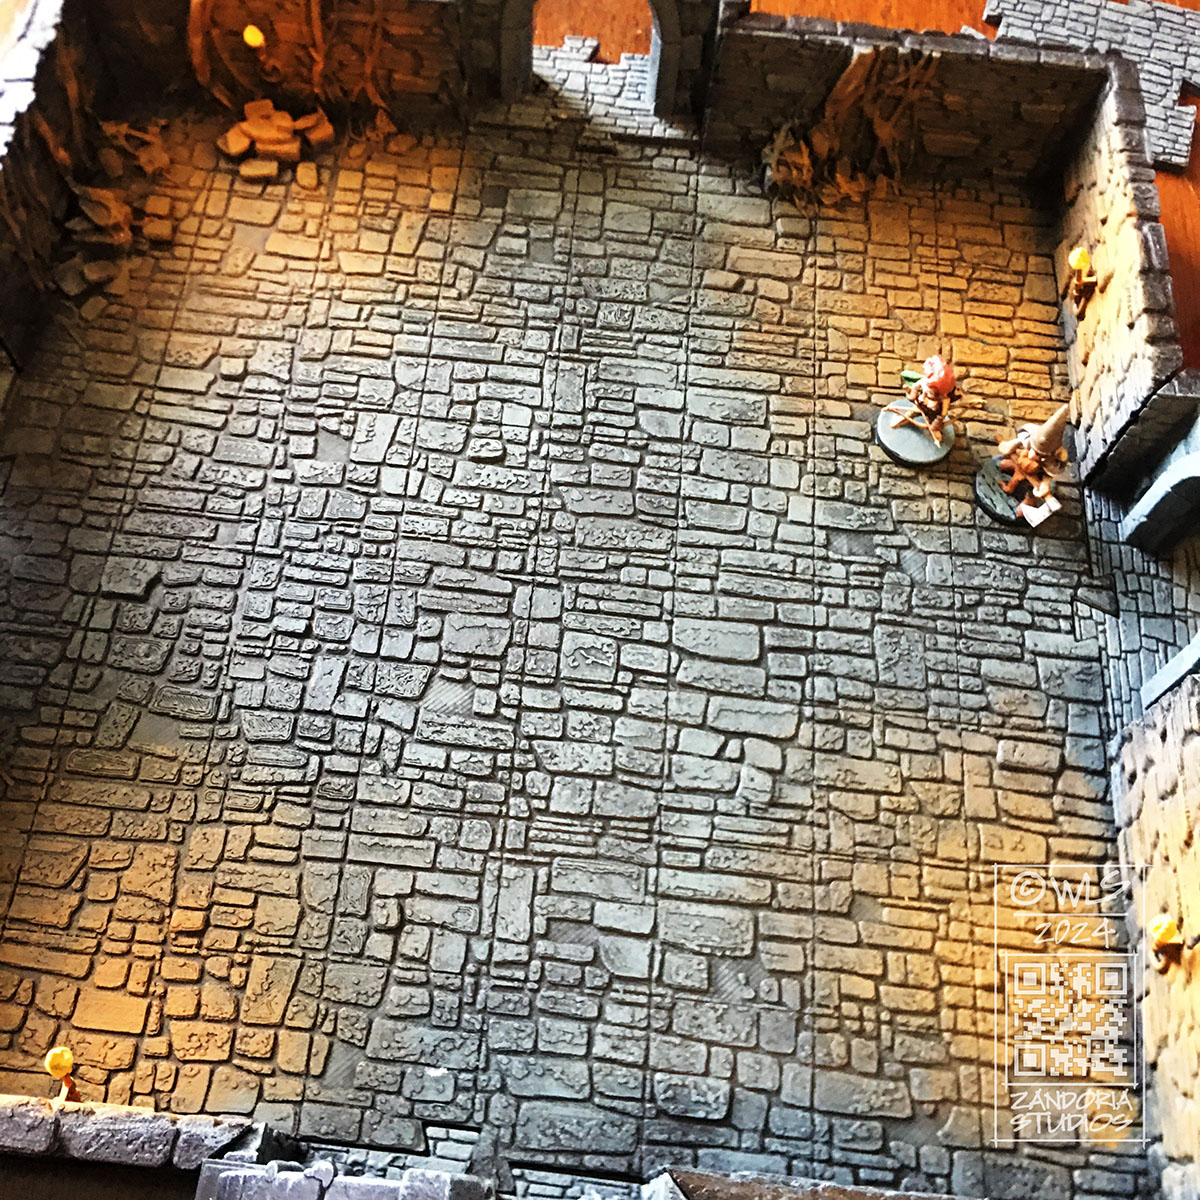
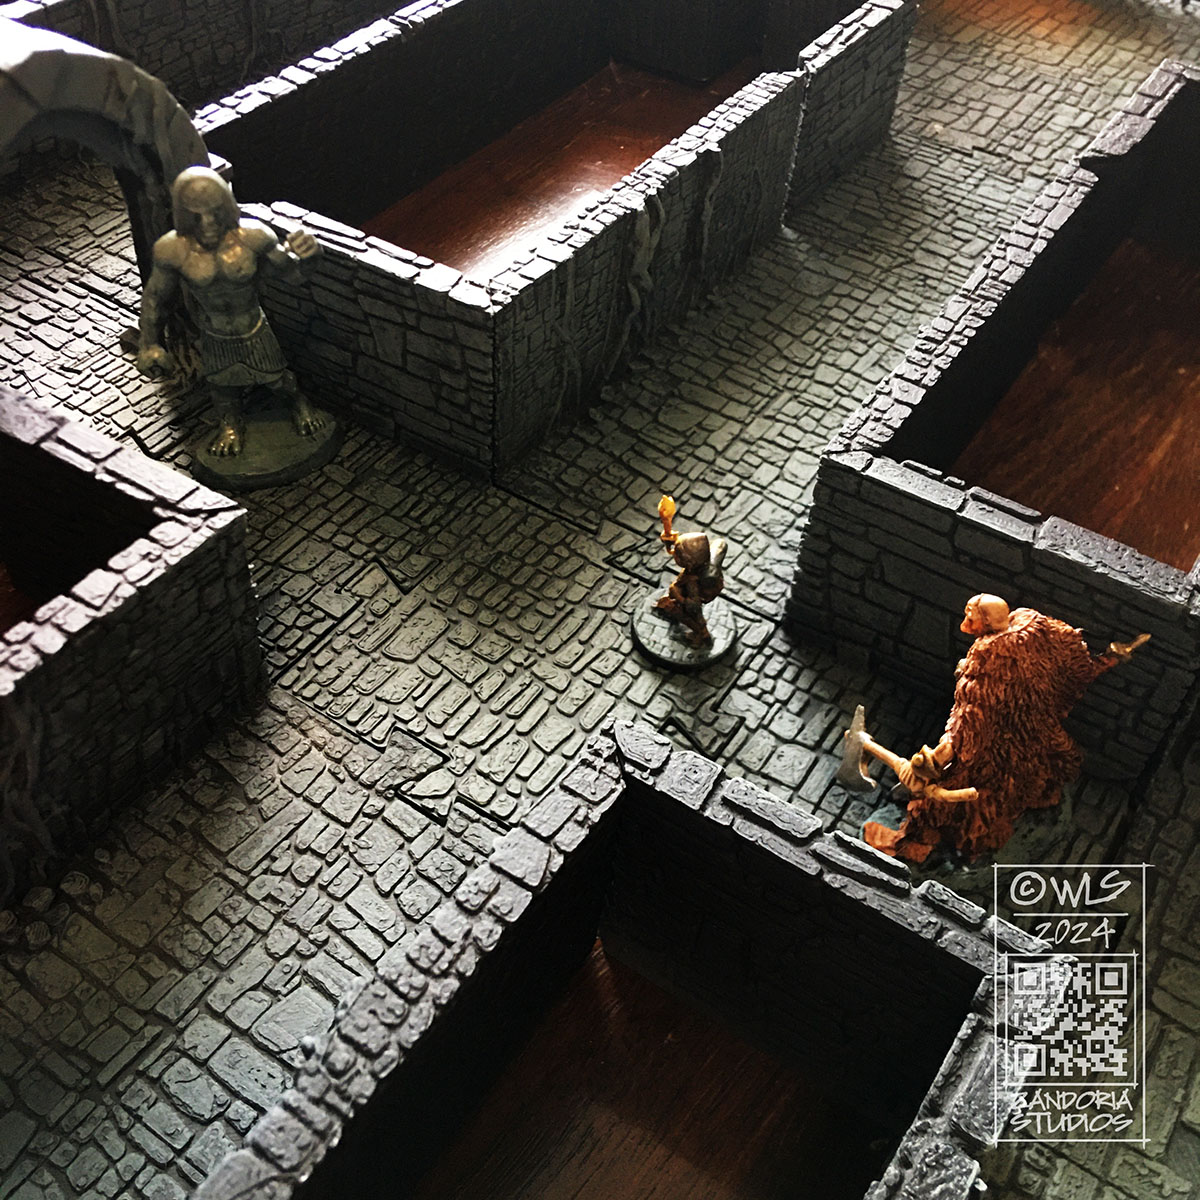
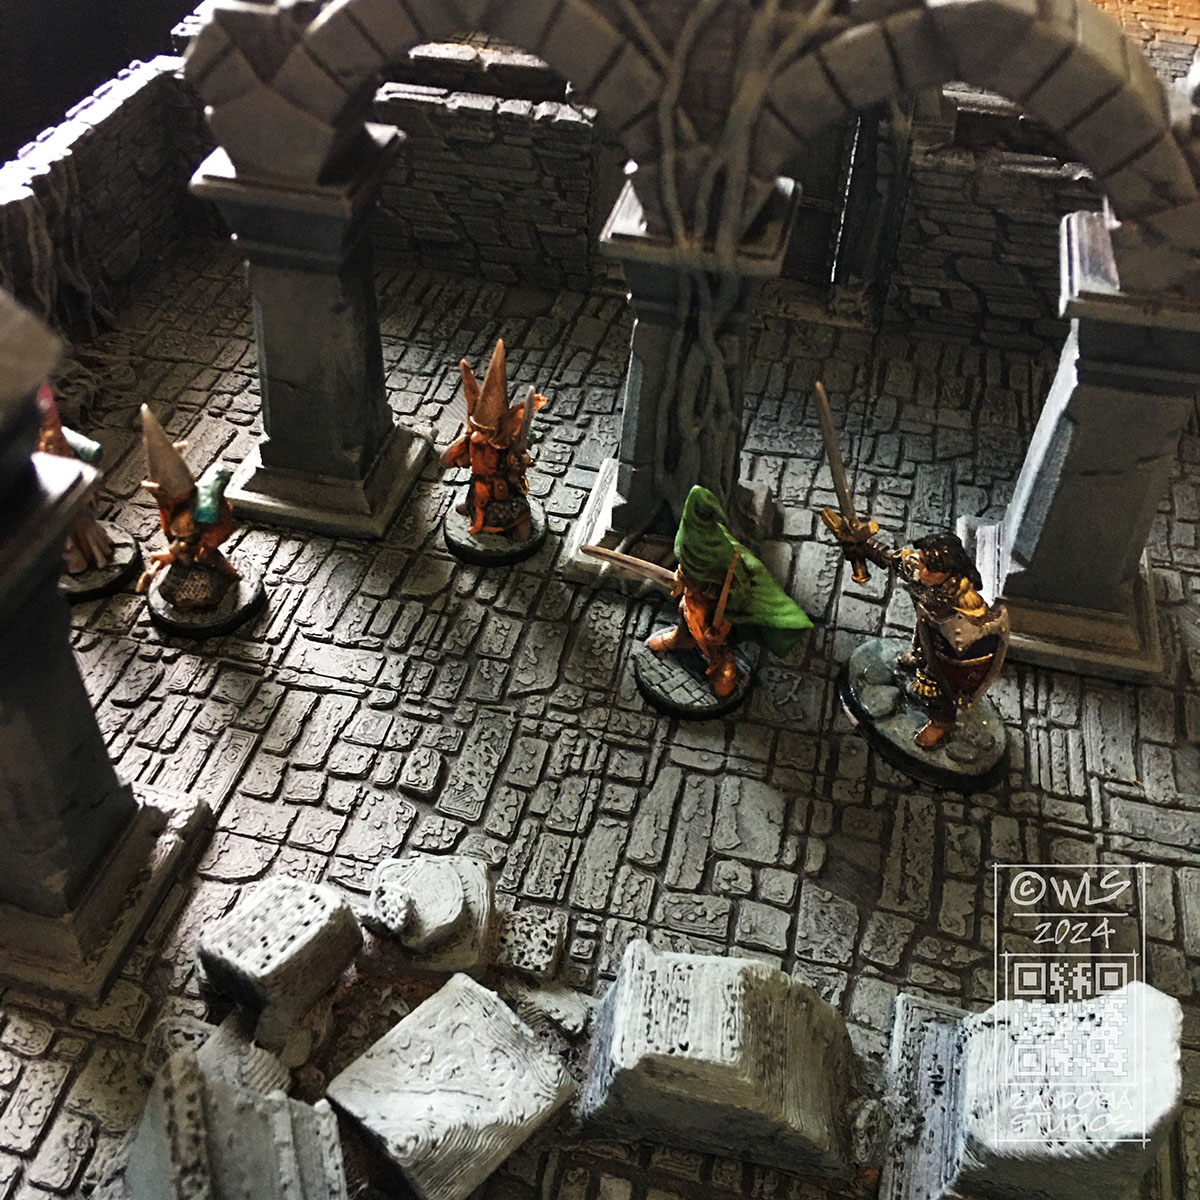
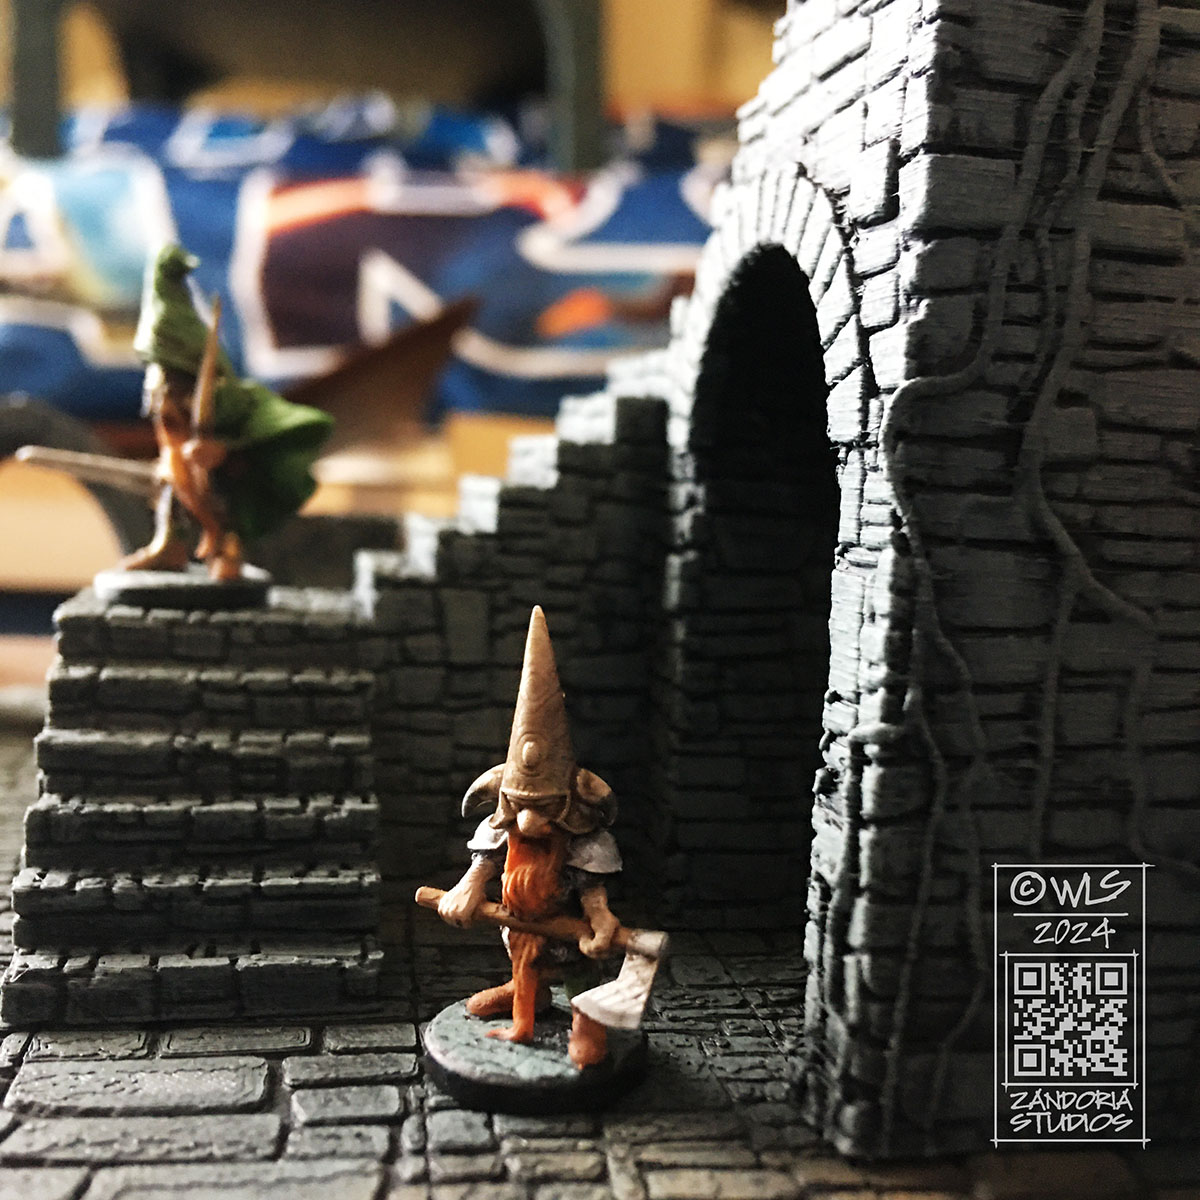
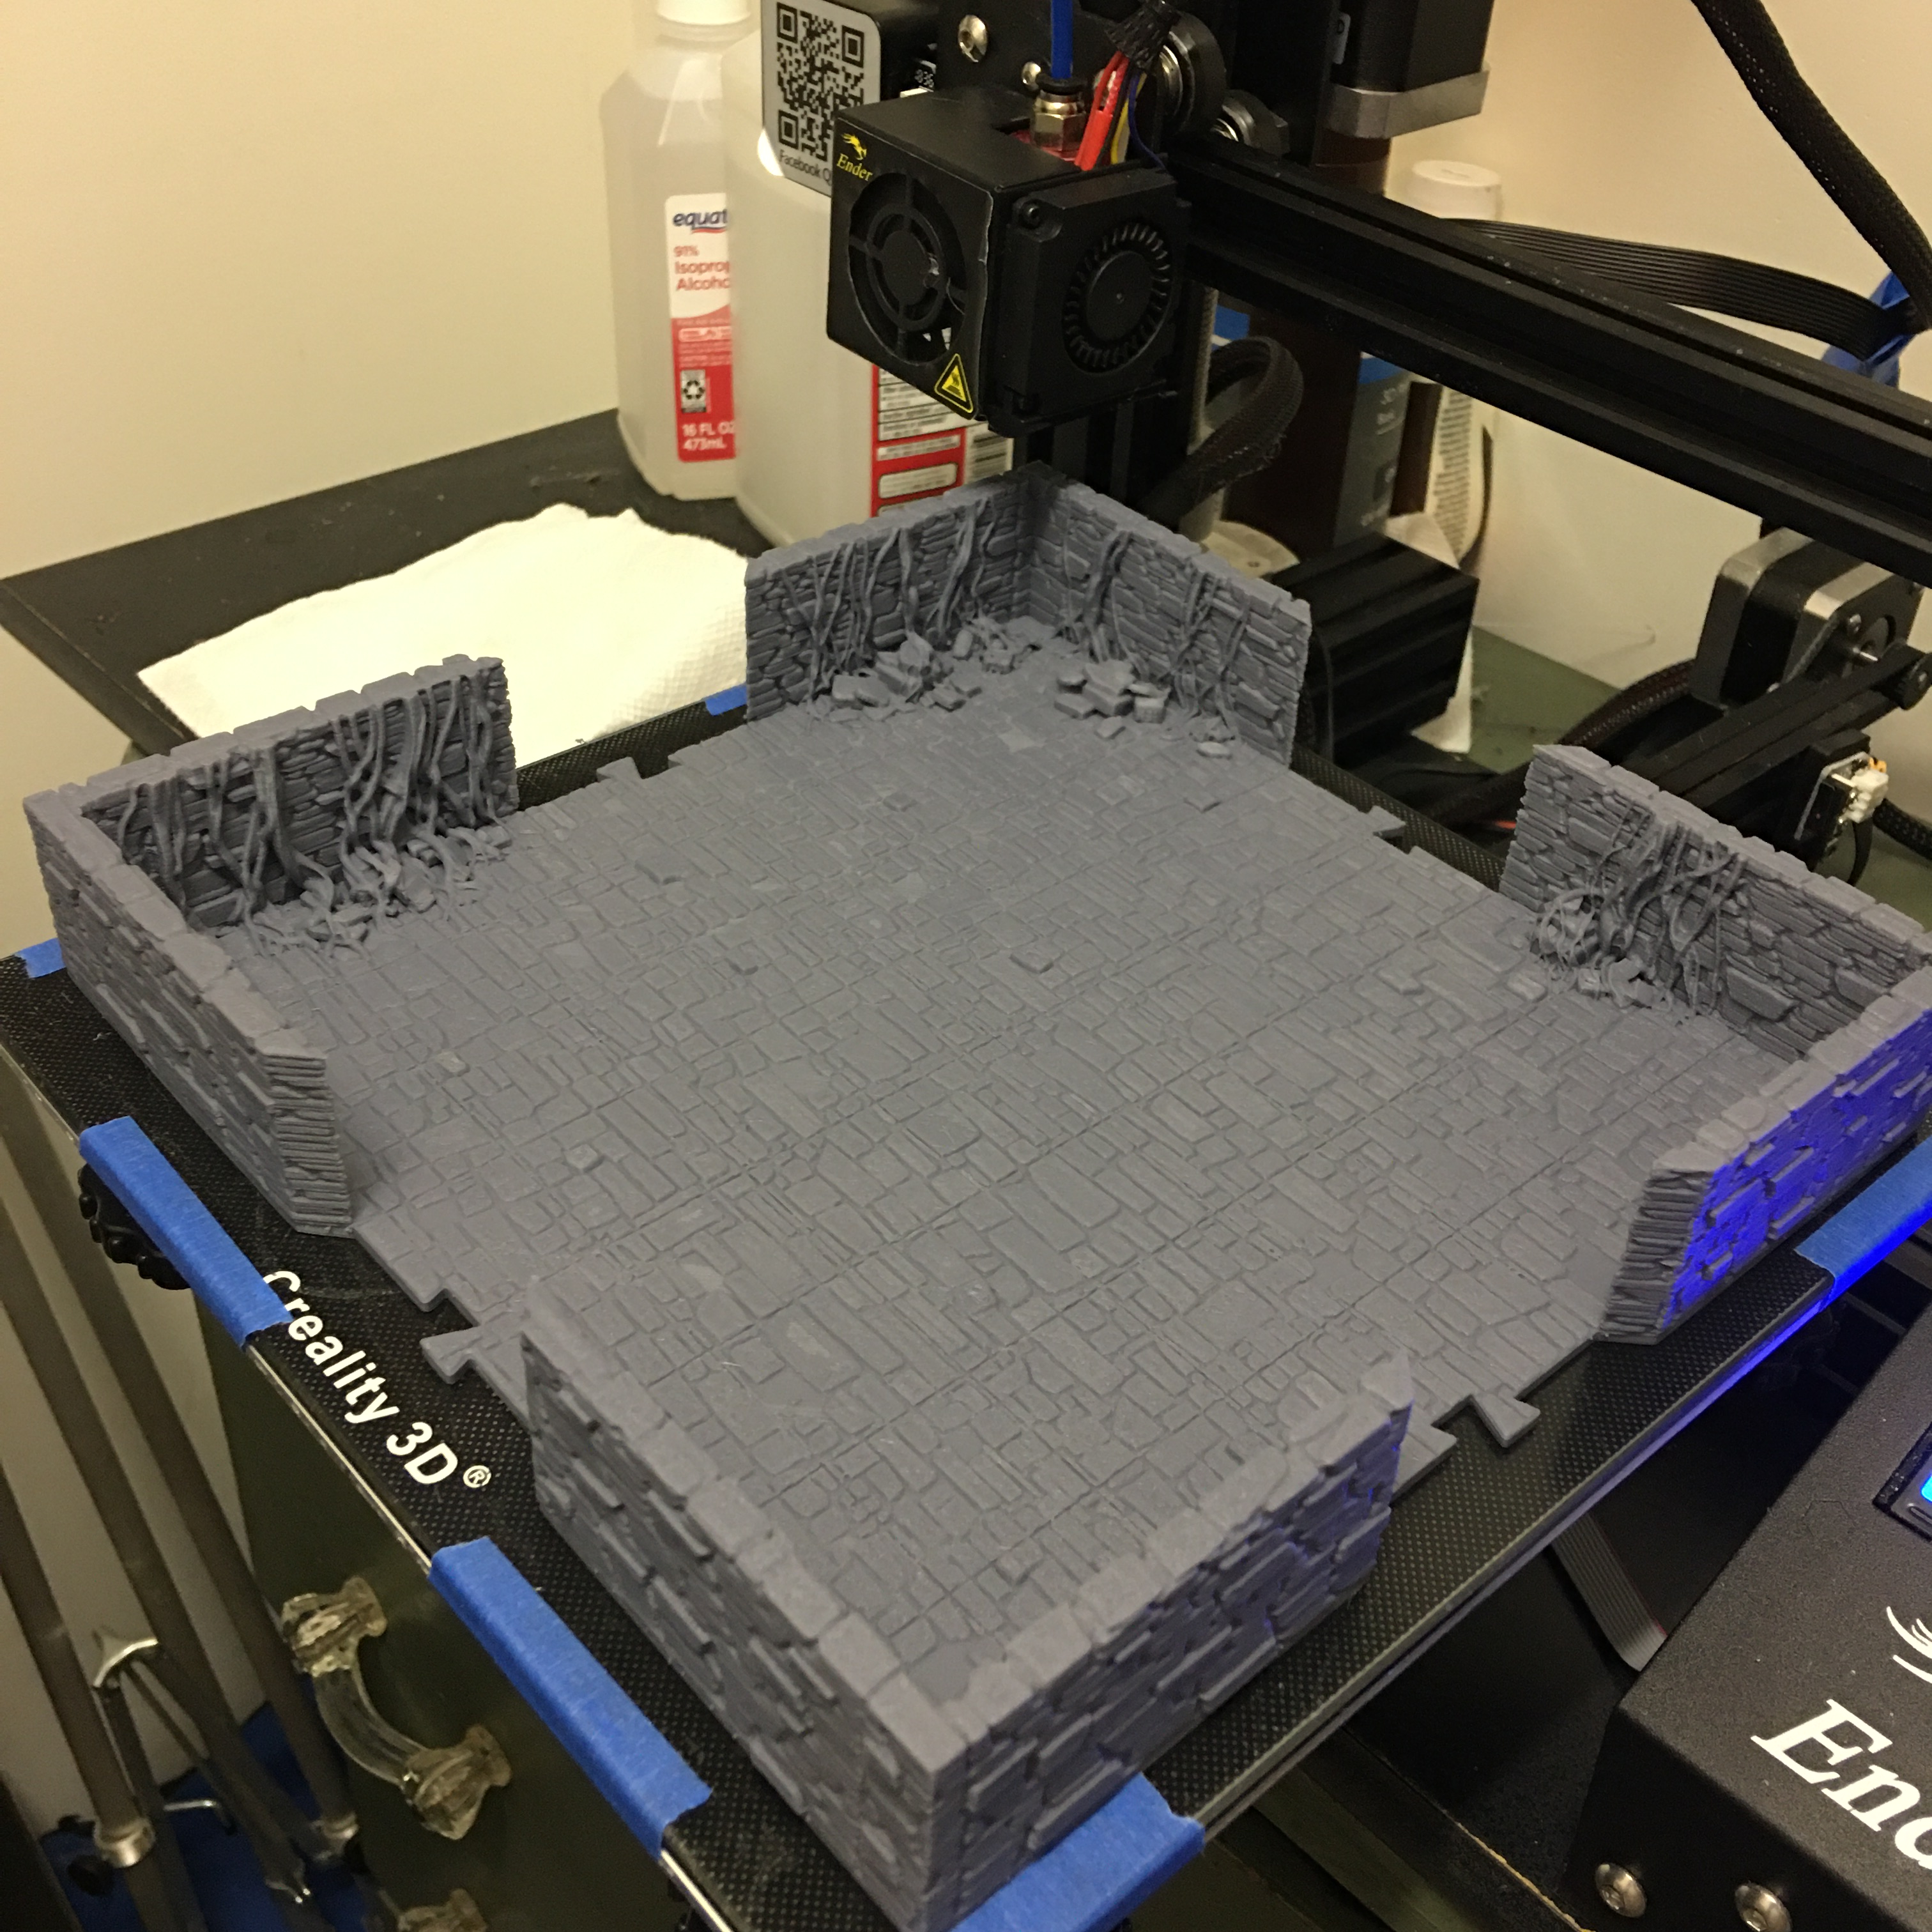
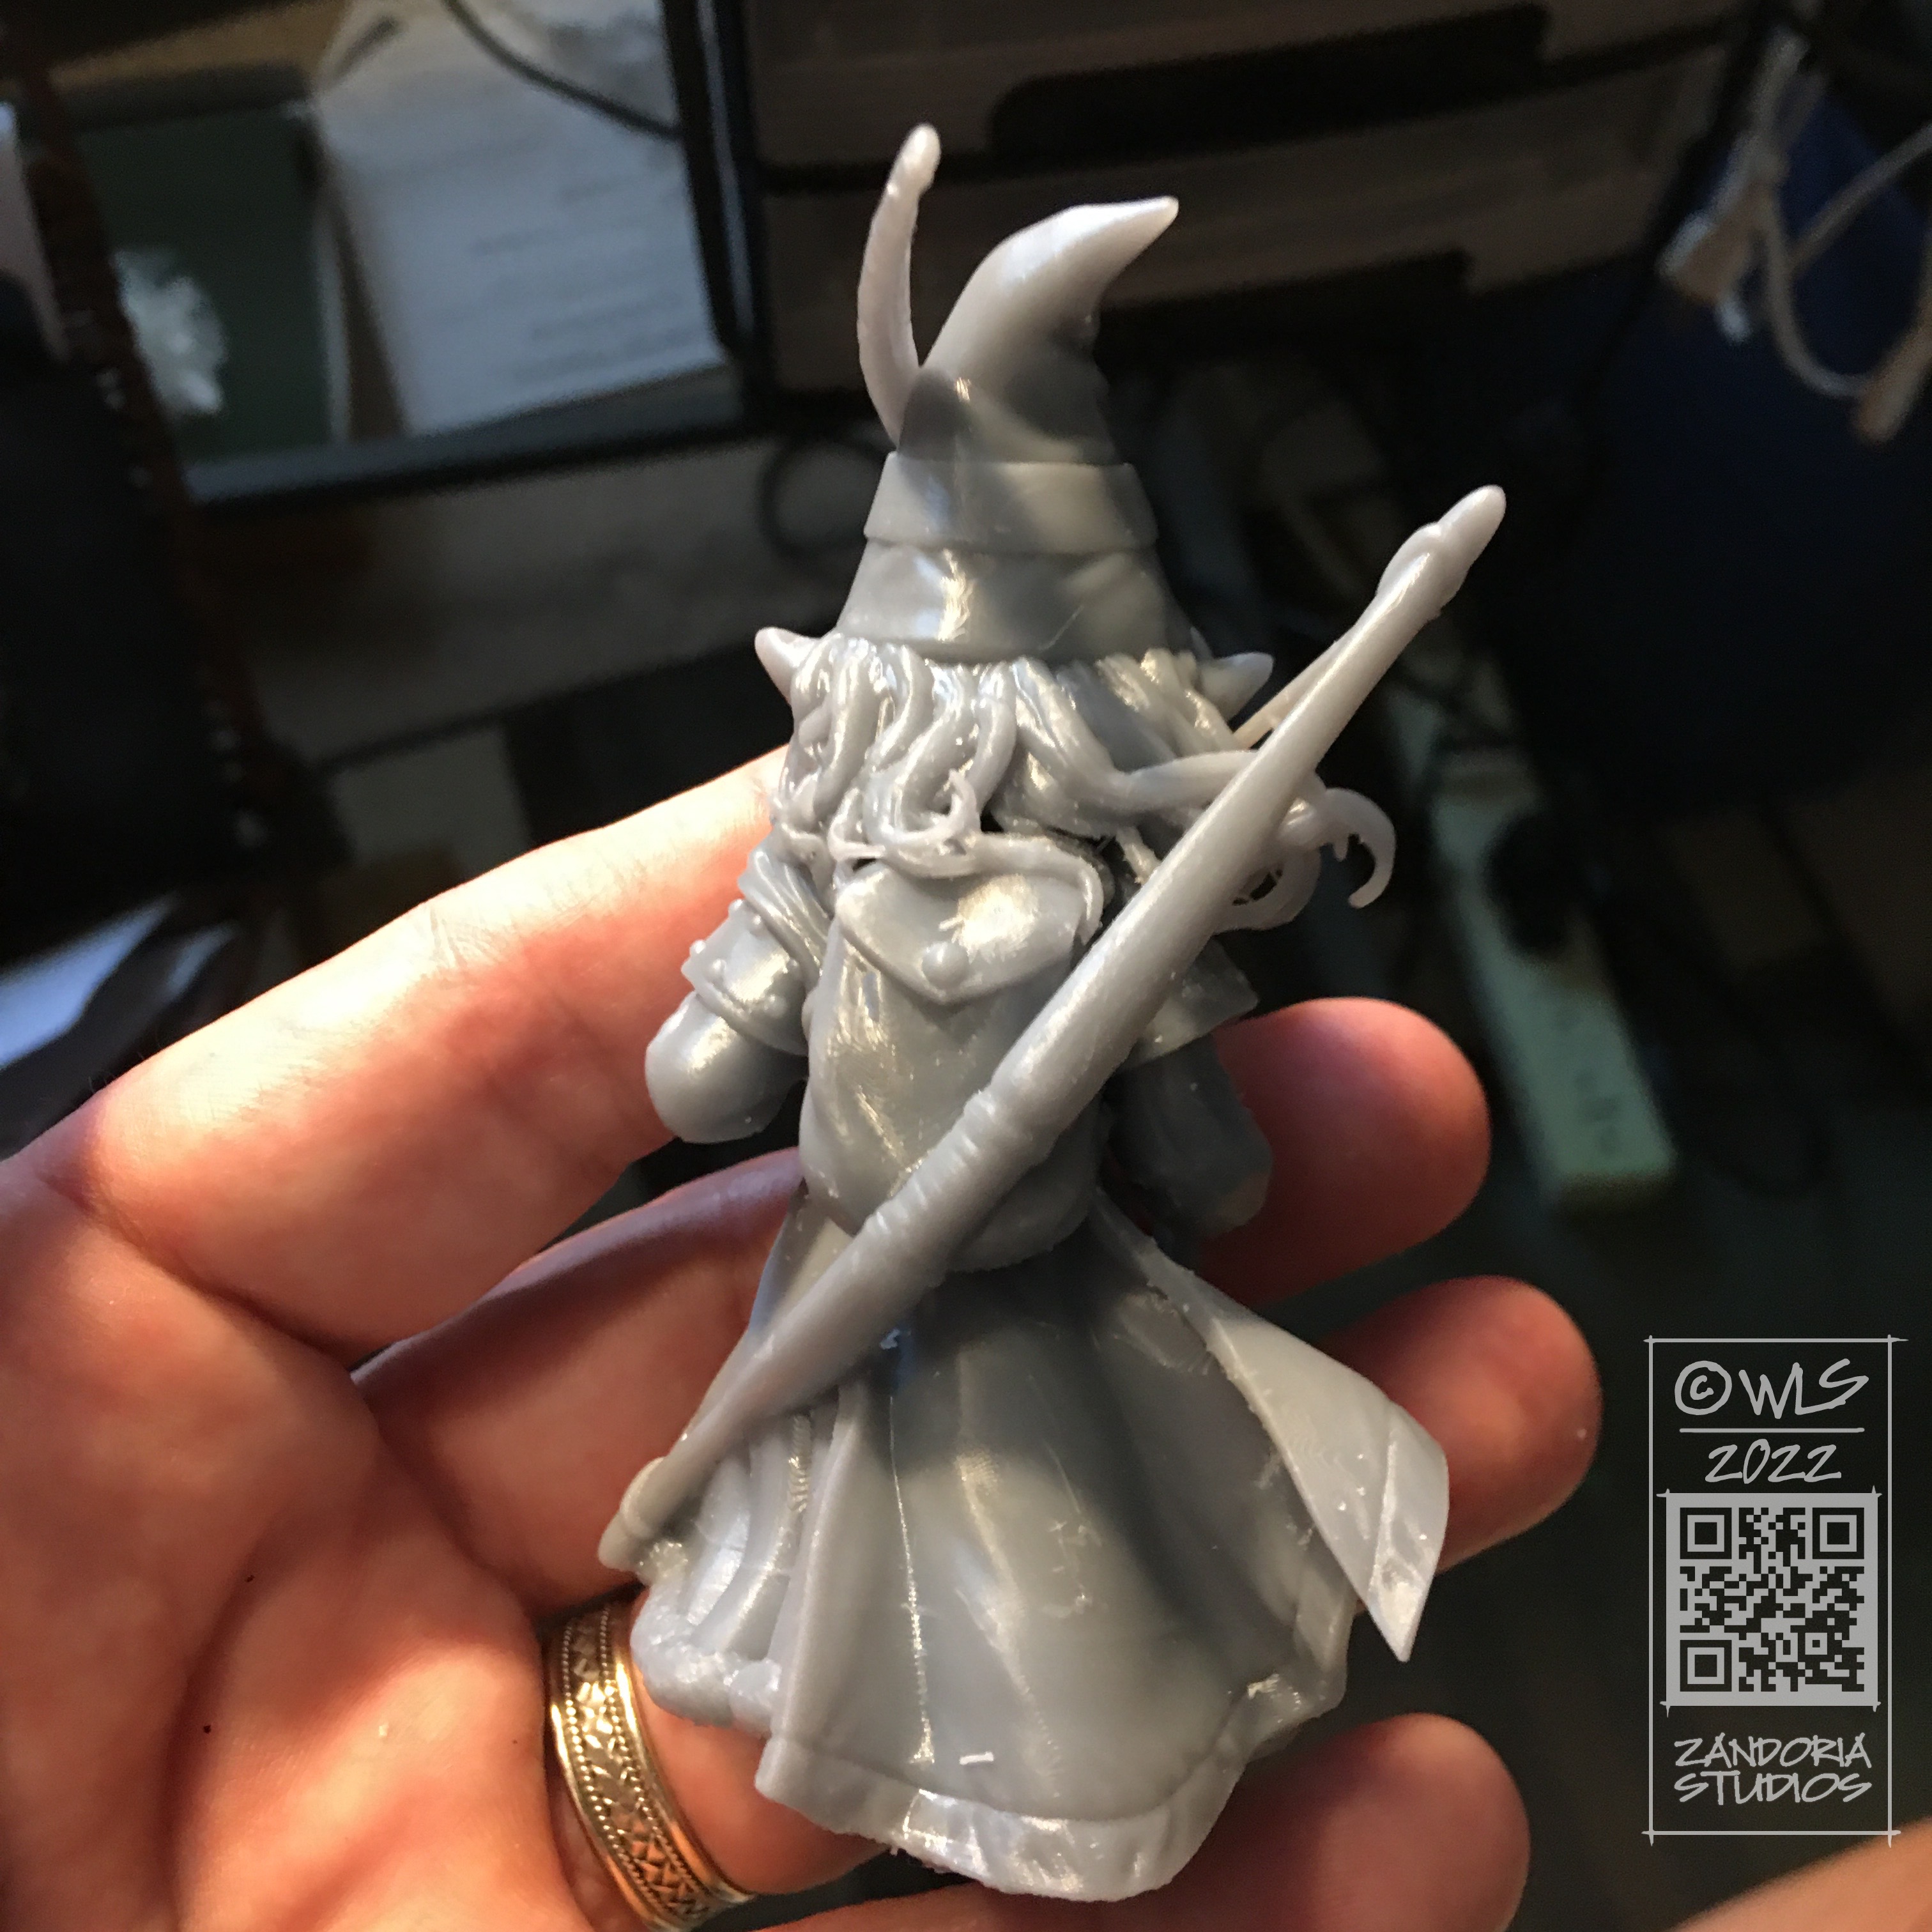
PuzzleLock Dungeon II is a 3Dprintable terrain system for tabletop RPGs like Dungeons and Dragons or Pathfinder. Bring your miniatures game to life with this immersive, detailed dungeon.
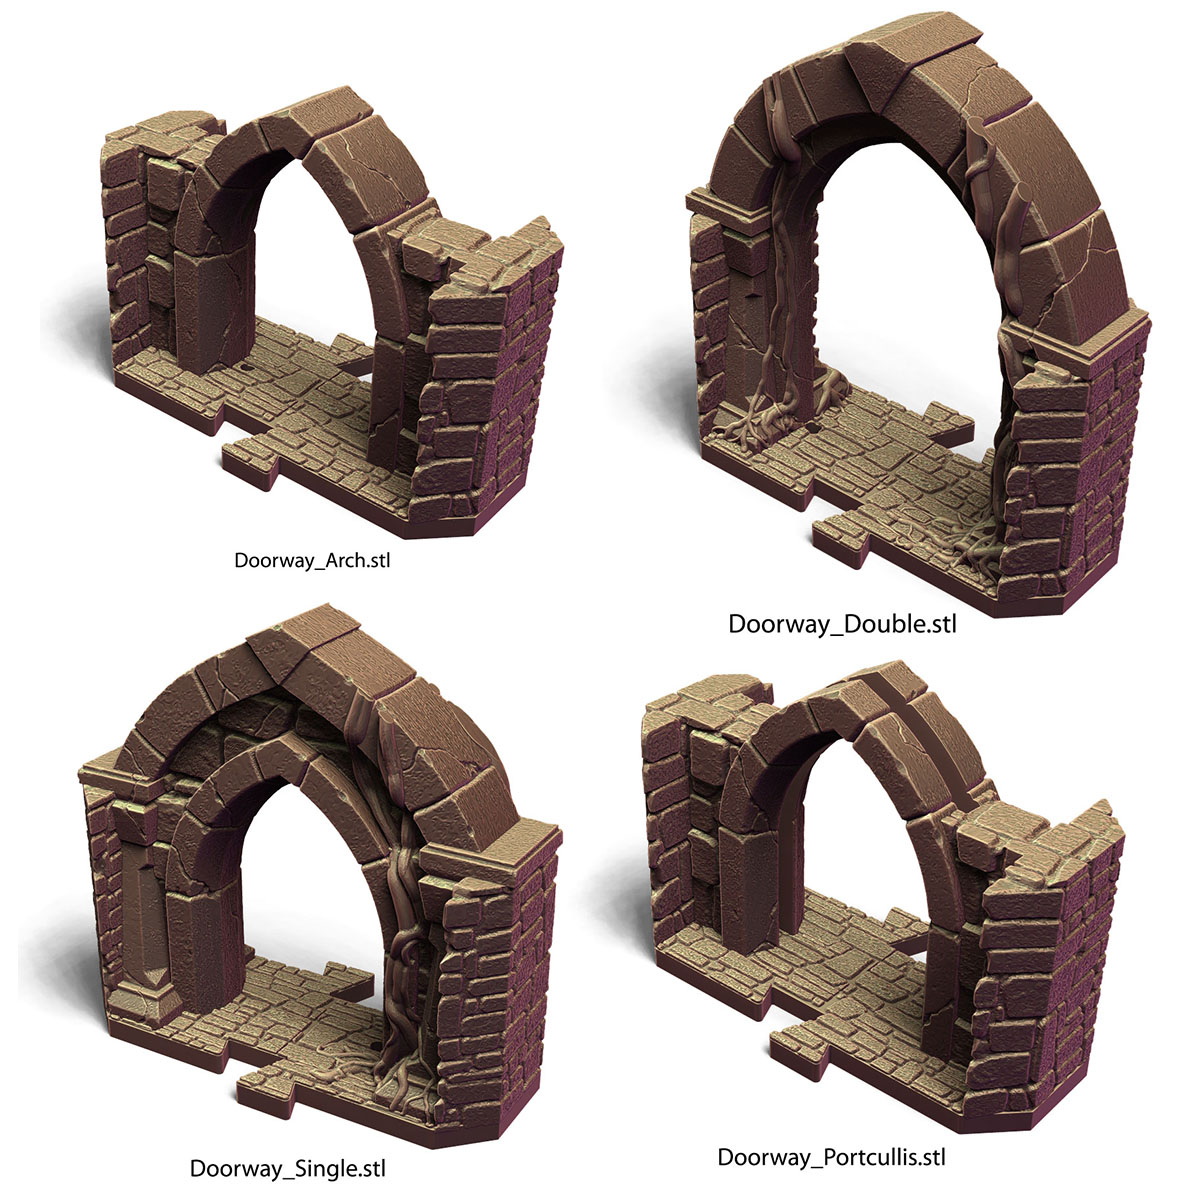
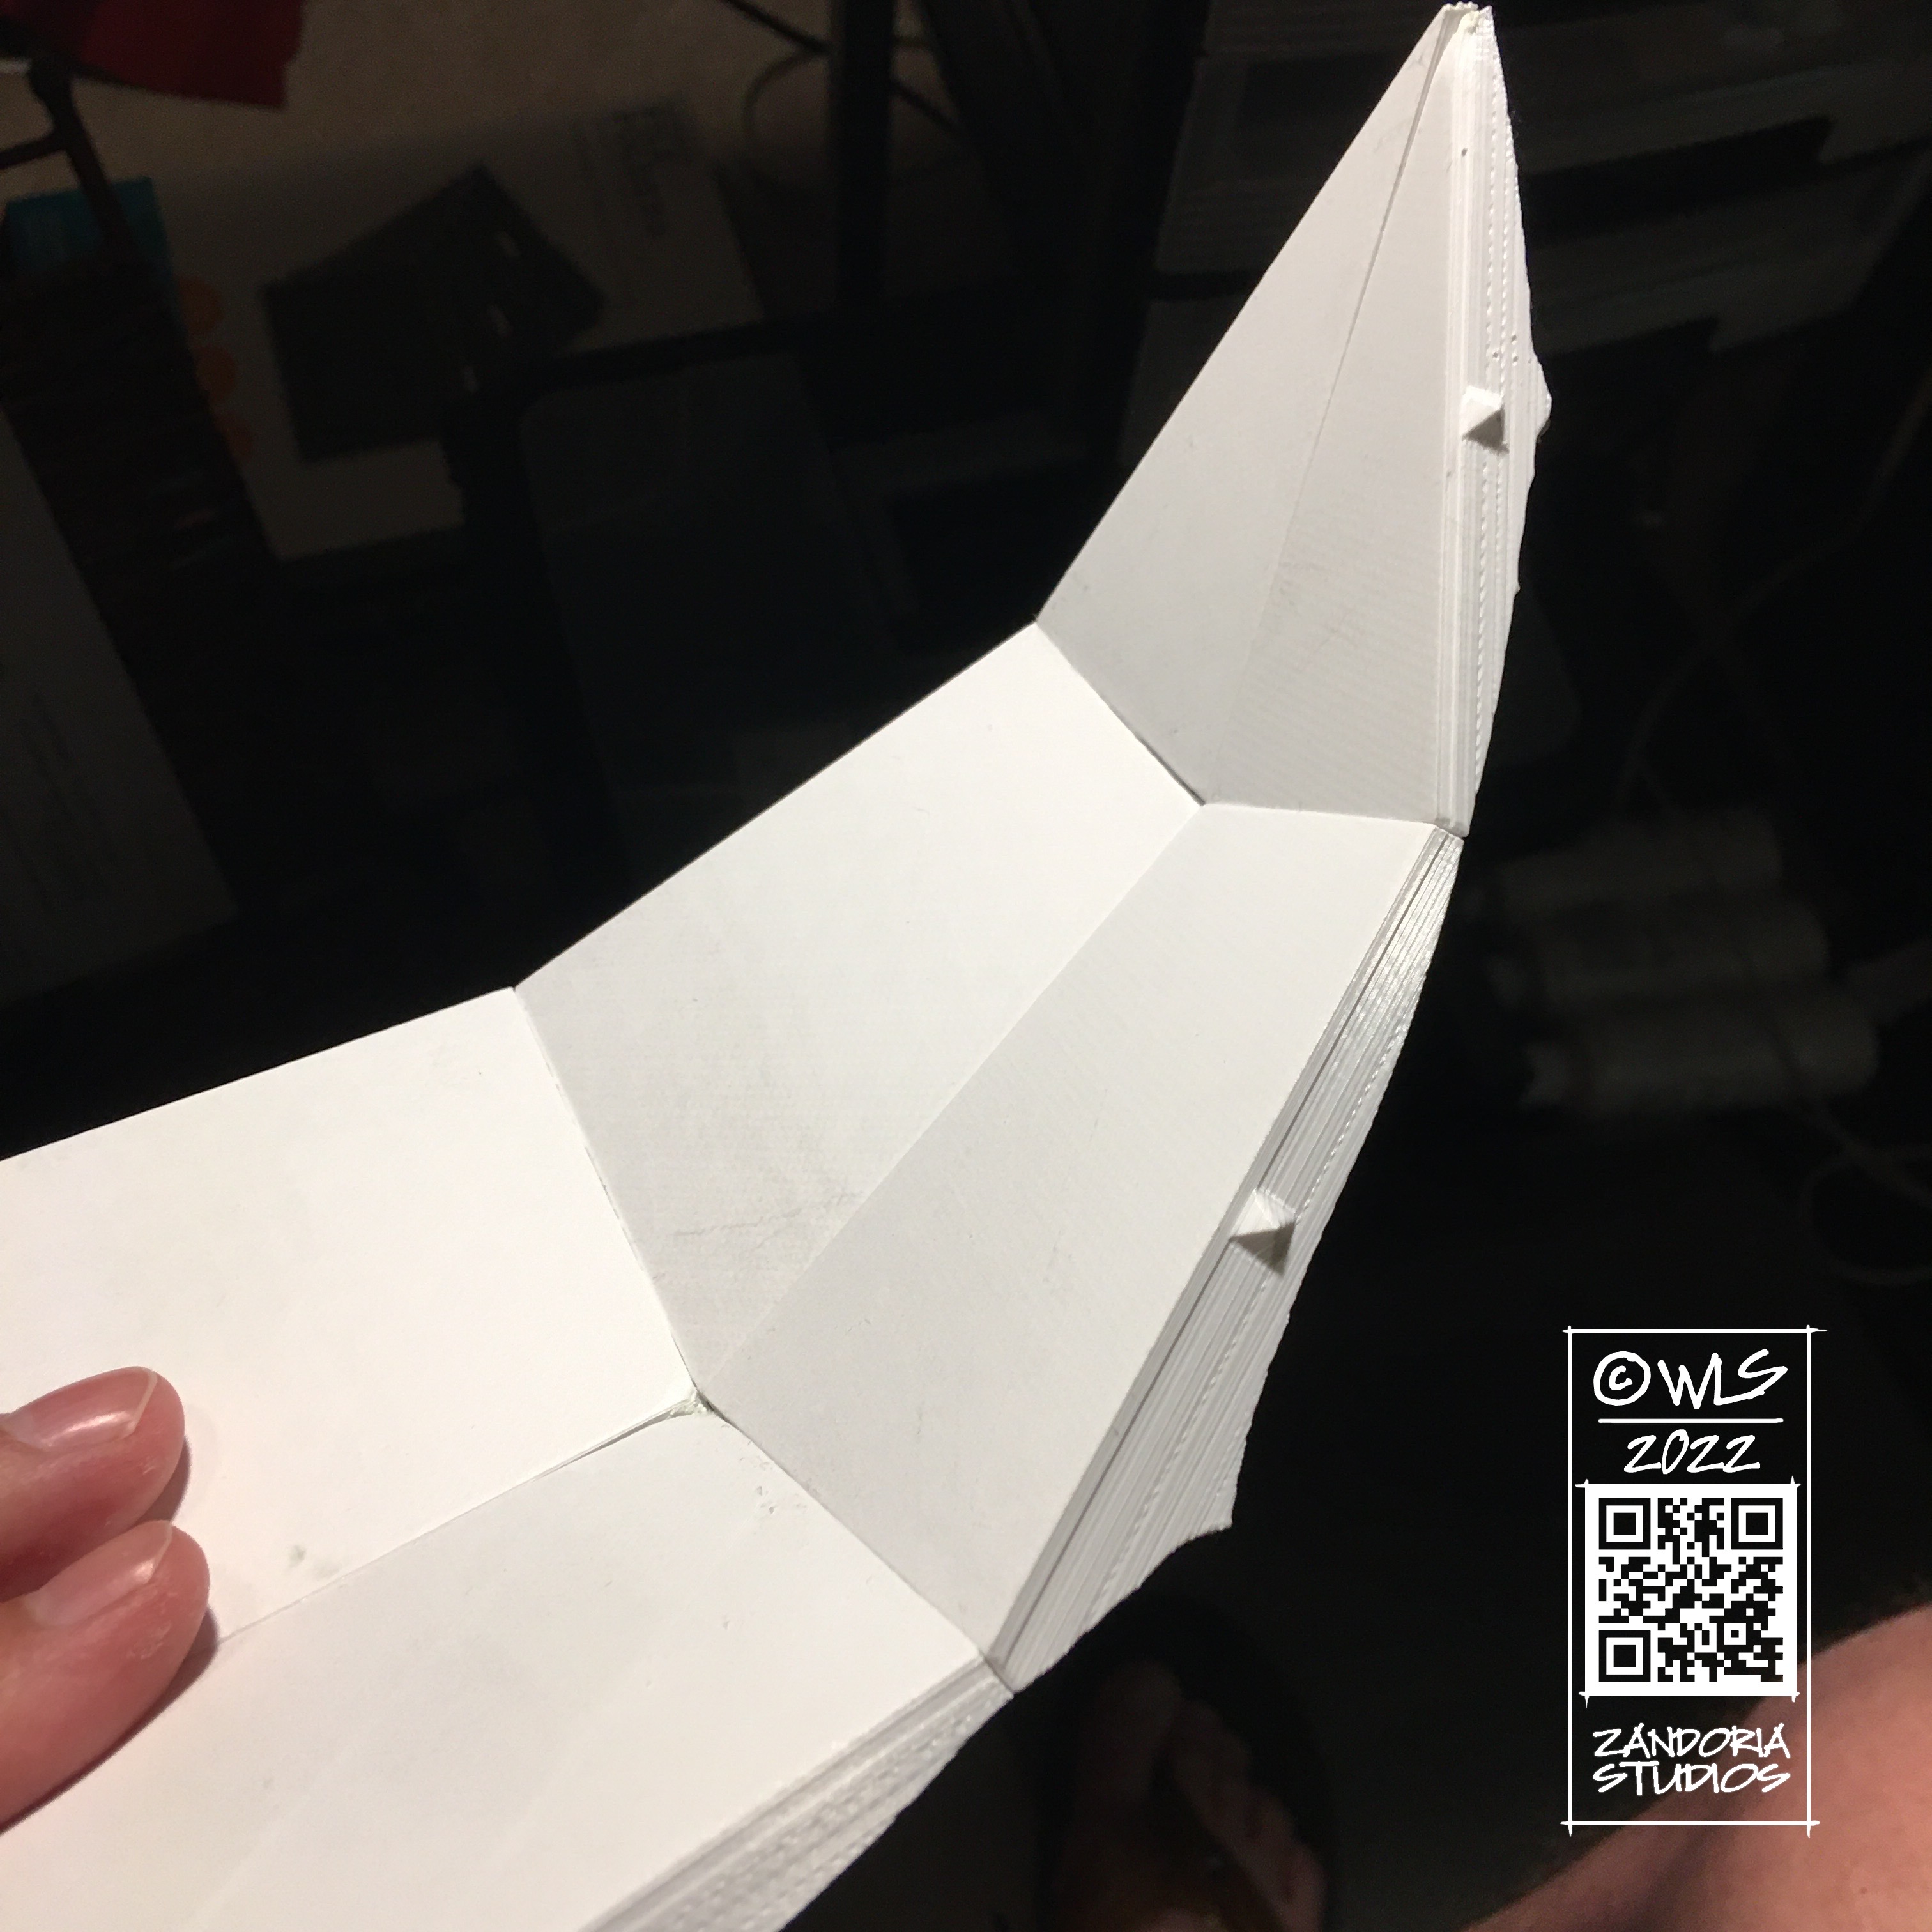
There are 47 unique STL files in this set. Not just tiles–print entire rooms and corridors! The innovative offset wall design gives you the full grid to play on. The walls are 32mm tall (overall 35mm), so they will not obscure the miniatures. The pieces connect with my original PuzzleLock. No clips, no magnets, they connect like a jigsaw puzzle!
The doorways feature working doors! There is a pin edge to the doors, with corresponding holes in the doorways.
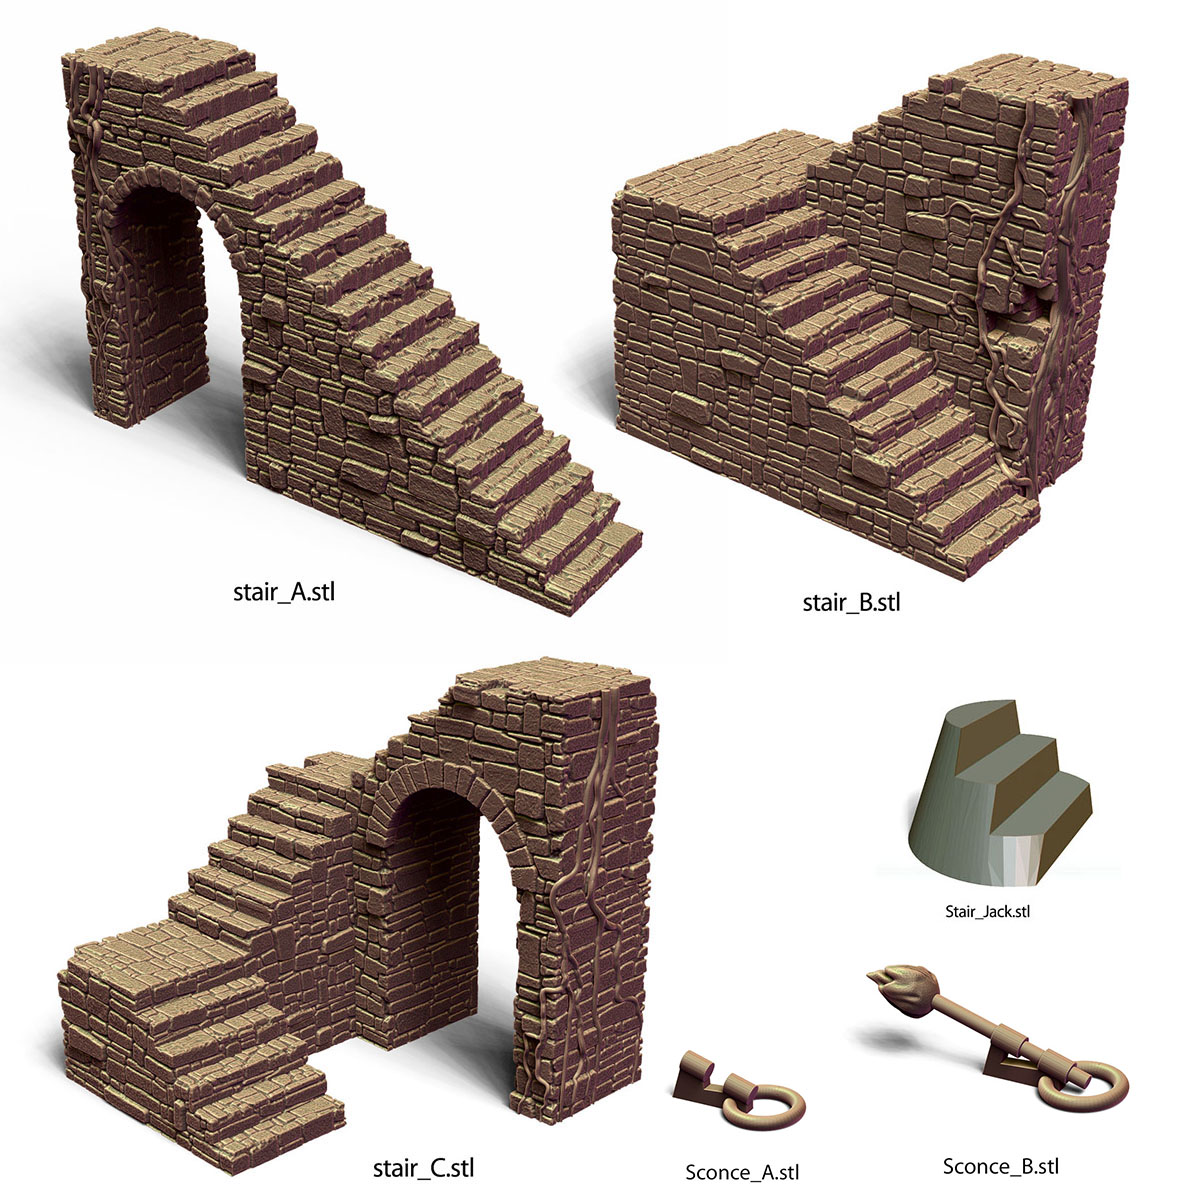
Pillars, stairways and rubble are scatter terrain. Place them directly on top of the tiles to create unique rooms.
There are also many tiles to let you build any room that your dungeon may require.
The entire PuzzleLock Dungeon II set of STL files is exclusively available on Cults3D for only $10.
As the year wraps up, I have been thinking about projects that have been on the back burner that I would like to finish. I have been working on freelance projects the past few months, so haven’t had as much time to devote to them…
I also want to start using this blog, instead of social media. I am going to post new work here first, and then share it to social media instead of directly posting it there. I have been following the rise of AI over the past year, and companies like Meta are scraping up every piece of content to train them. It is very disheartening to me.
At long last, I am ready to launch the new version of my Puzzlelock Dungeon 3Dprintable terrain. I have test printed it and am painting it up for photos, and will put it up on Cults3D soon.
Another project that I want to finish is my interpretation of a fairytale about Princess Cottengrass. In it, the young princess goes on an adventure riding on the back of a moose elk named Leap.
This is my concept sketch. Below is a screenshot from ZBrush of a work-in-progress of the moose. This will be a resin sculpture with a bronze finish, for my Etsy shop.
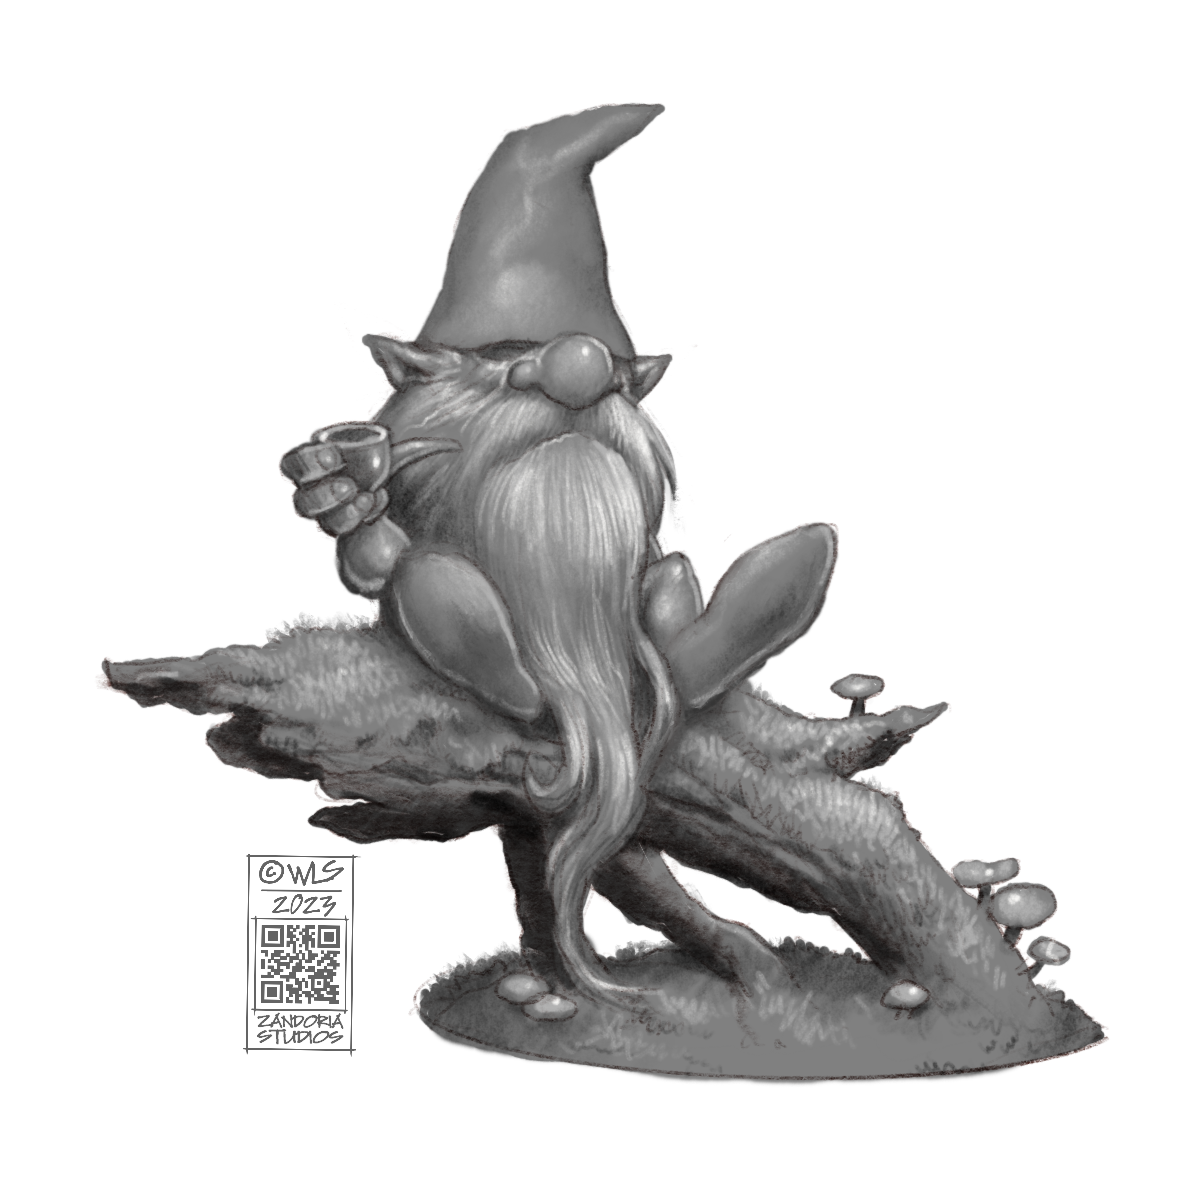
I was sitting on the edge of the woods, smoking my pipe. listening to the wind in the trees and watching a couple of squirrels. I had work that I needed to do, but I decided that I also needed a break.
That became my inspiration for a new gnome. I did a few doodles and came up with a pose that I liked. I also wanted to have him on a mossy log or branch, so I adjusted the sketch until I had a final concept.
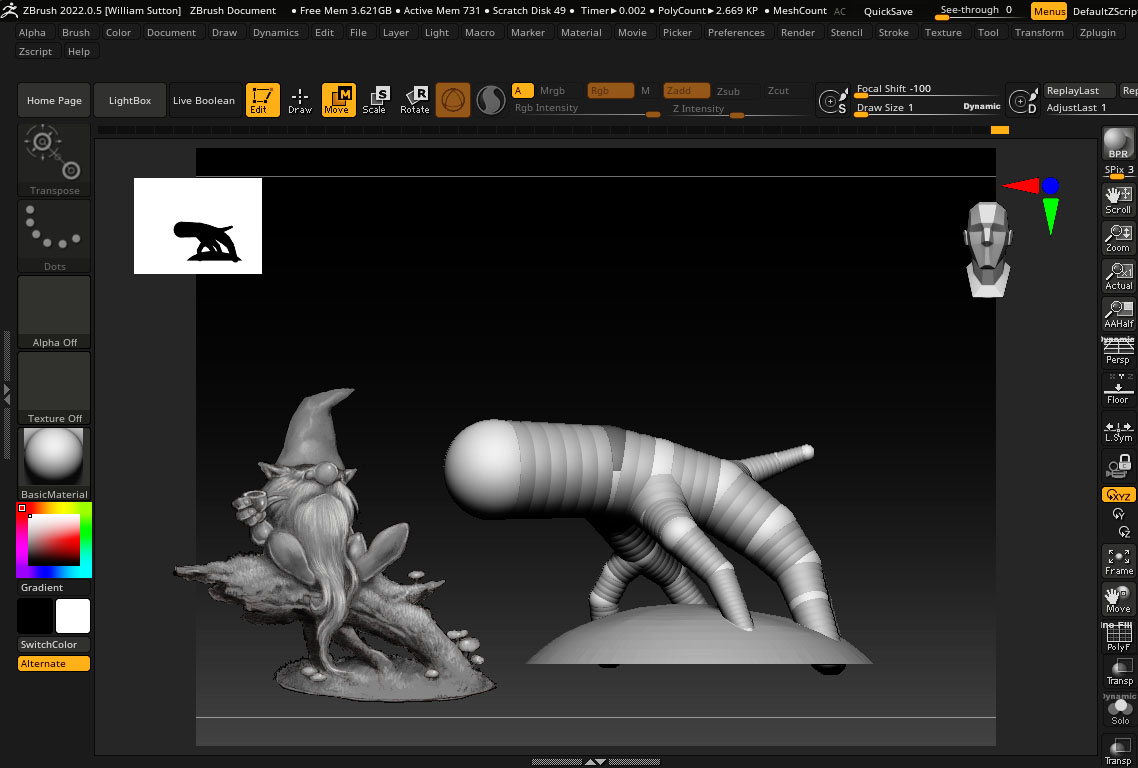
The first thing that I did in ZBrush was to rough in where the gnome would be sitting, and also match the diameter of the base with a 3″ wood base that I planned to use.
I exported my sketch from Procreate with a transparent background as a .PNG file. This allows me to load the image into Spotlight inside of ZBrush and float it above my workspace as a reference, without the background obscuring my viewport. The Stump is drawn with Zspheres to match the sketch.
After converting it into a mesh, I sculpted the wood and extracted some bark. then once that was ready, I masked and extracted the areas that I wanted to be covered with moss. To create the moss texture, I used surface noise and inflate.
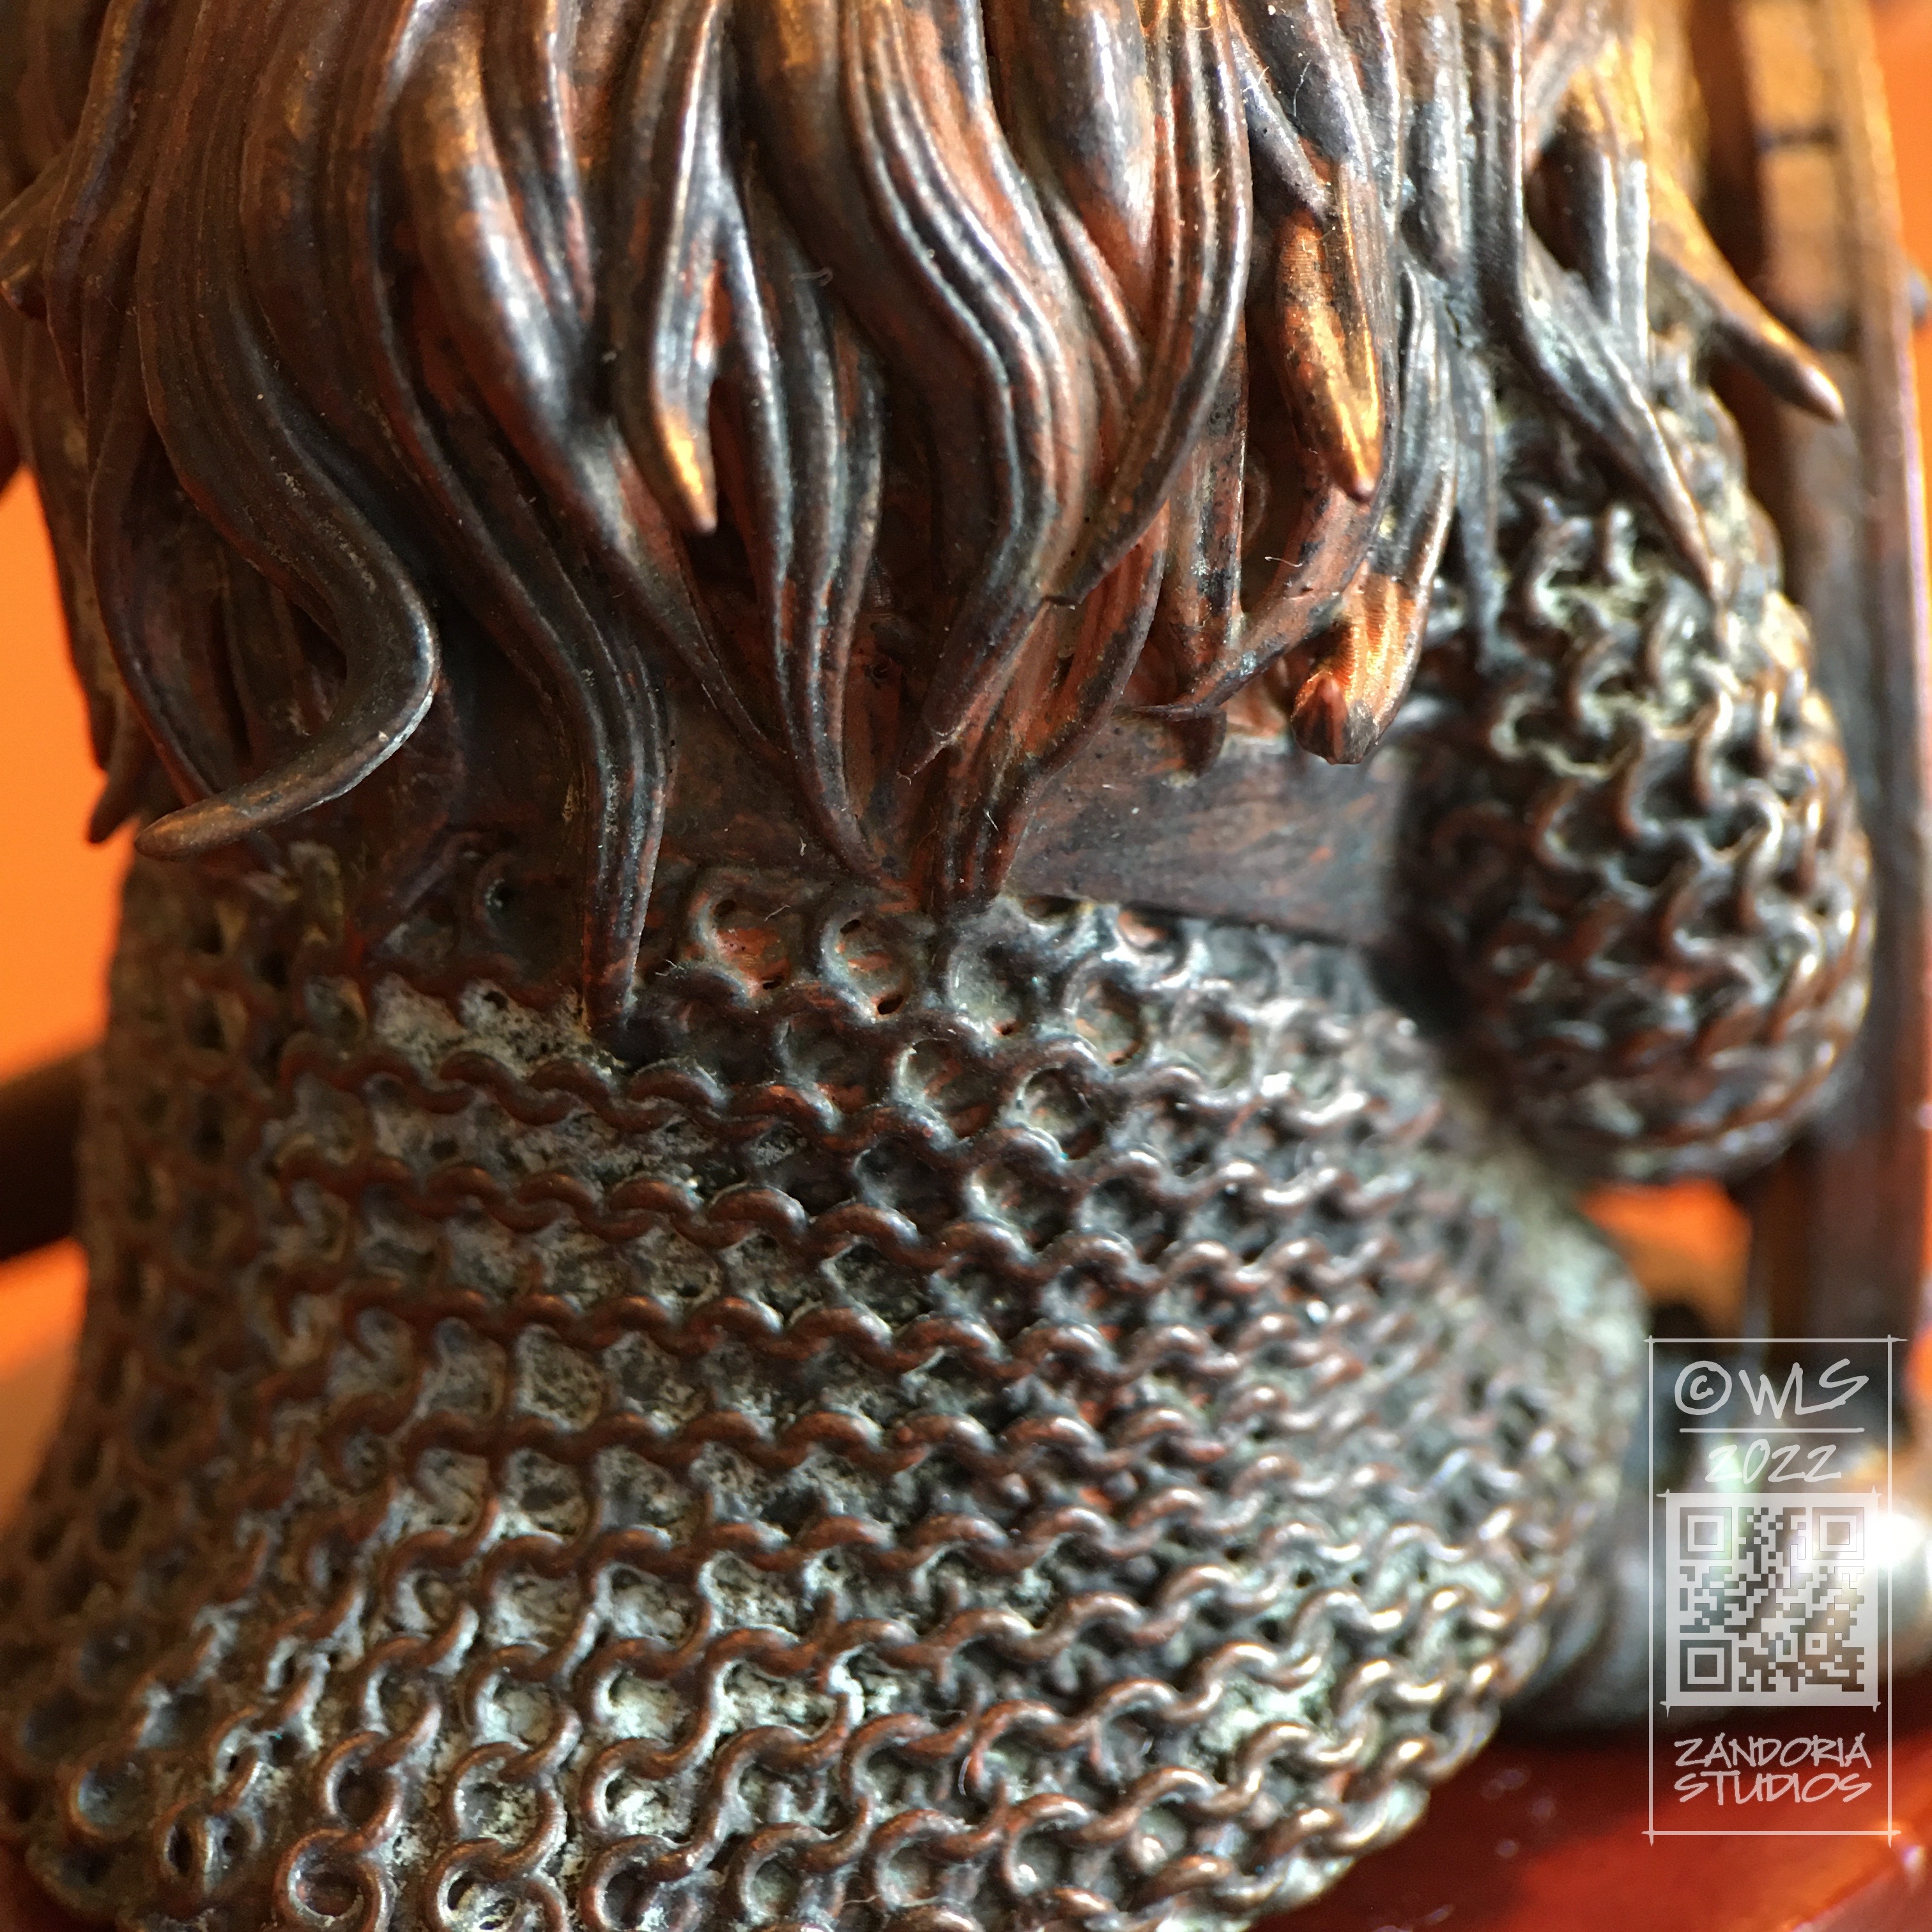
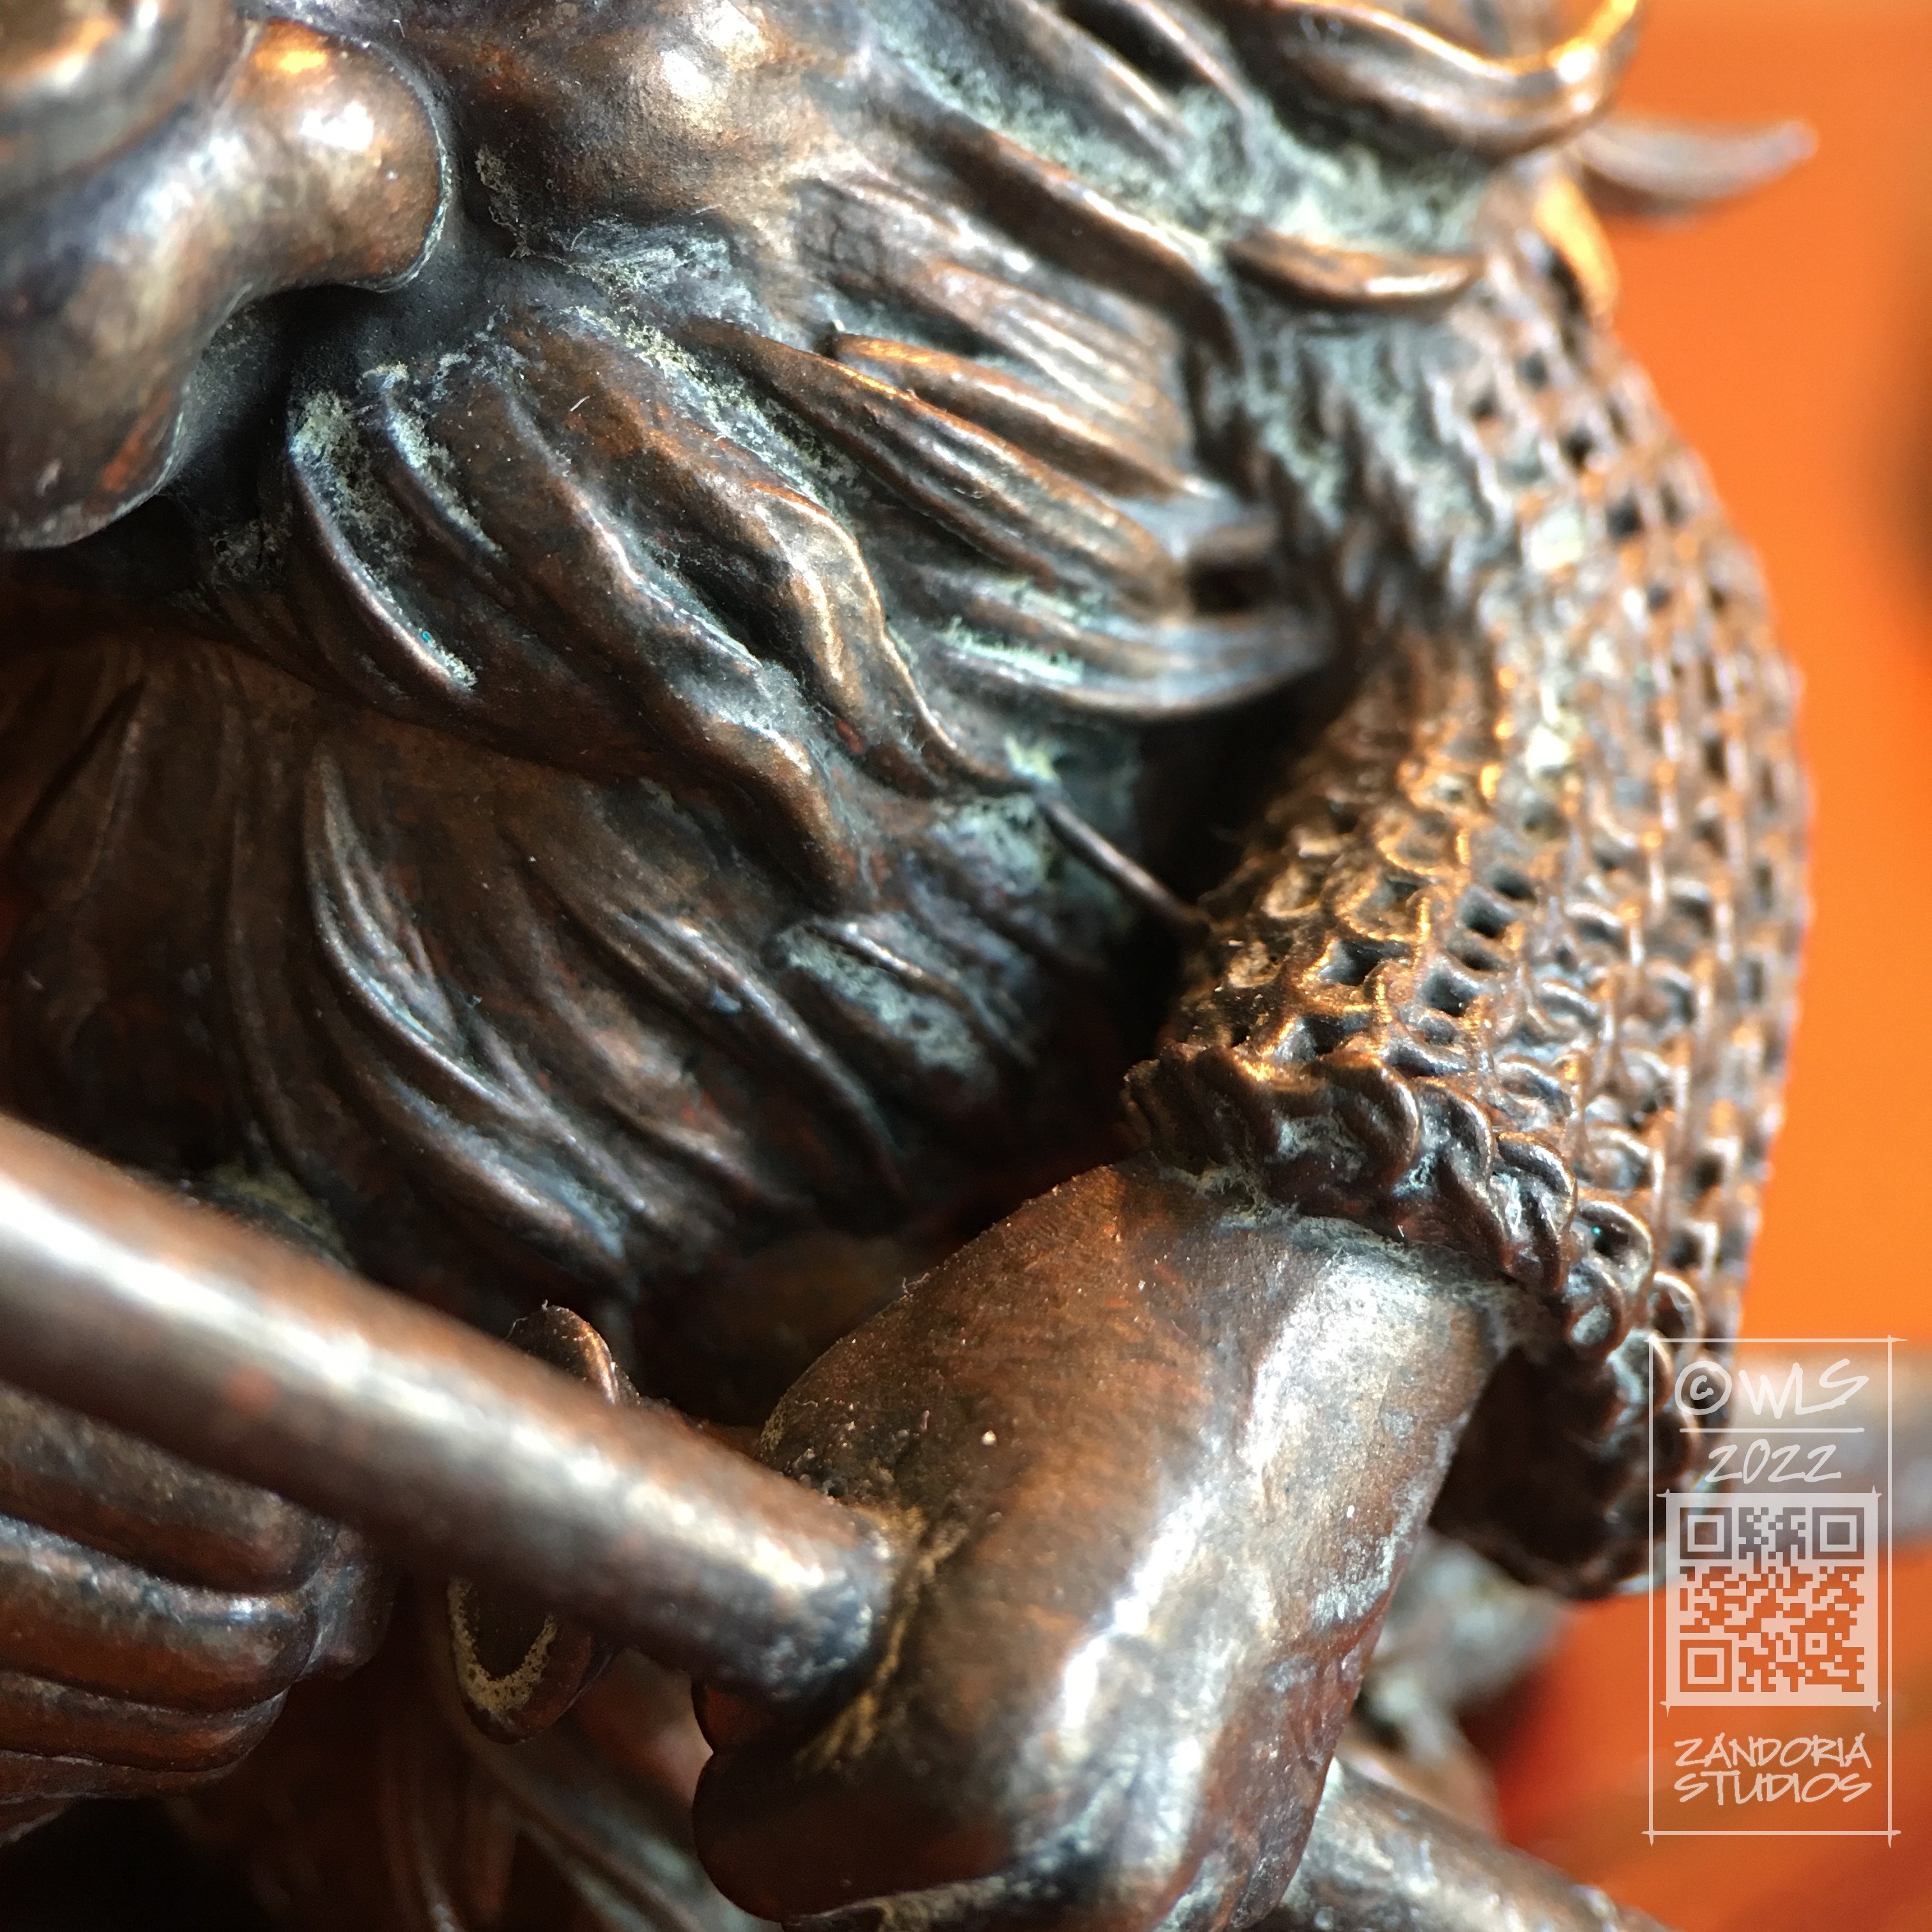
I started blocking in the gnome with two spheres and a cone. I used the curve tube brush to draw the legs and arms (you can see the right arm in this screenshot is still just a tube). Those simple shapes are subdivided and dynameshed so that the details can be sculpted. the beard area is just roughed in, because I know I will be building it later.
Here is a closeup of that arm. The arm and hand are finished, holding the pipe. I’ve extracted geometry to make the sleeve. I will use the cloth move brush to shape it before sculpting the details and stitching…
The beard is made using the Alpha curve brush. Each lock of hair is drawn as a curve, with an irregular shaped black and white image defining the cross-section of the lock of hair as it is extruded along the curve. The lock is tapered at one end, and because the stroke is a curve, you can manipulate it, twist it and move it into place before you commit to it.
Here is the model, 3Dprinted in resin. I was very pleased that all of my mushrooms printed and nothing broke off! Printed with Mighty4K using 3DRS Hard Grey resin.
Using an airbrush, I primed the model in black. Then I used grey primer at a downward angle to simulate ambient lighting. The “zenithal” priming brings out the details and will enhance the painting, even though it will be covered.
I have made a step-by-step tutorial, if you are wanting to paint your own gnomes–Here is the link
Here is the finished gnome, enjoying his pipe!
I hope that you enjoyed this look at the process. If you are into 3Dprinting, you can get the STL to print your own on my Patreon. If you would like to just buy the finished figurine, I have them available (unpainted, bronze, hand-painted) on my Etsy shop.
I was talking to a friend of mine today about a 3Dprinting project. He was unaware that I had a 15 year background in design for manufacturing, and I realized that maybe it would be a good idea to talk about CAD (Computer Aided Design), and how I integrate it with some of the work I create for 3Dprinting.
When creating an object that is to be manufactured, or that has to mate up with other components, It is critical to use CAD to make sure that all of your dimensions and tolerances are going to work. Much of my freelance work combines CAD with digital sculpting, allowing me the best of both worlds–especially when dealing with 3Dprinting.
Part of a Tap Handle designed in RhinoIncendiary Tap Handle for Big Bridge Manufacturing
For this tap handle for Big Bridge Design, which is manufactured with resin 3Dprinting, the handle needs to mate up with a brass insert nut, so that the handle can be screwed onto the beer tap. Using Rhino I am able to utilize the clients 2D Illustrator file (.ai) to create a 3D model with the basic graphic design elements at the precise size, and also create the threads to receive the metal insert. The skulls are sculpted in ZBrush.
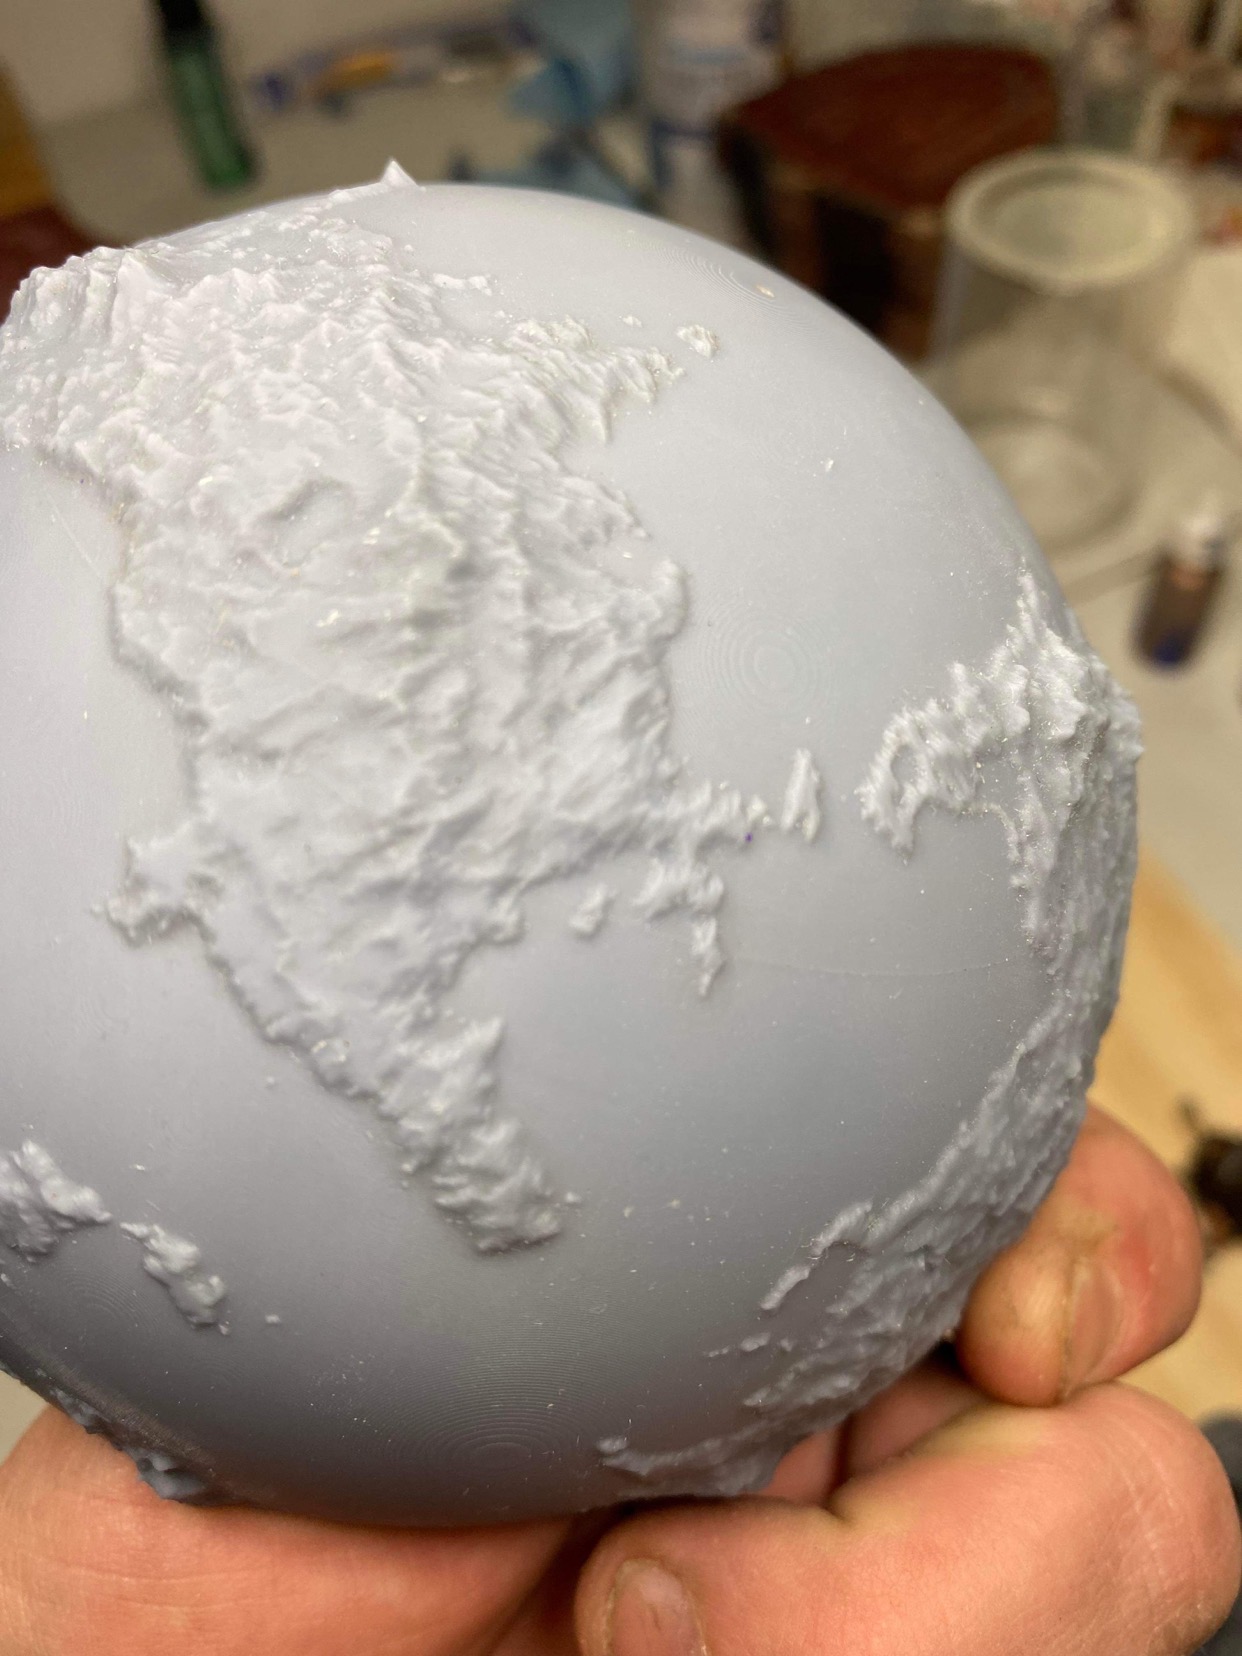
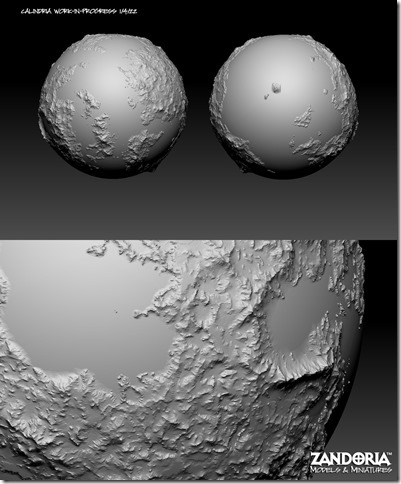
Turning the World of Calindria into a 3D model
This globe project was to create a 3Dprintable world for Noble Dwarf, the publisher of a tabletop role-playing setting Legends of Calindria. It is not too difficult to generate terrain based on the clients map, but it also needed to be printed in sections and have keys for assembly.
I created a globe in CAD and split it into sections. then used ARRAY commands to position all of the interlocking keys. The surfaces of the sections were subdivided and projected against the terrain in ZBrush to get the final shape.
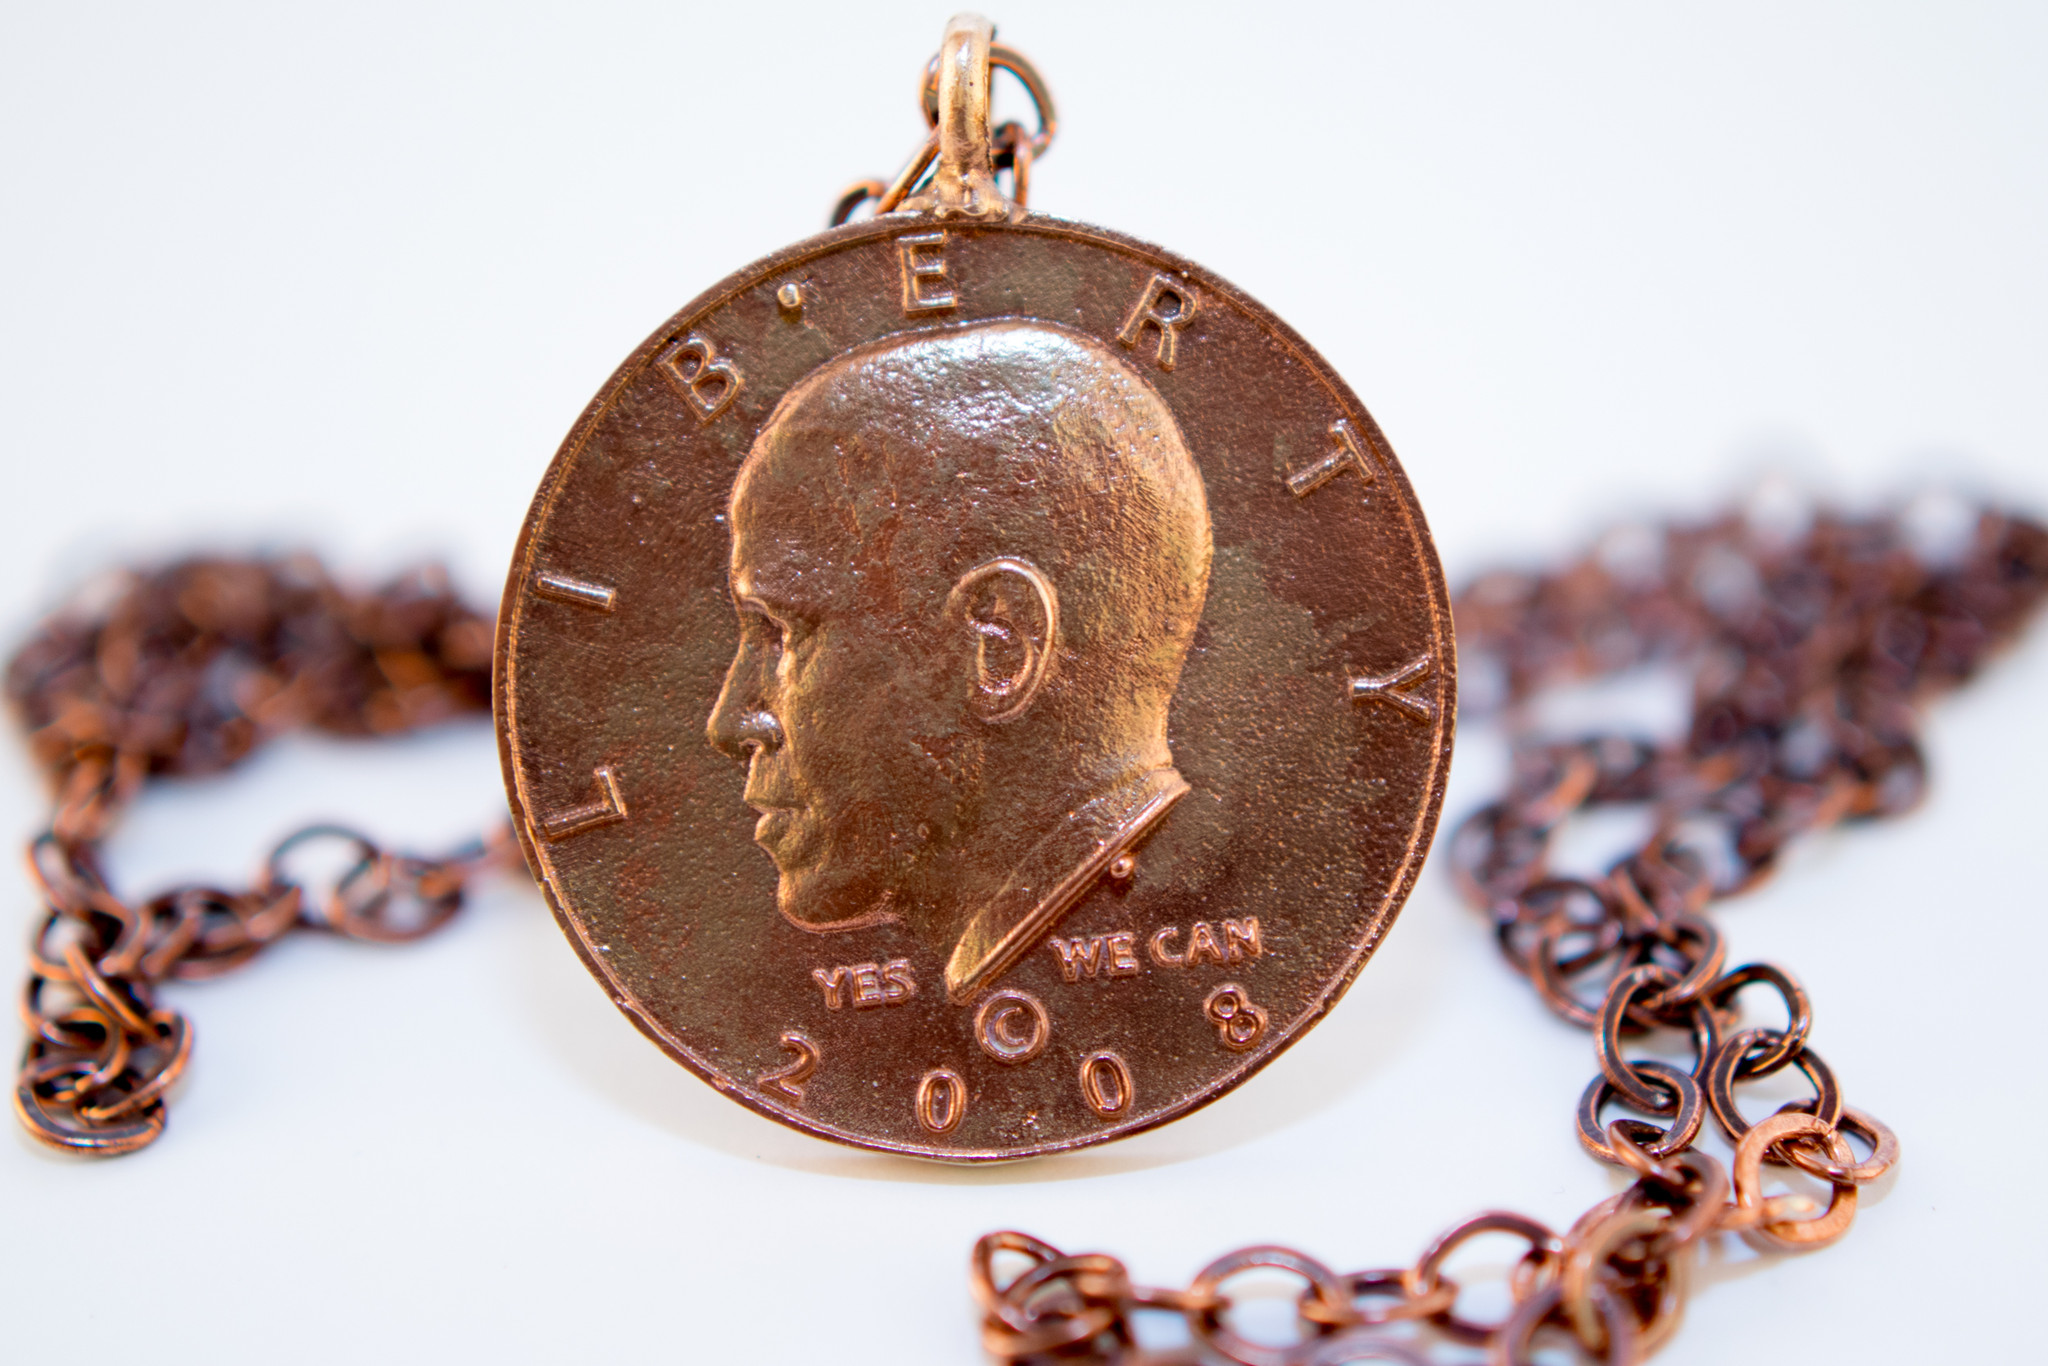
Jewelry is also something that is a good opportunity to mix sculpted elements with CAD. This set of cuff links and pendant for 44th Legacy combined a relief sculpture from ZBrush with elements modeled in Rhino. The final pieces were created in bronze with the lost-wax process.
cuff links and pendant for 44th Legacy
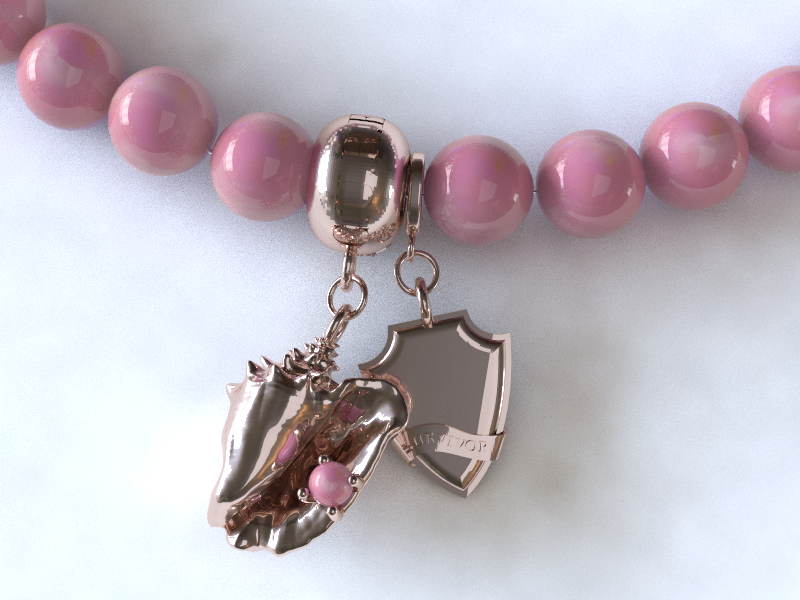
Another jewelry example combines a conch shell with other elements for a custom bracelet for BEACH BY JEWEL
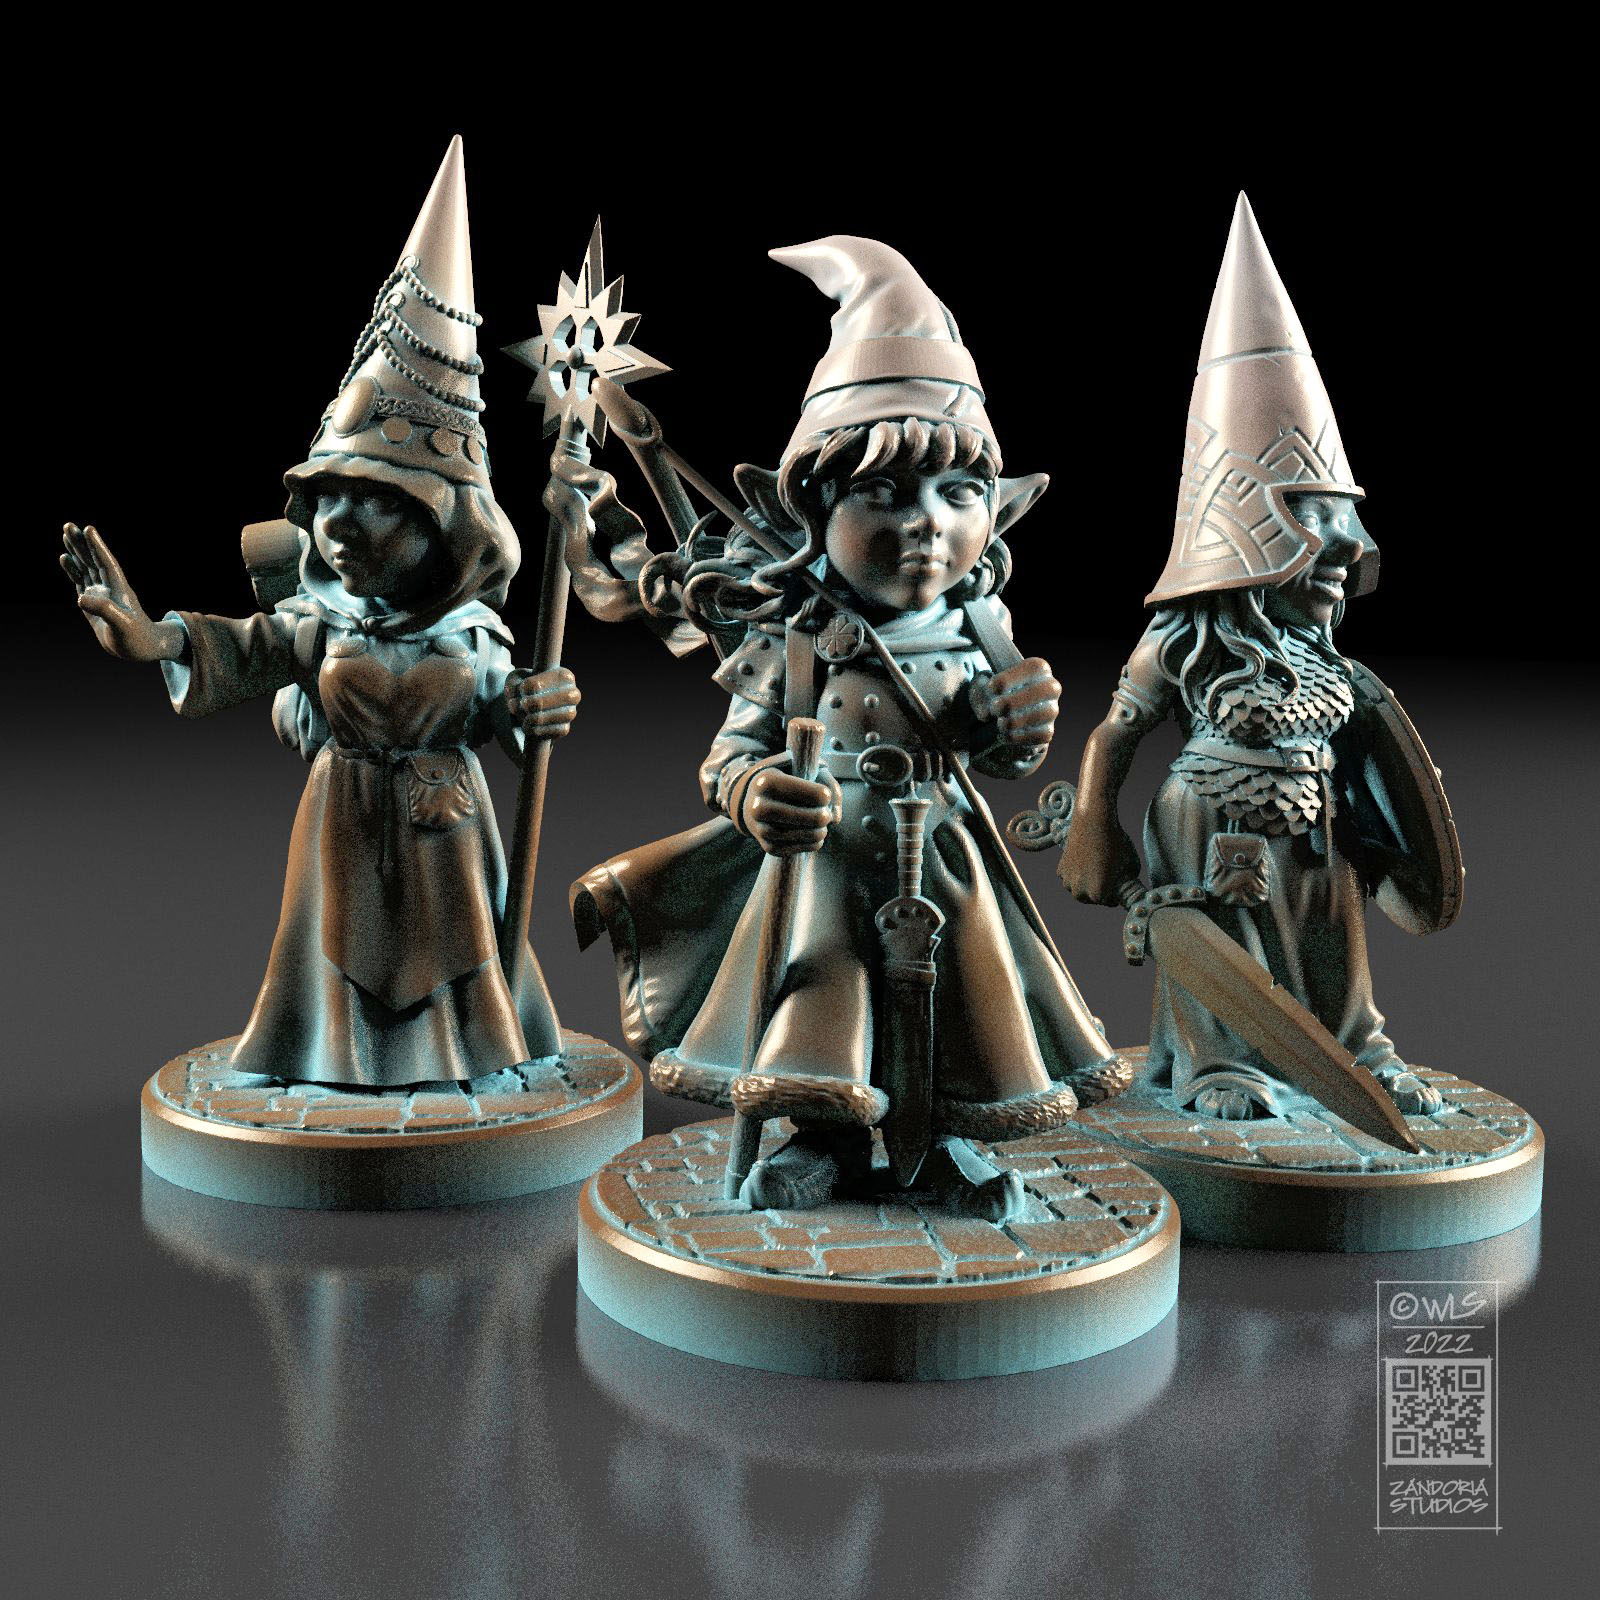
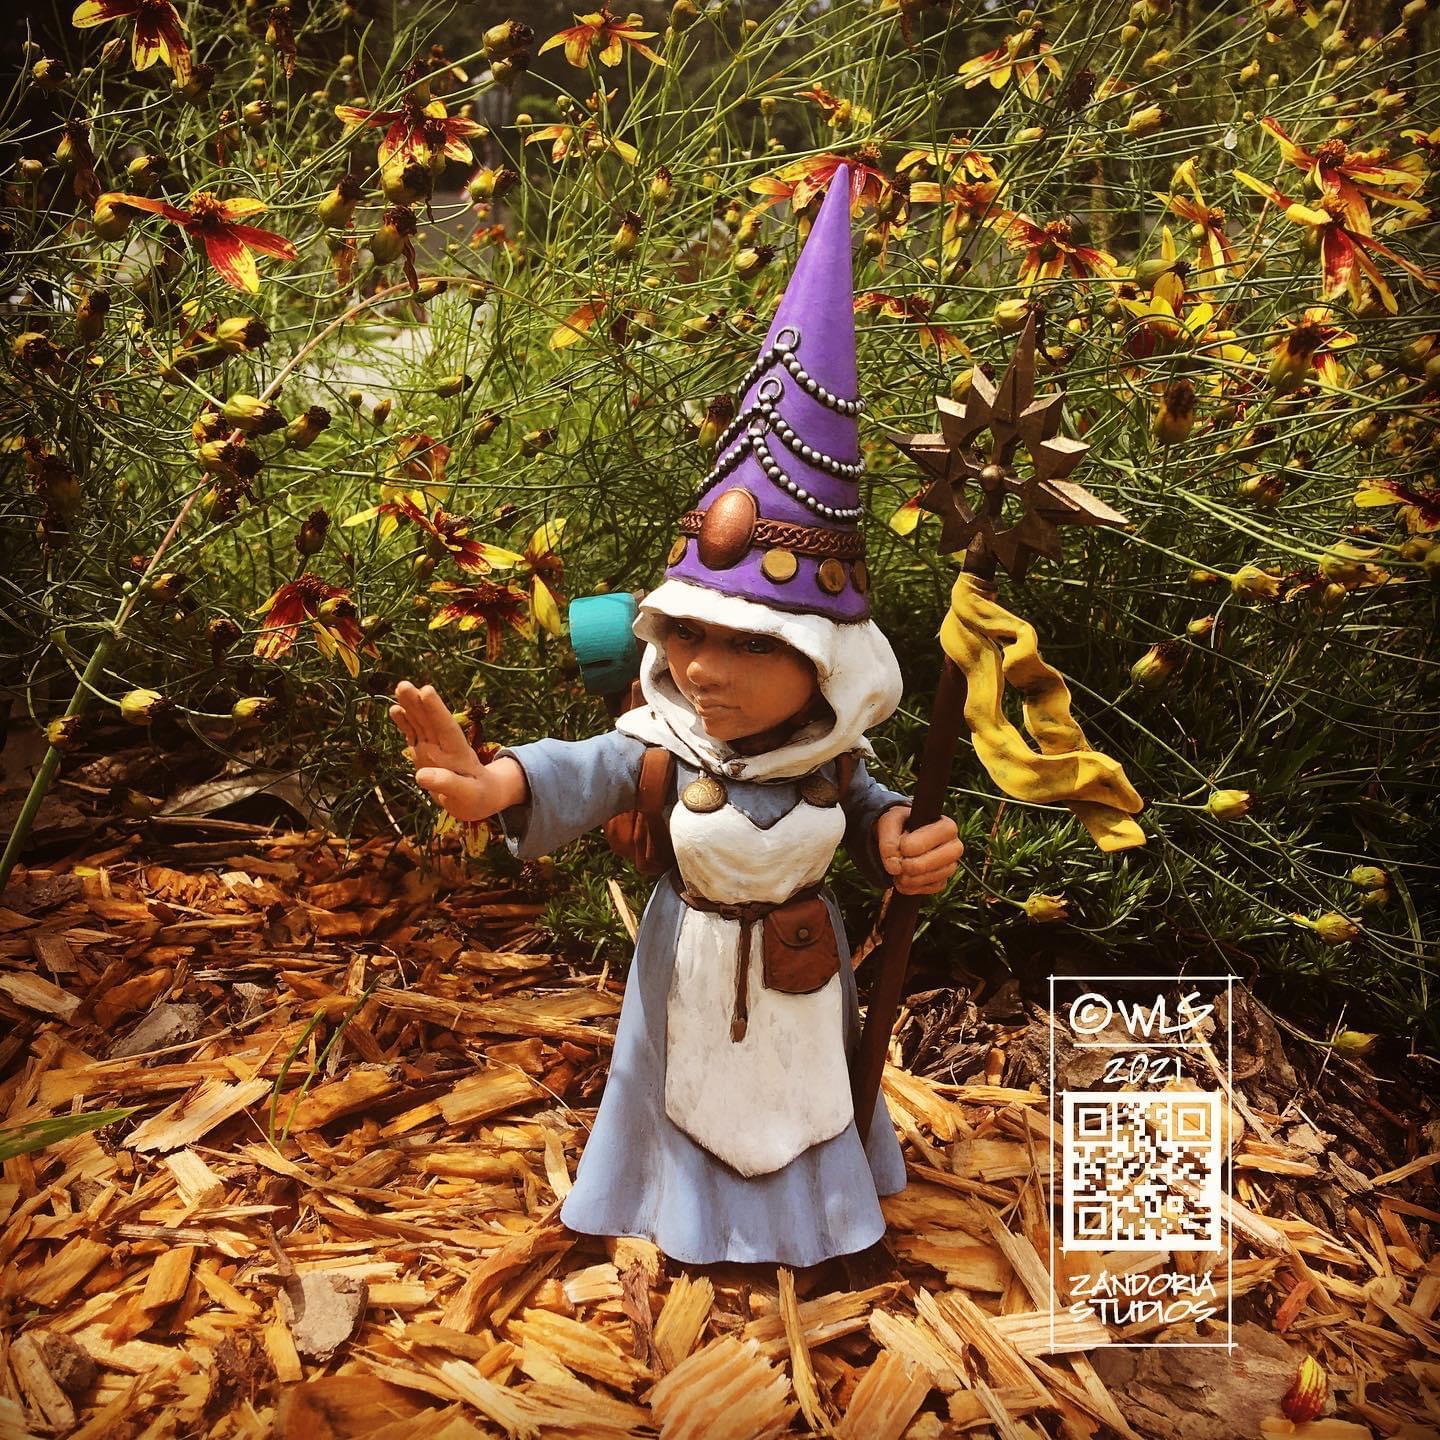
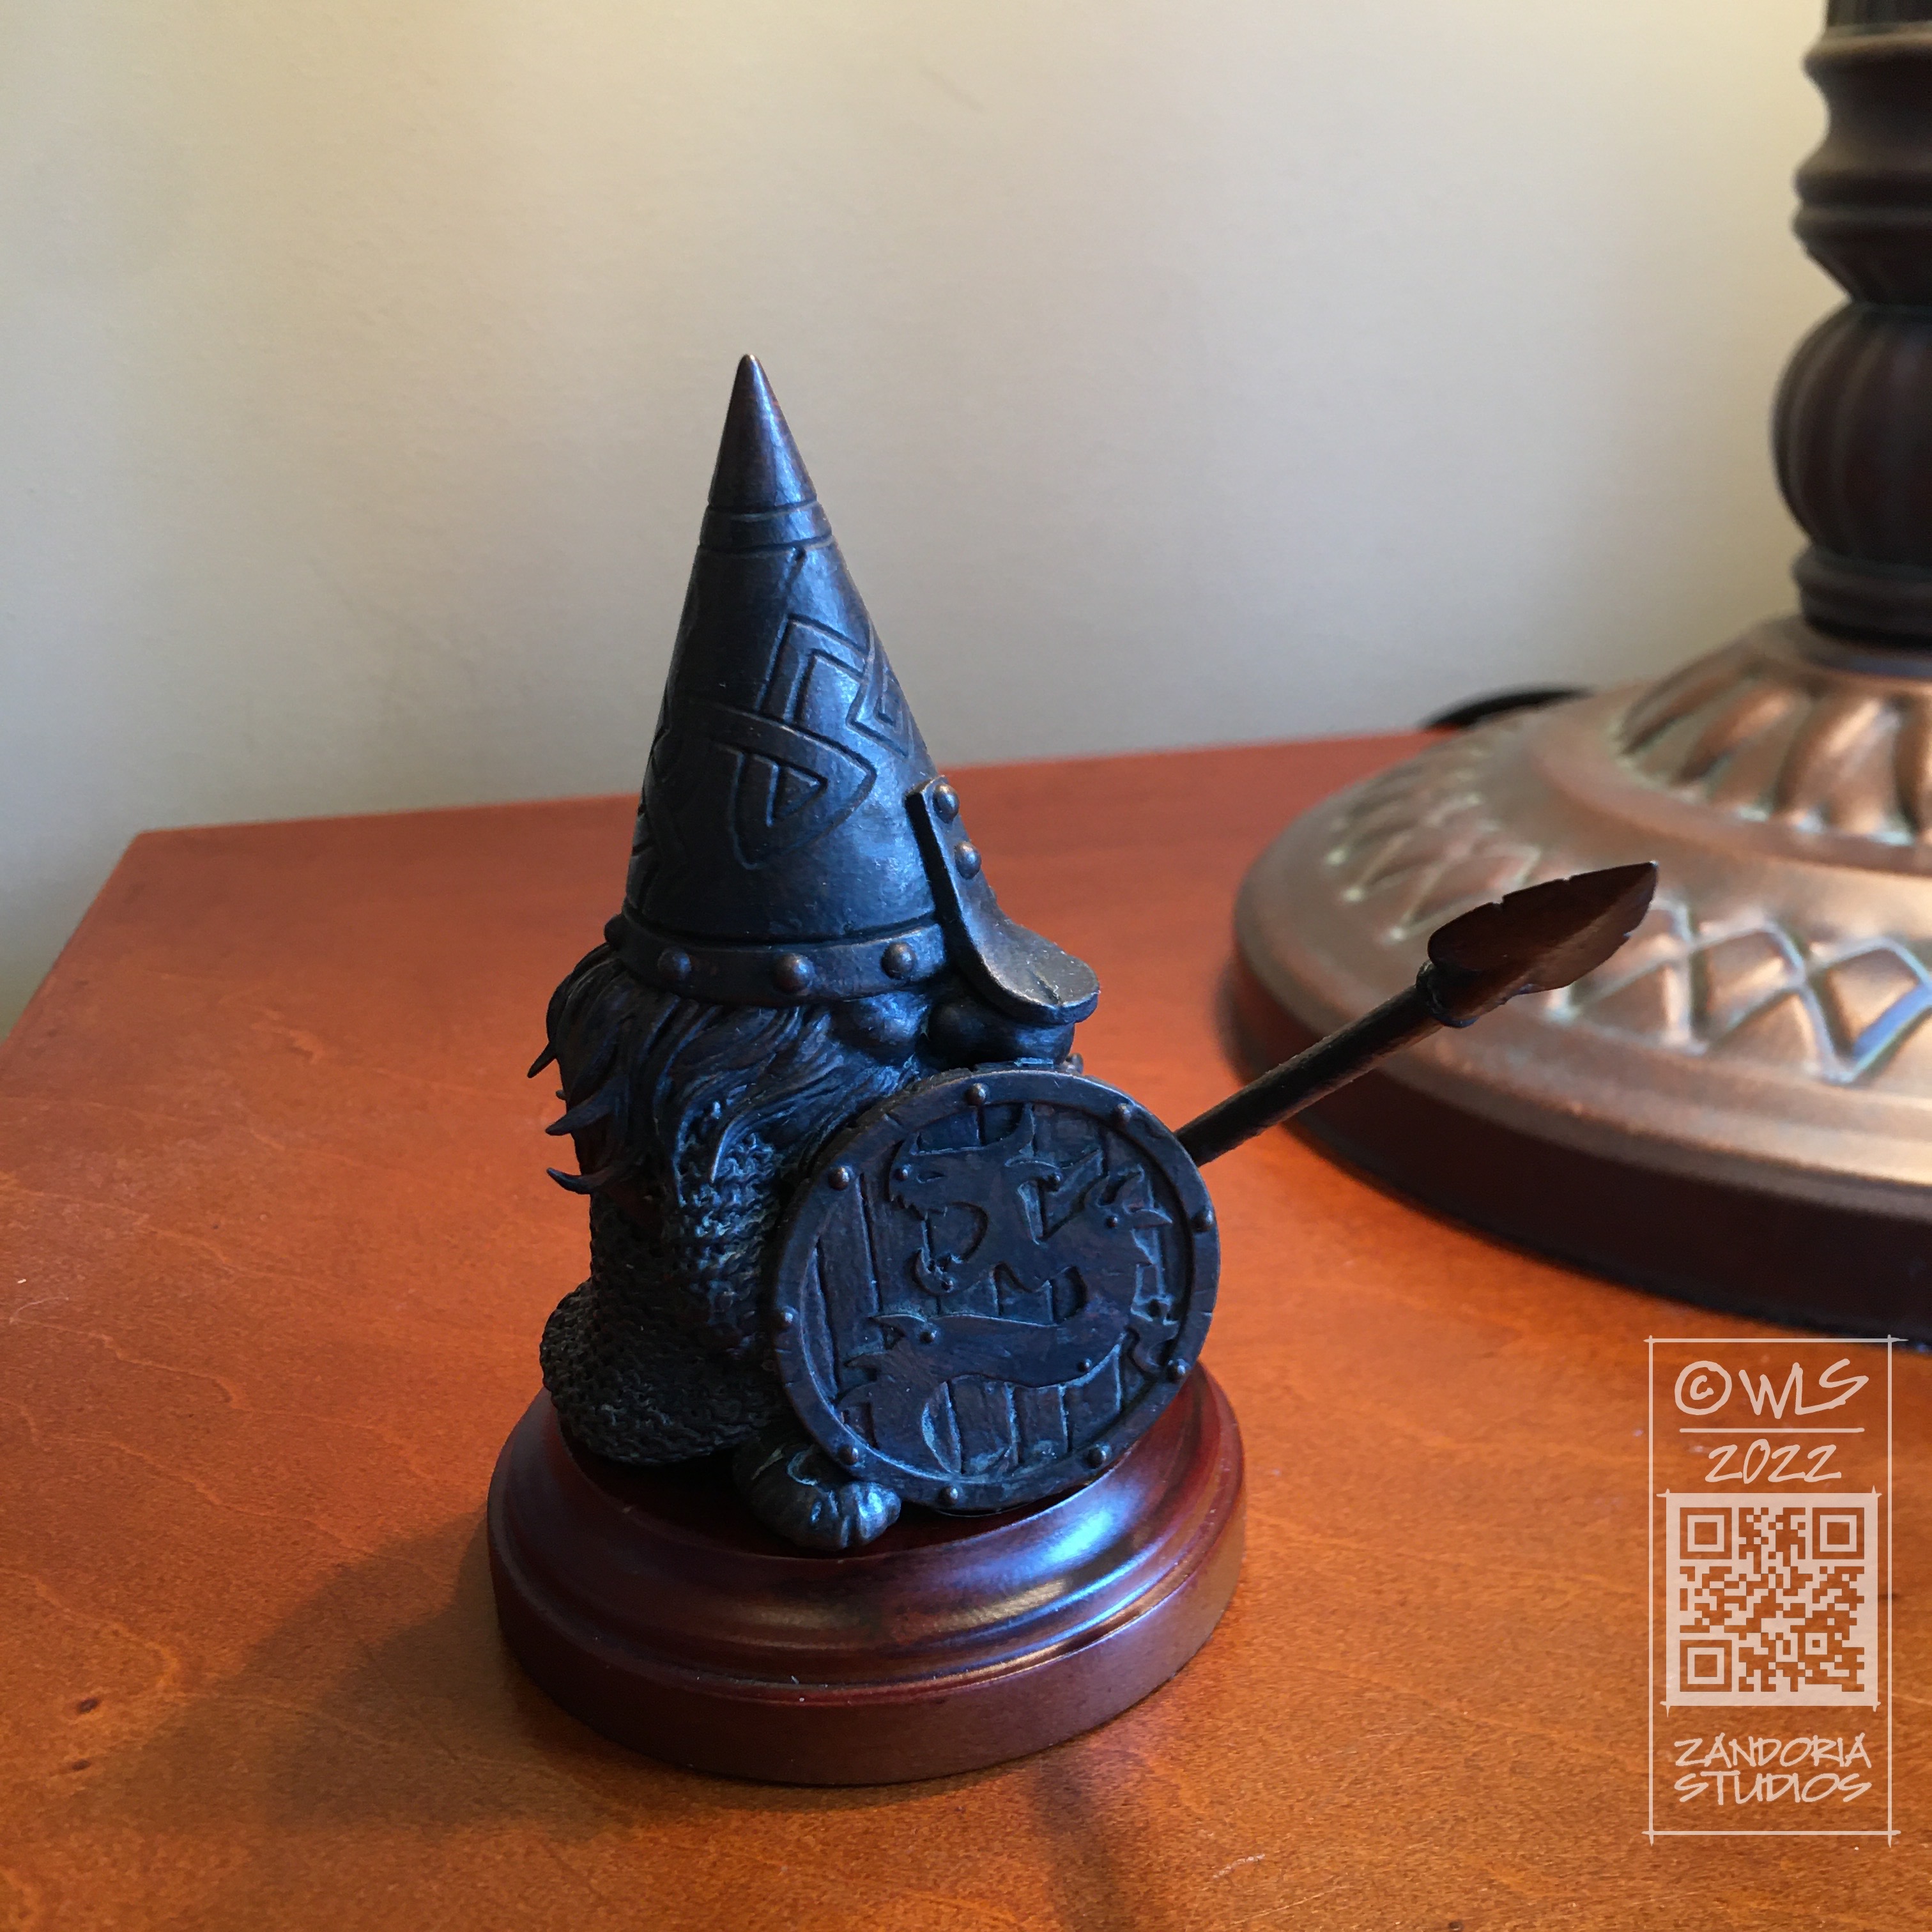
These are some gnomess miniatures that I made, which you would not be embarrassed to give your daughter for her D&D character. There is no shortage of female character minis out there, but many of them have a “pinup” aesthetic… I’m not against that, but I wanted to make my figures attractive rather than sexy.
The Gnomess Cleric was my first girl gnome,created to go with my other Guardin’ Gnomes.
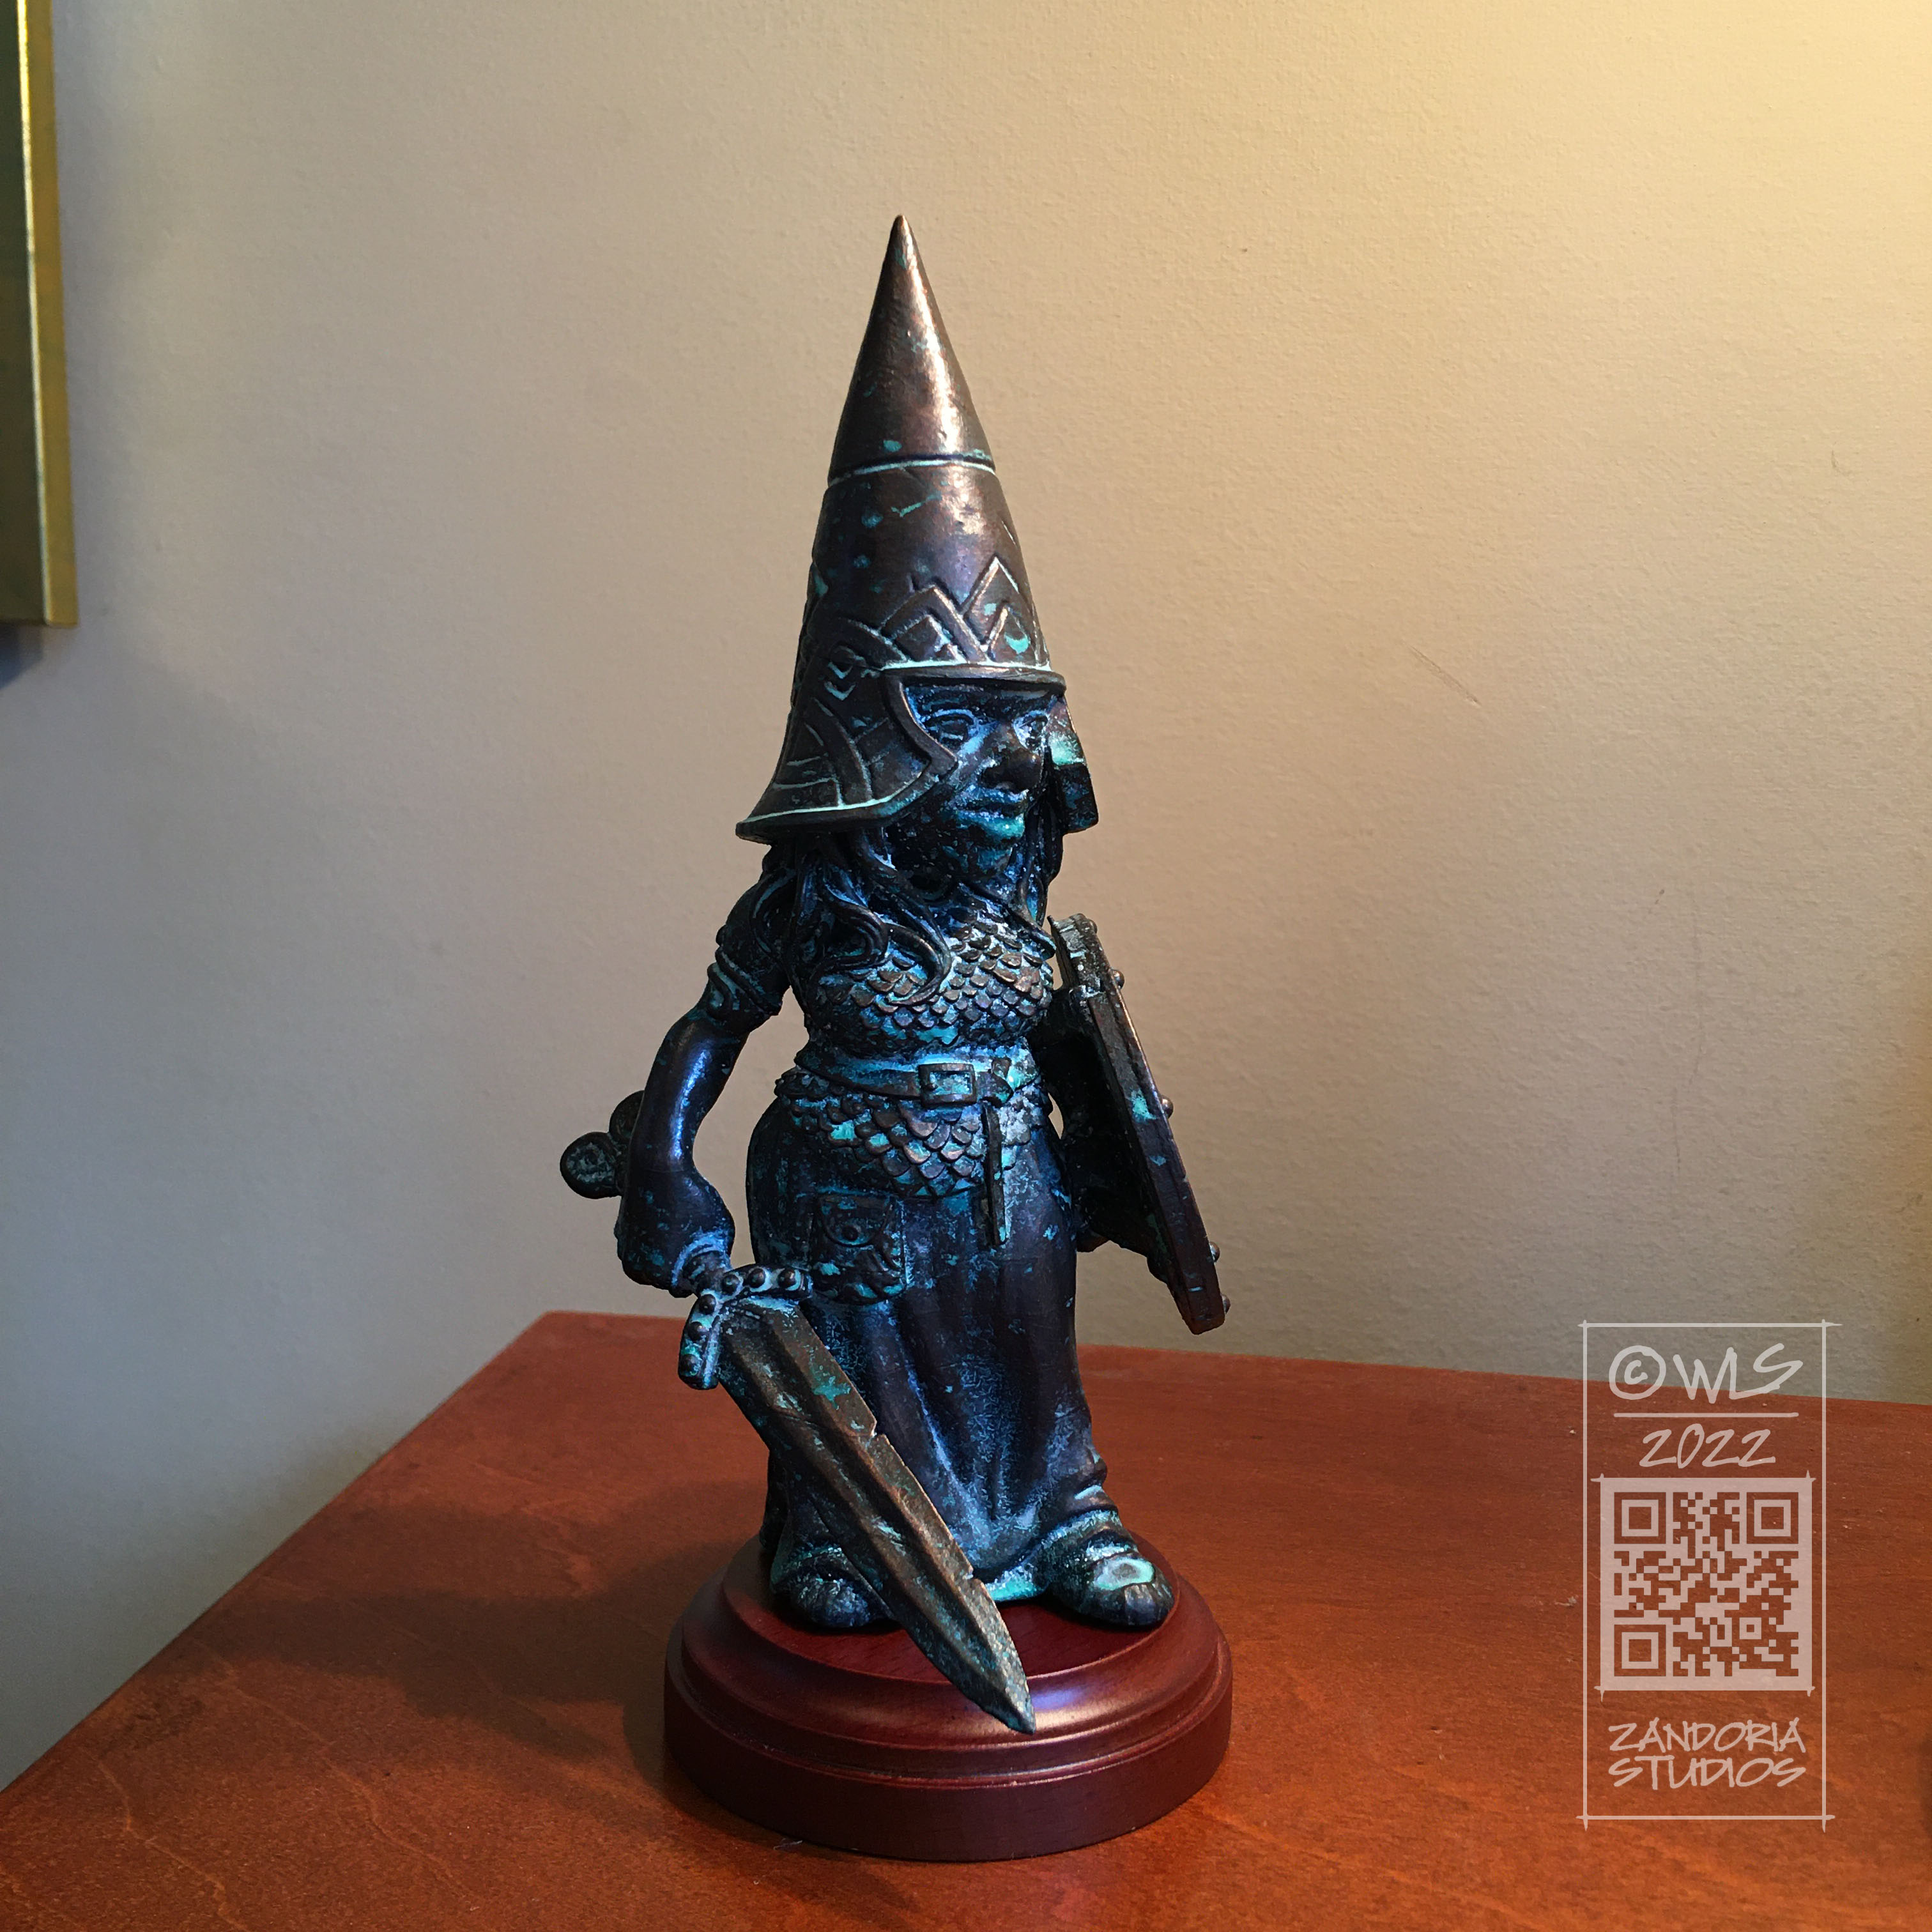
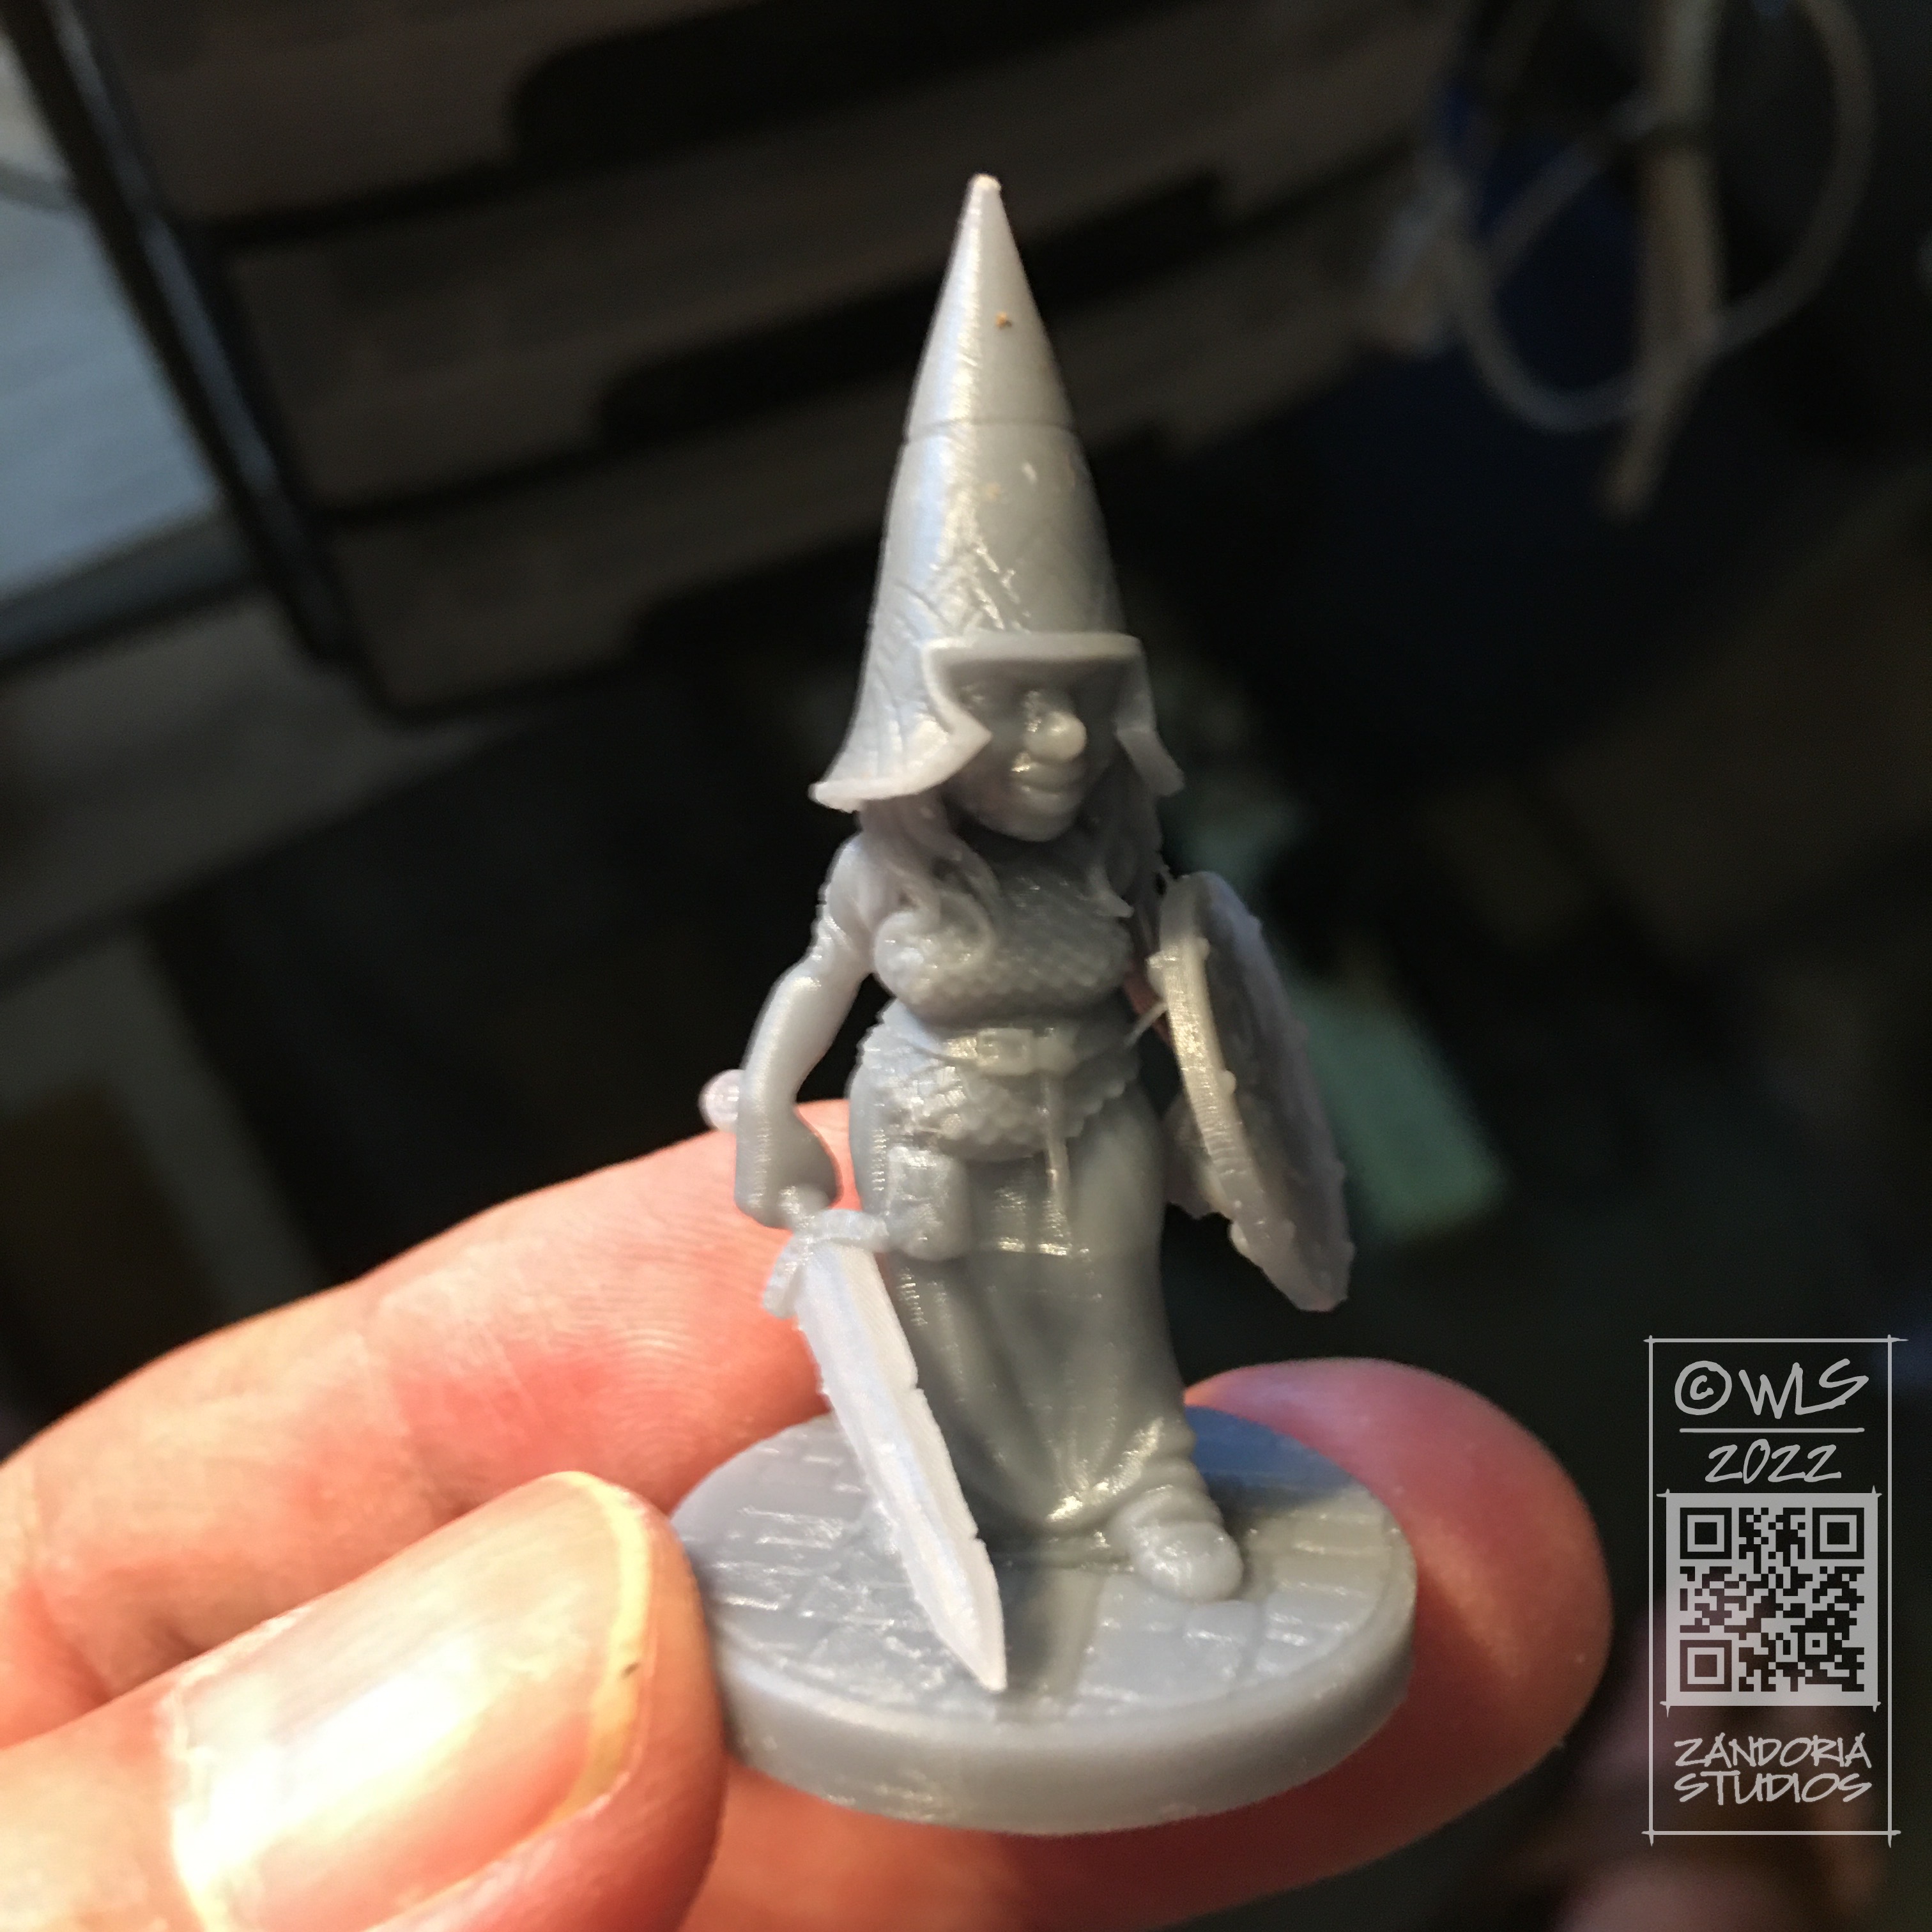
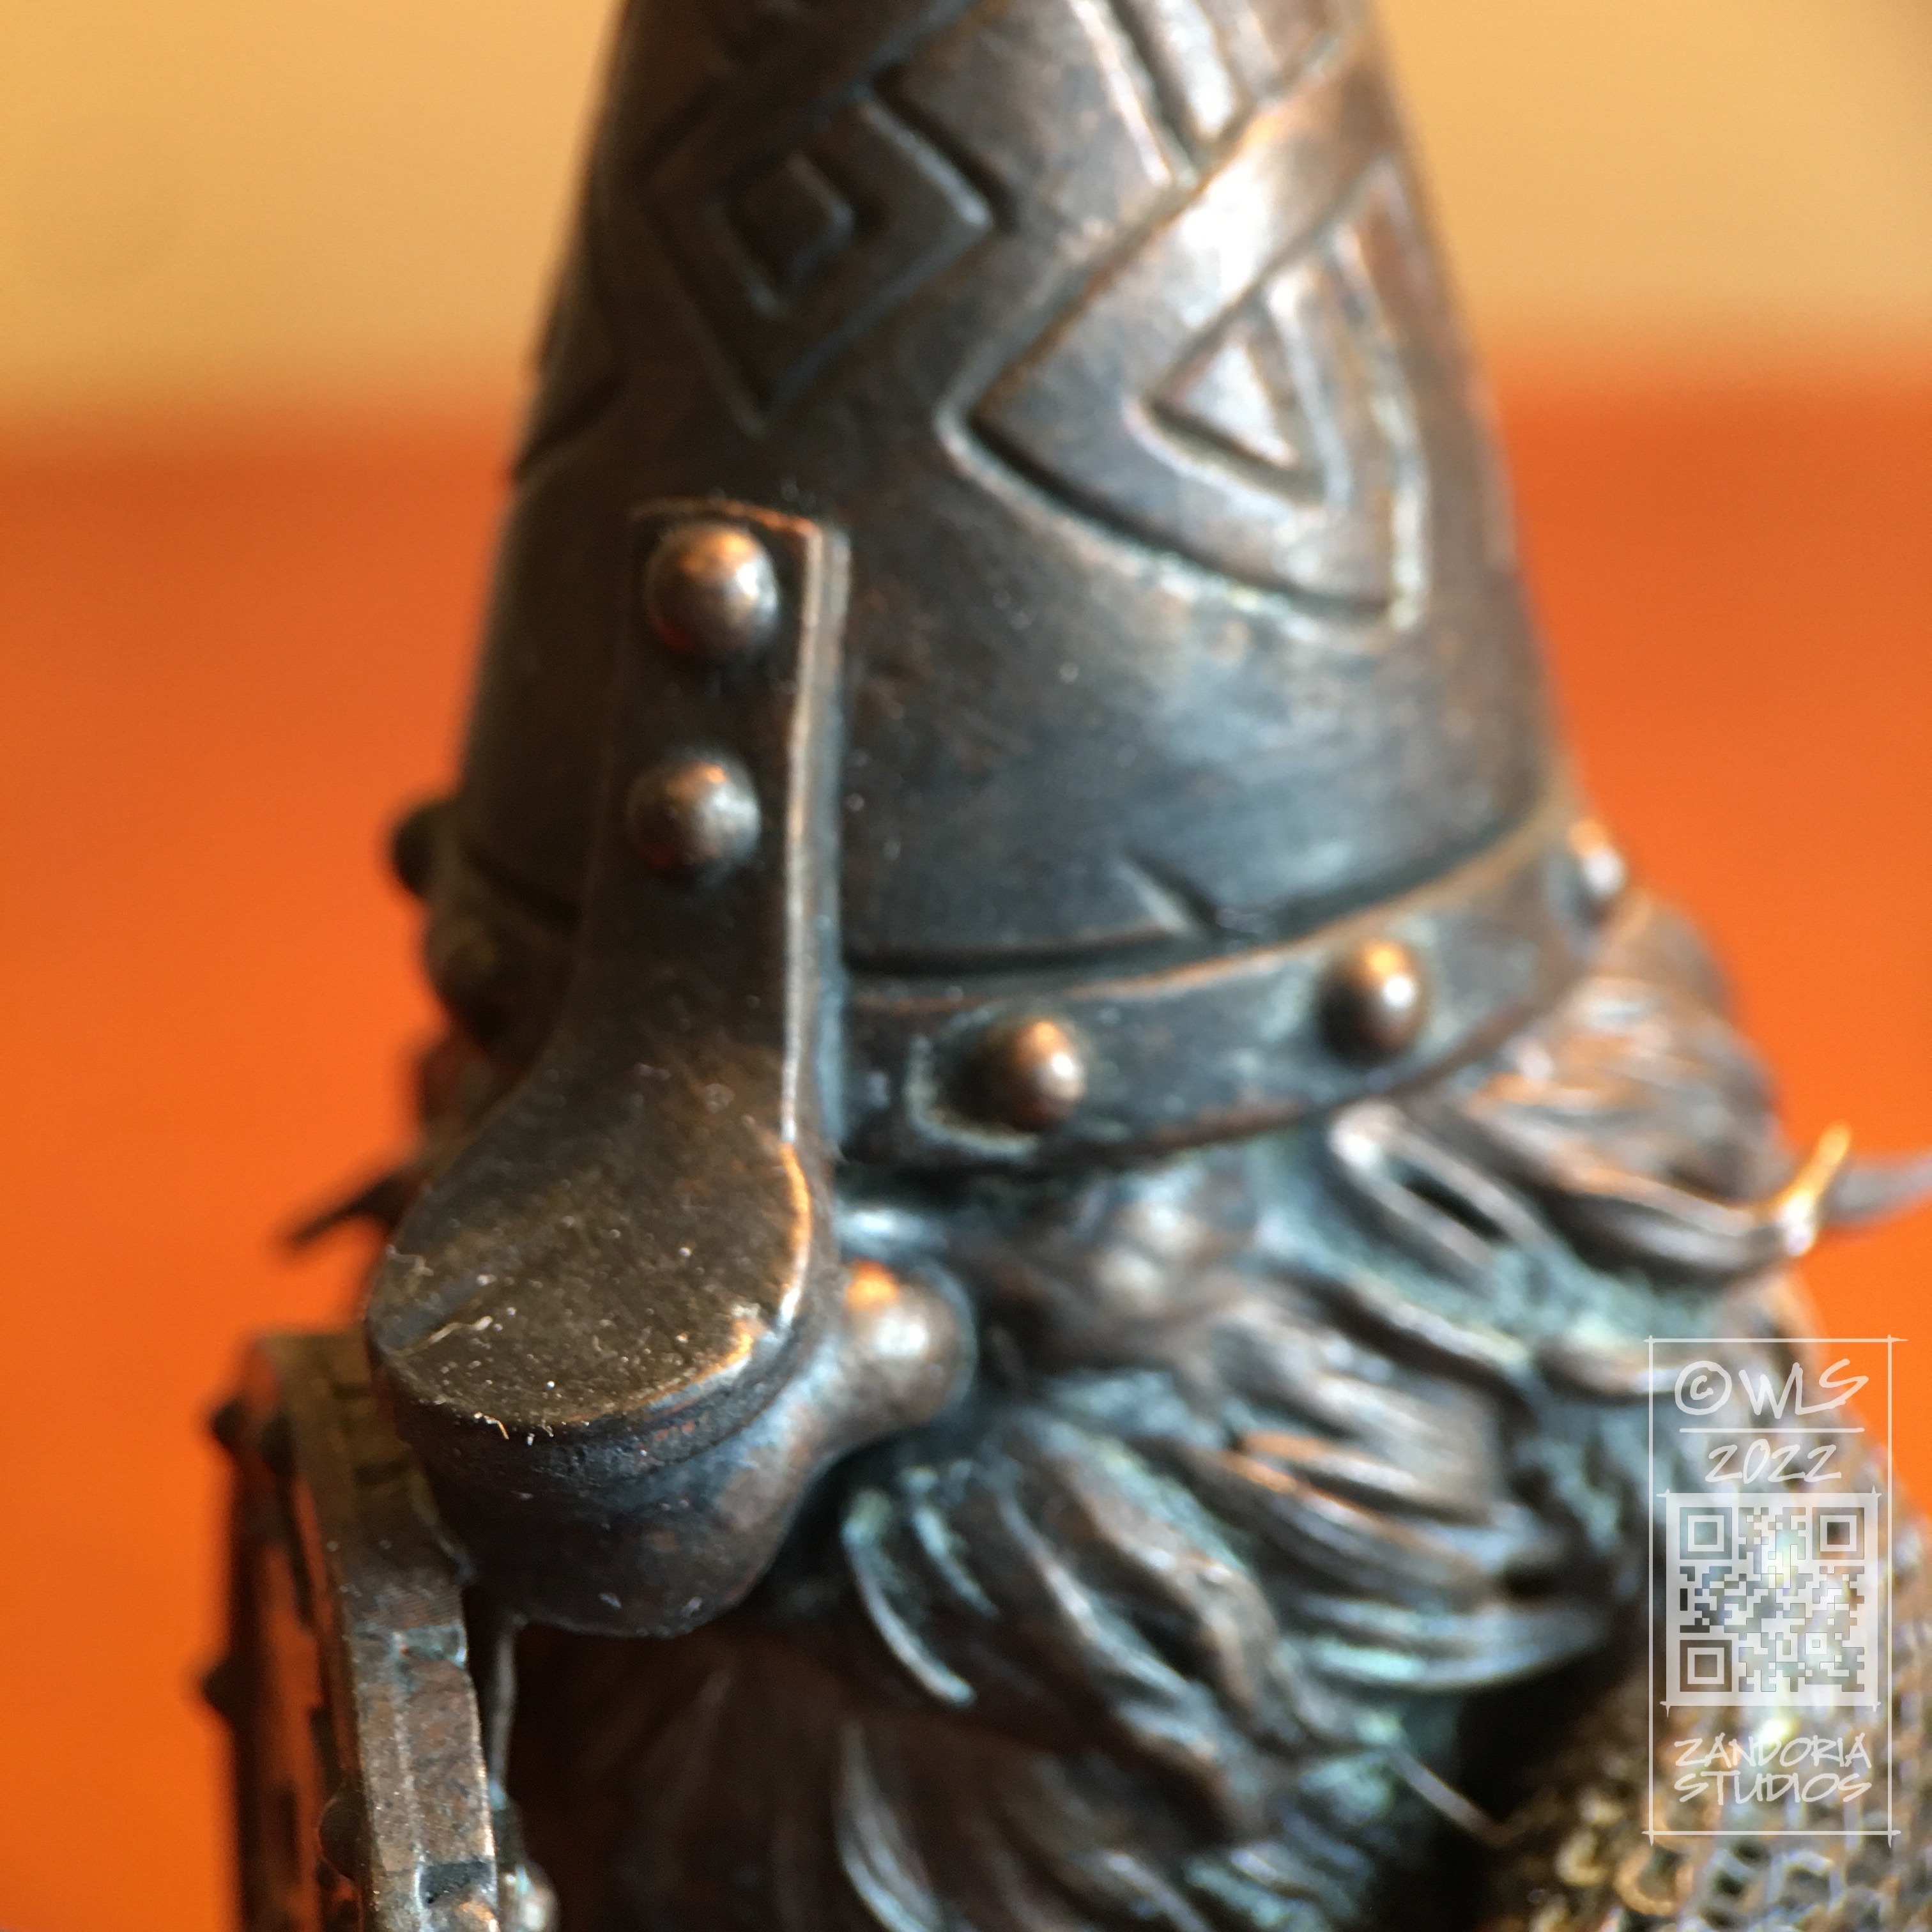
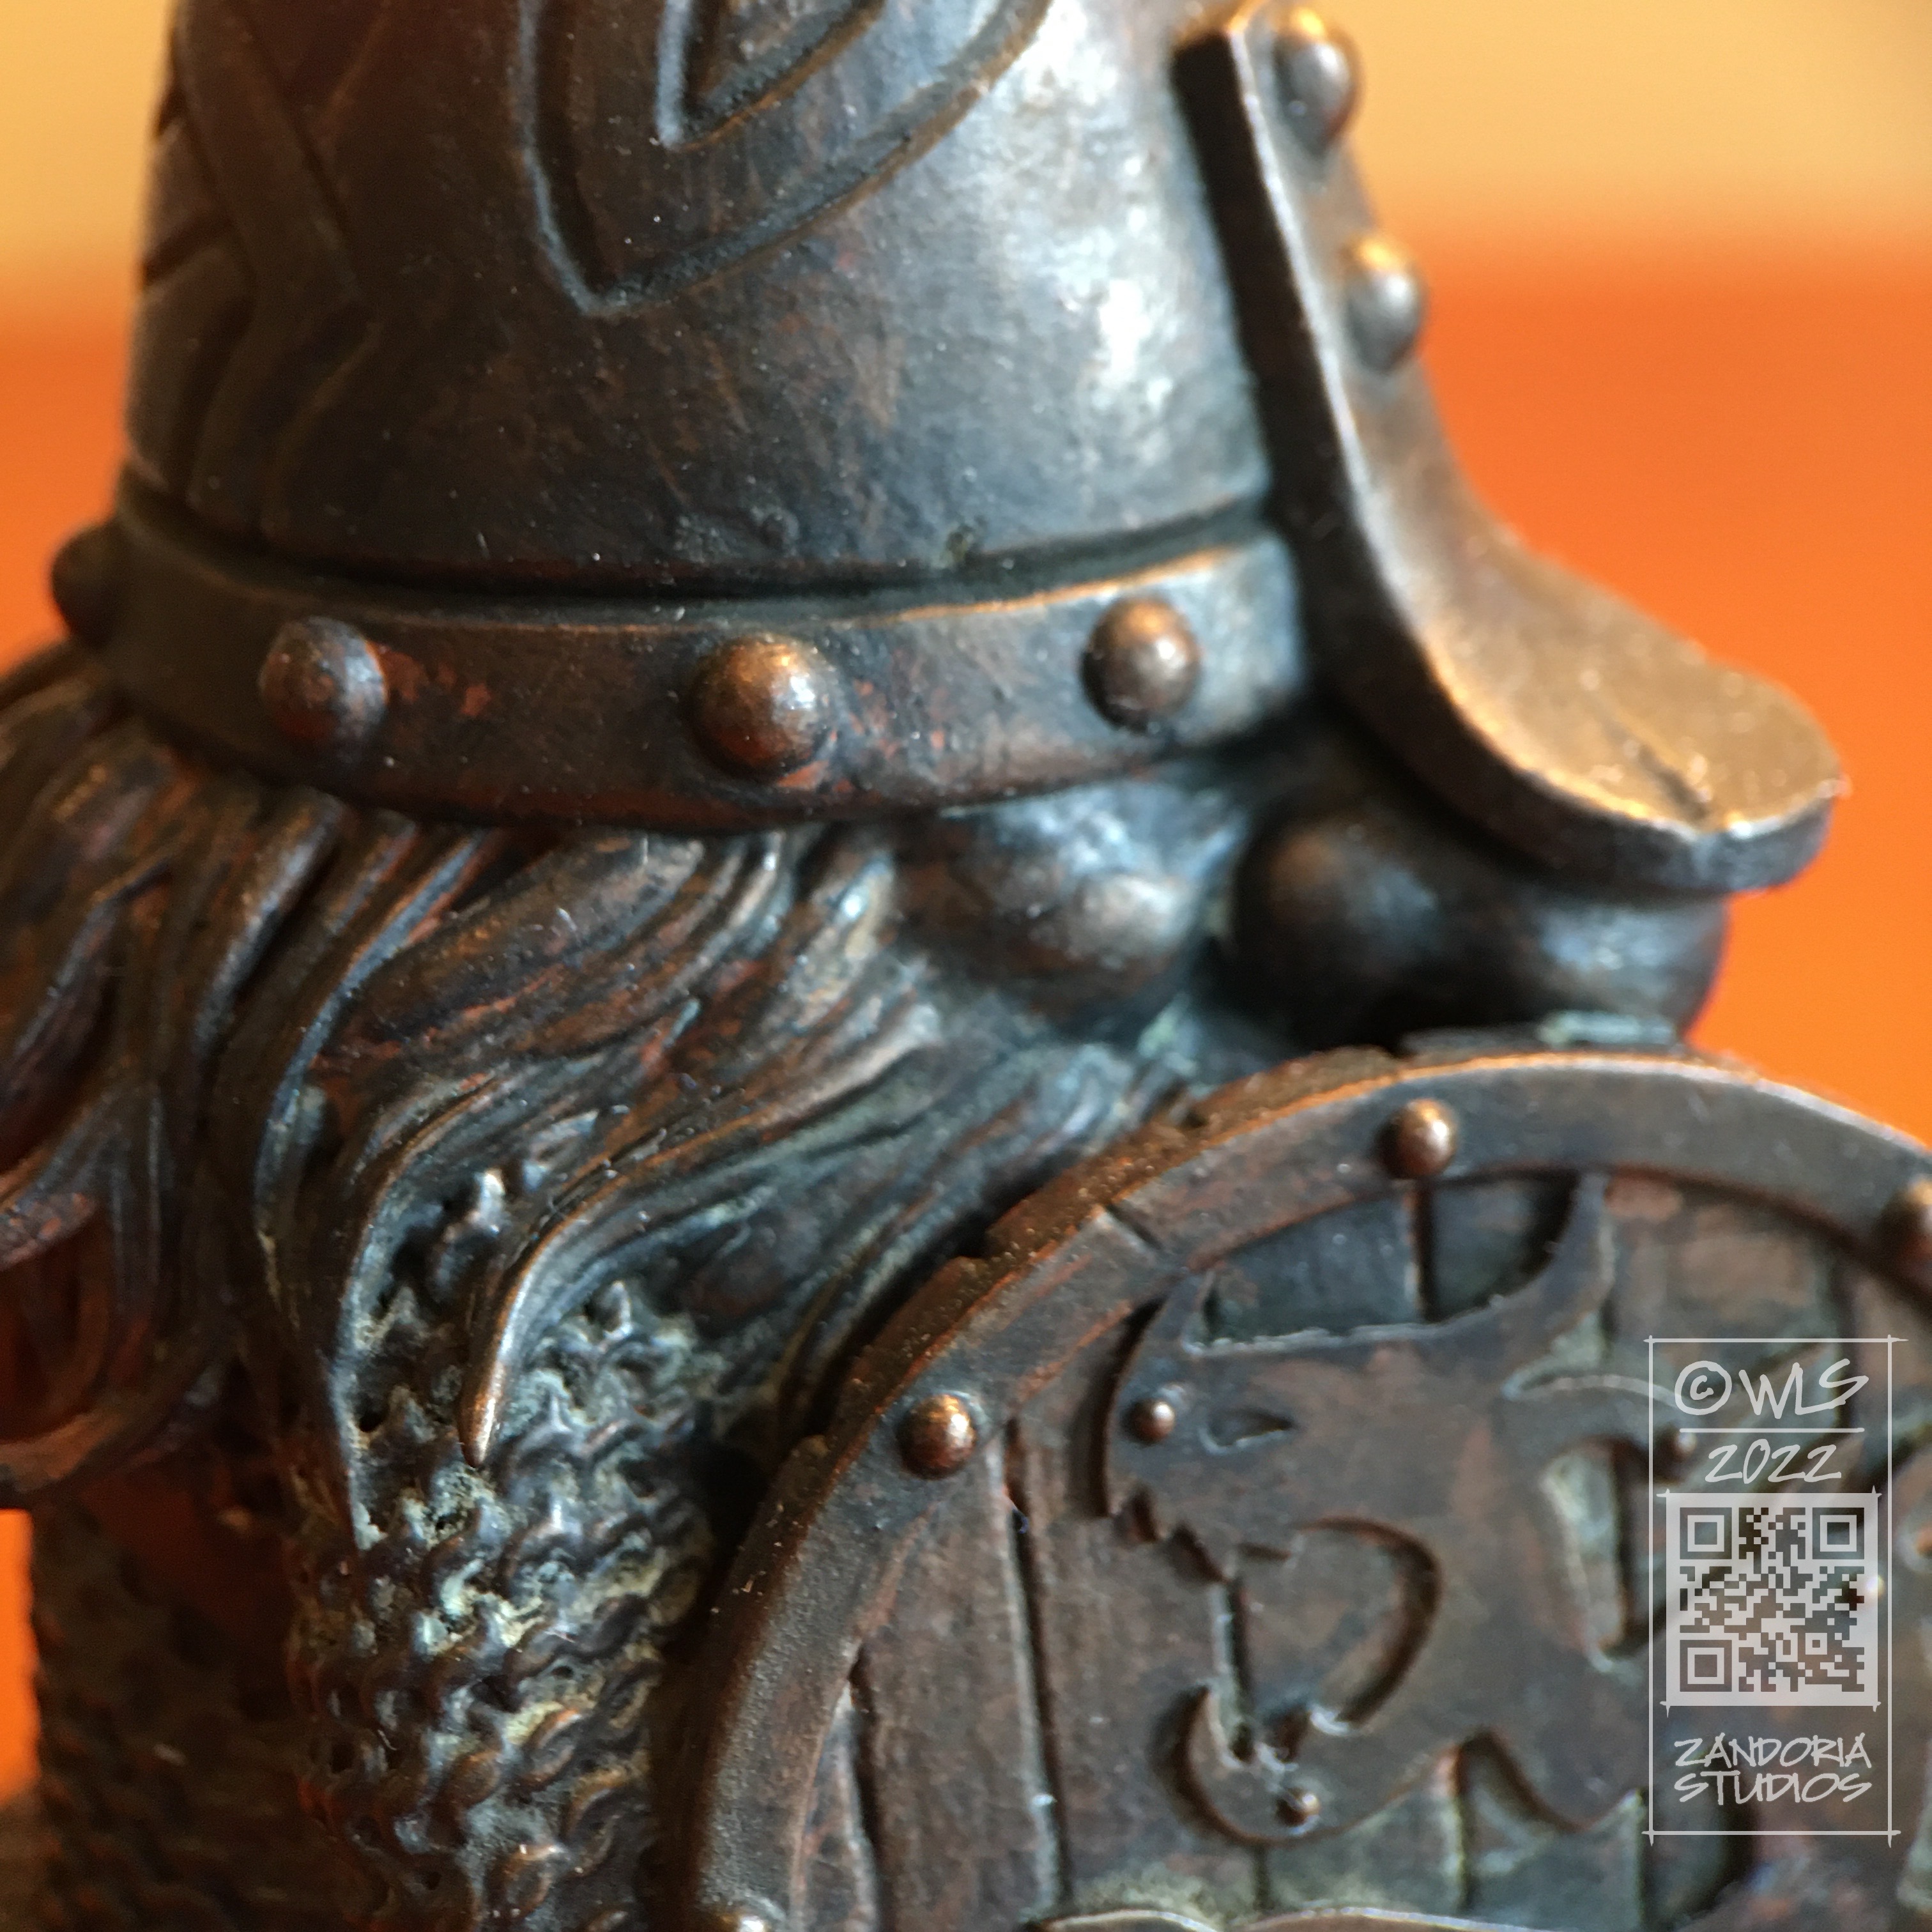
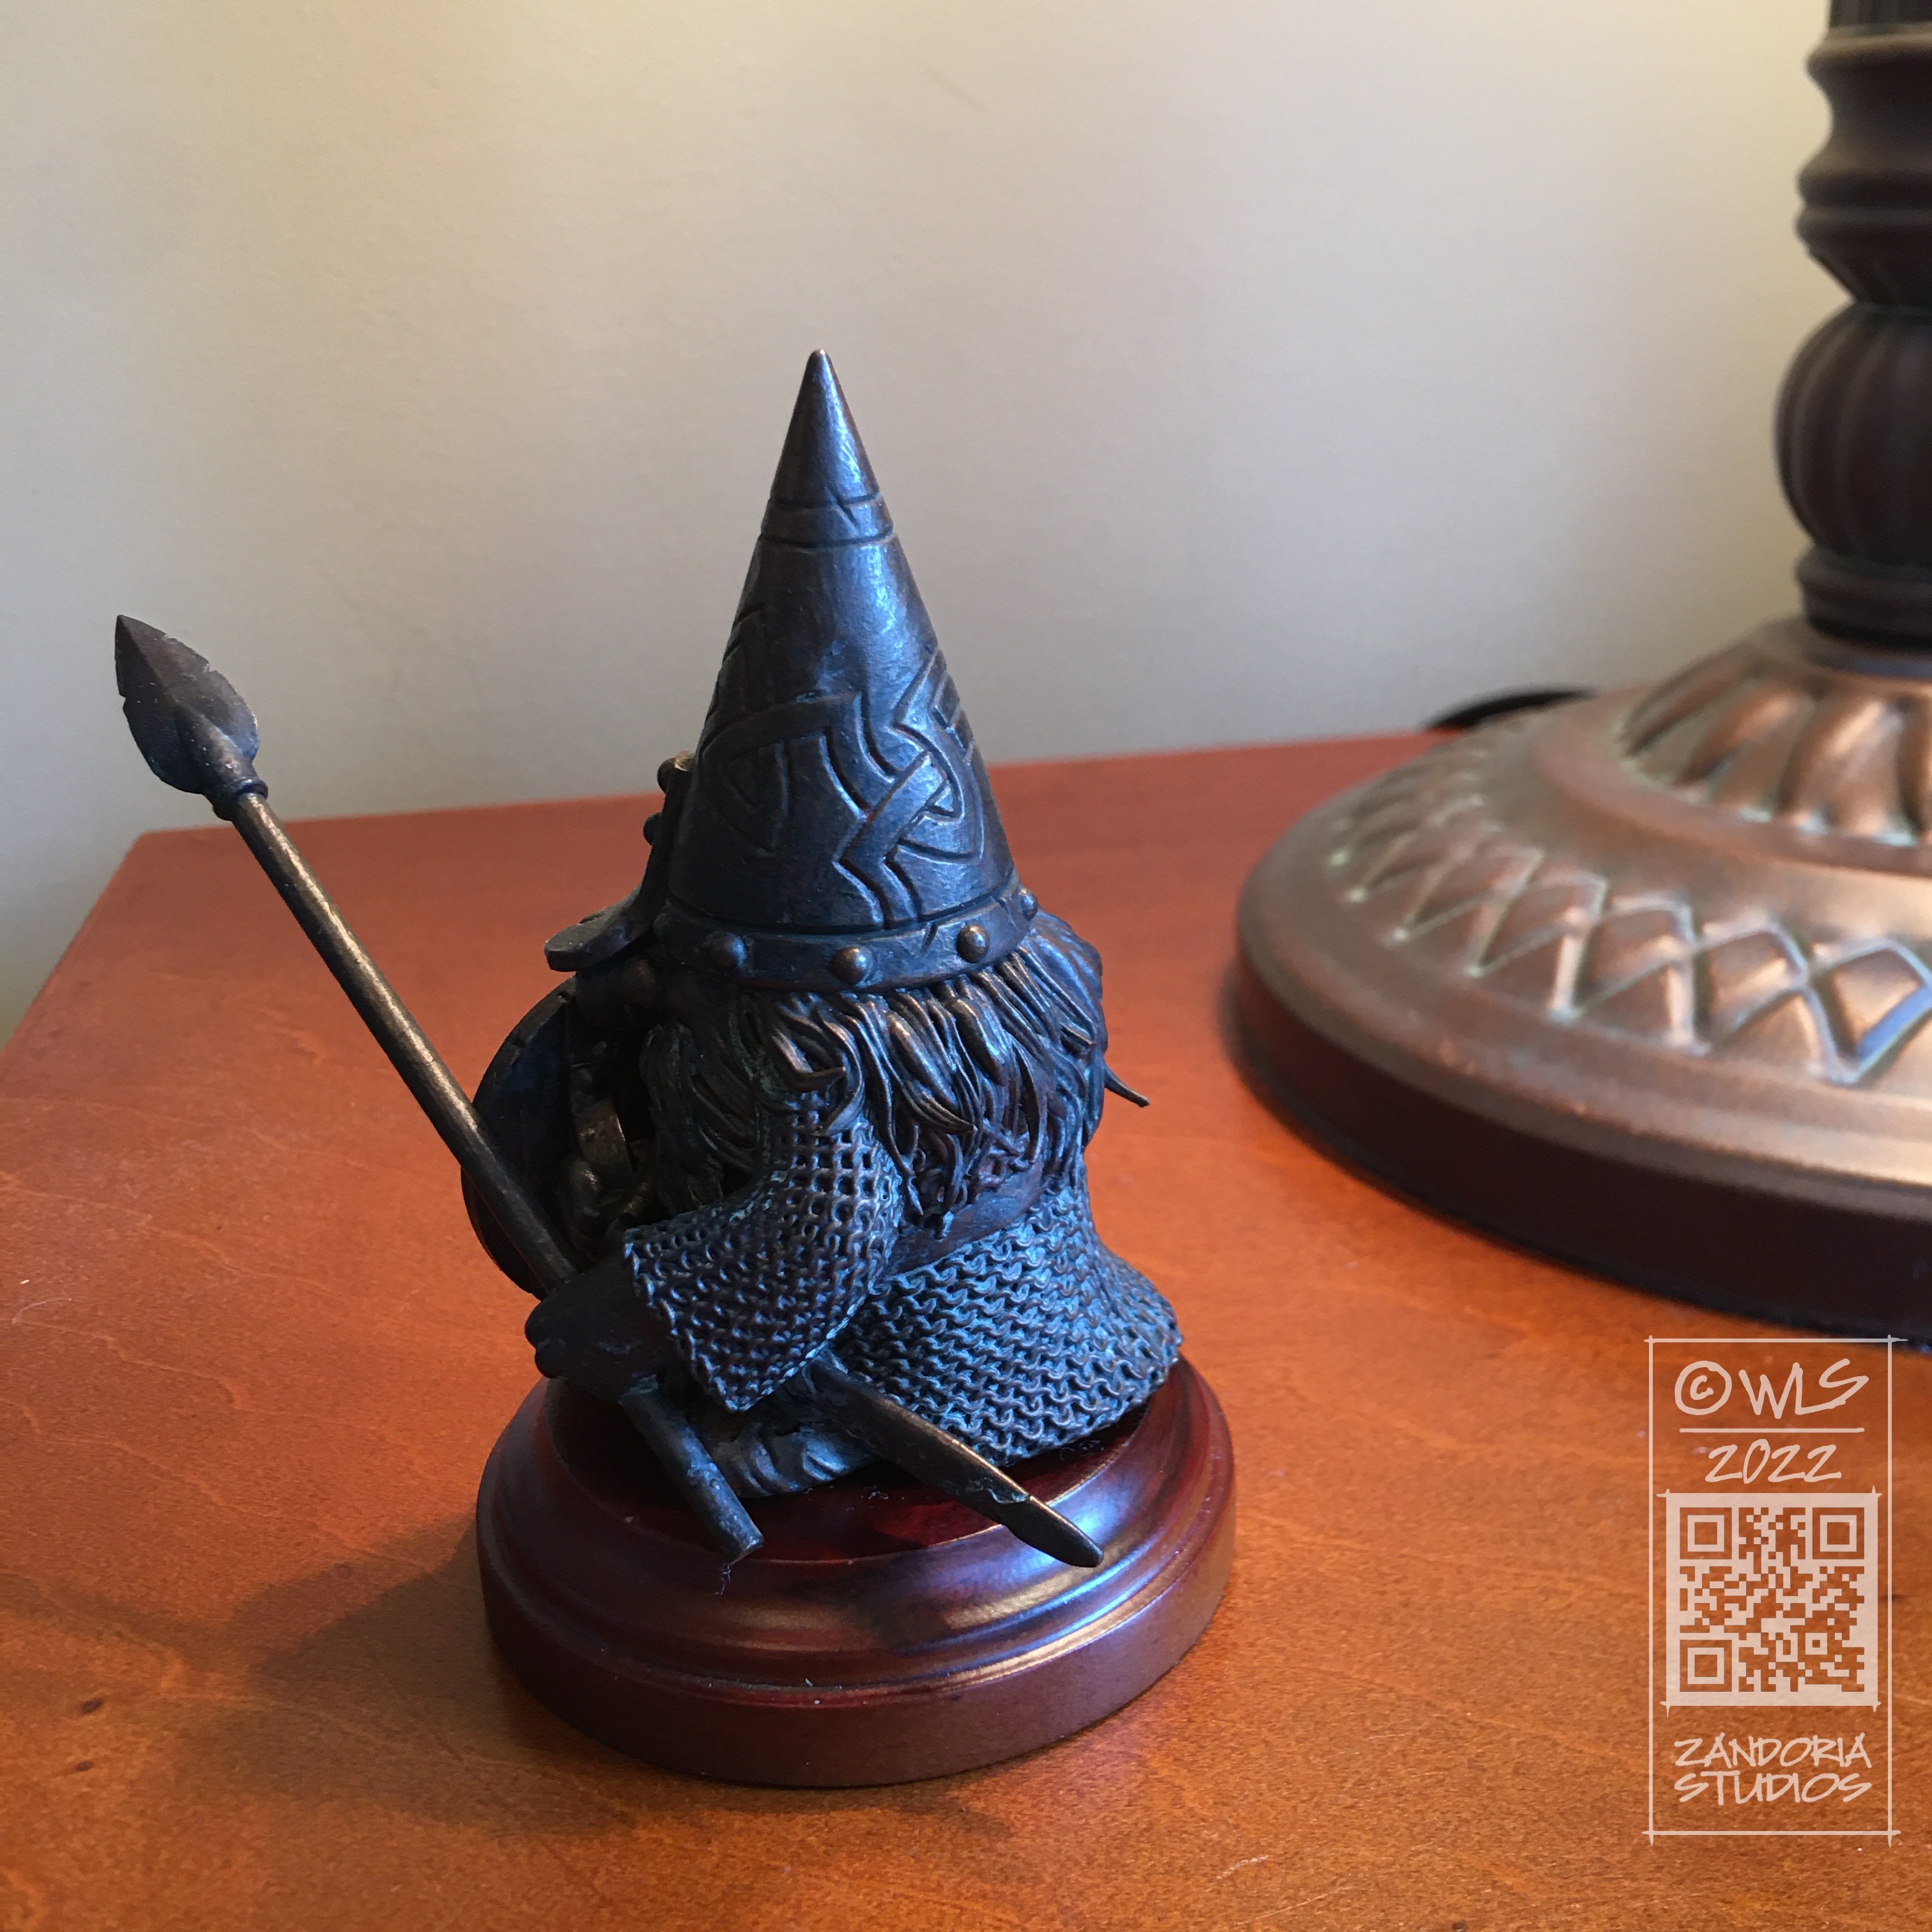
This Gnomess Warrior has scalemail armor, helm and shield. She also has a Scarlet Johannson smile!
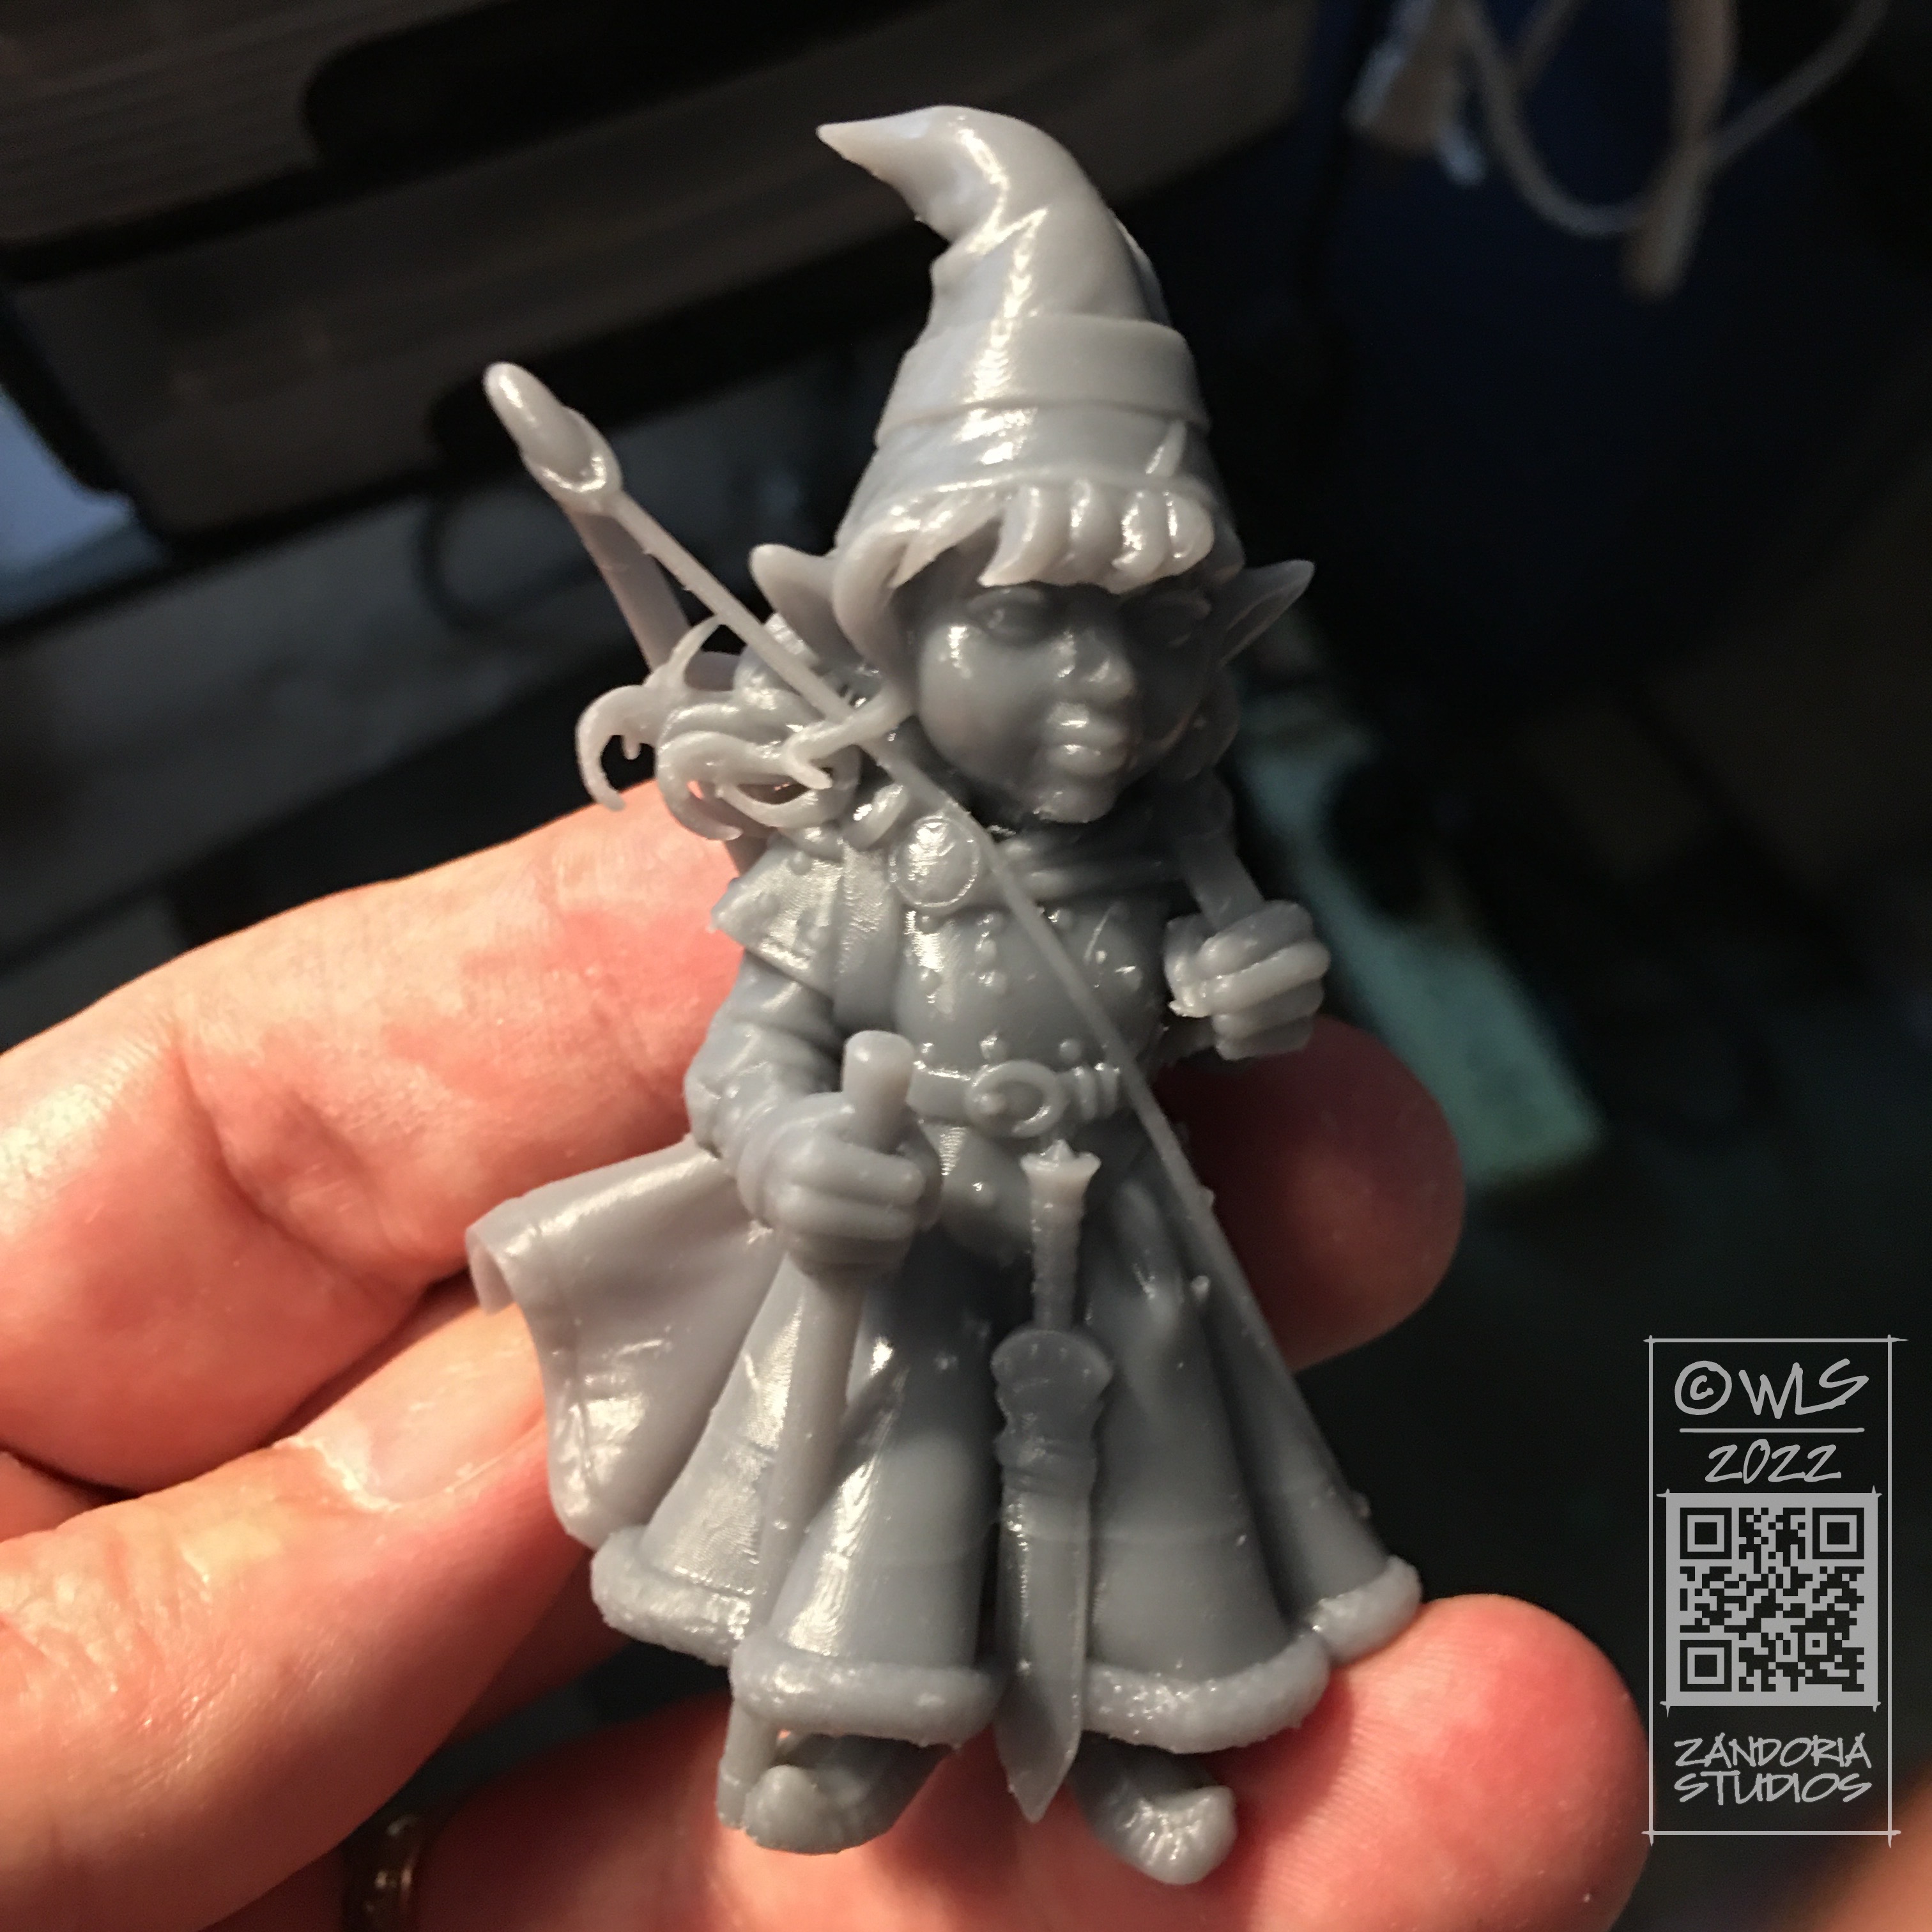
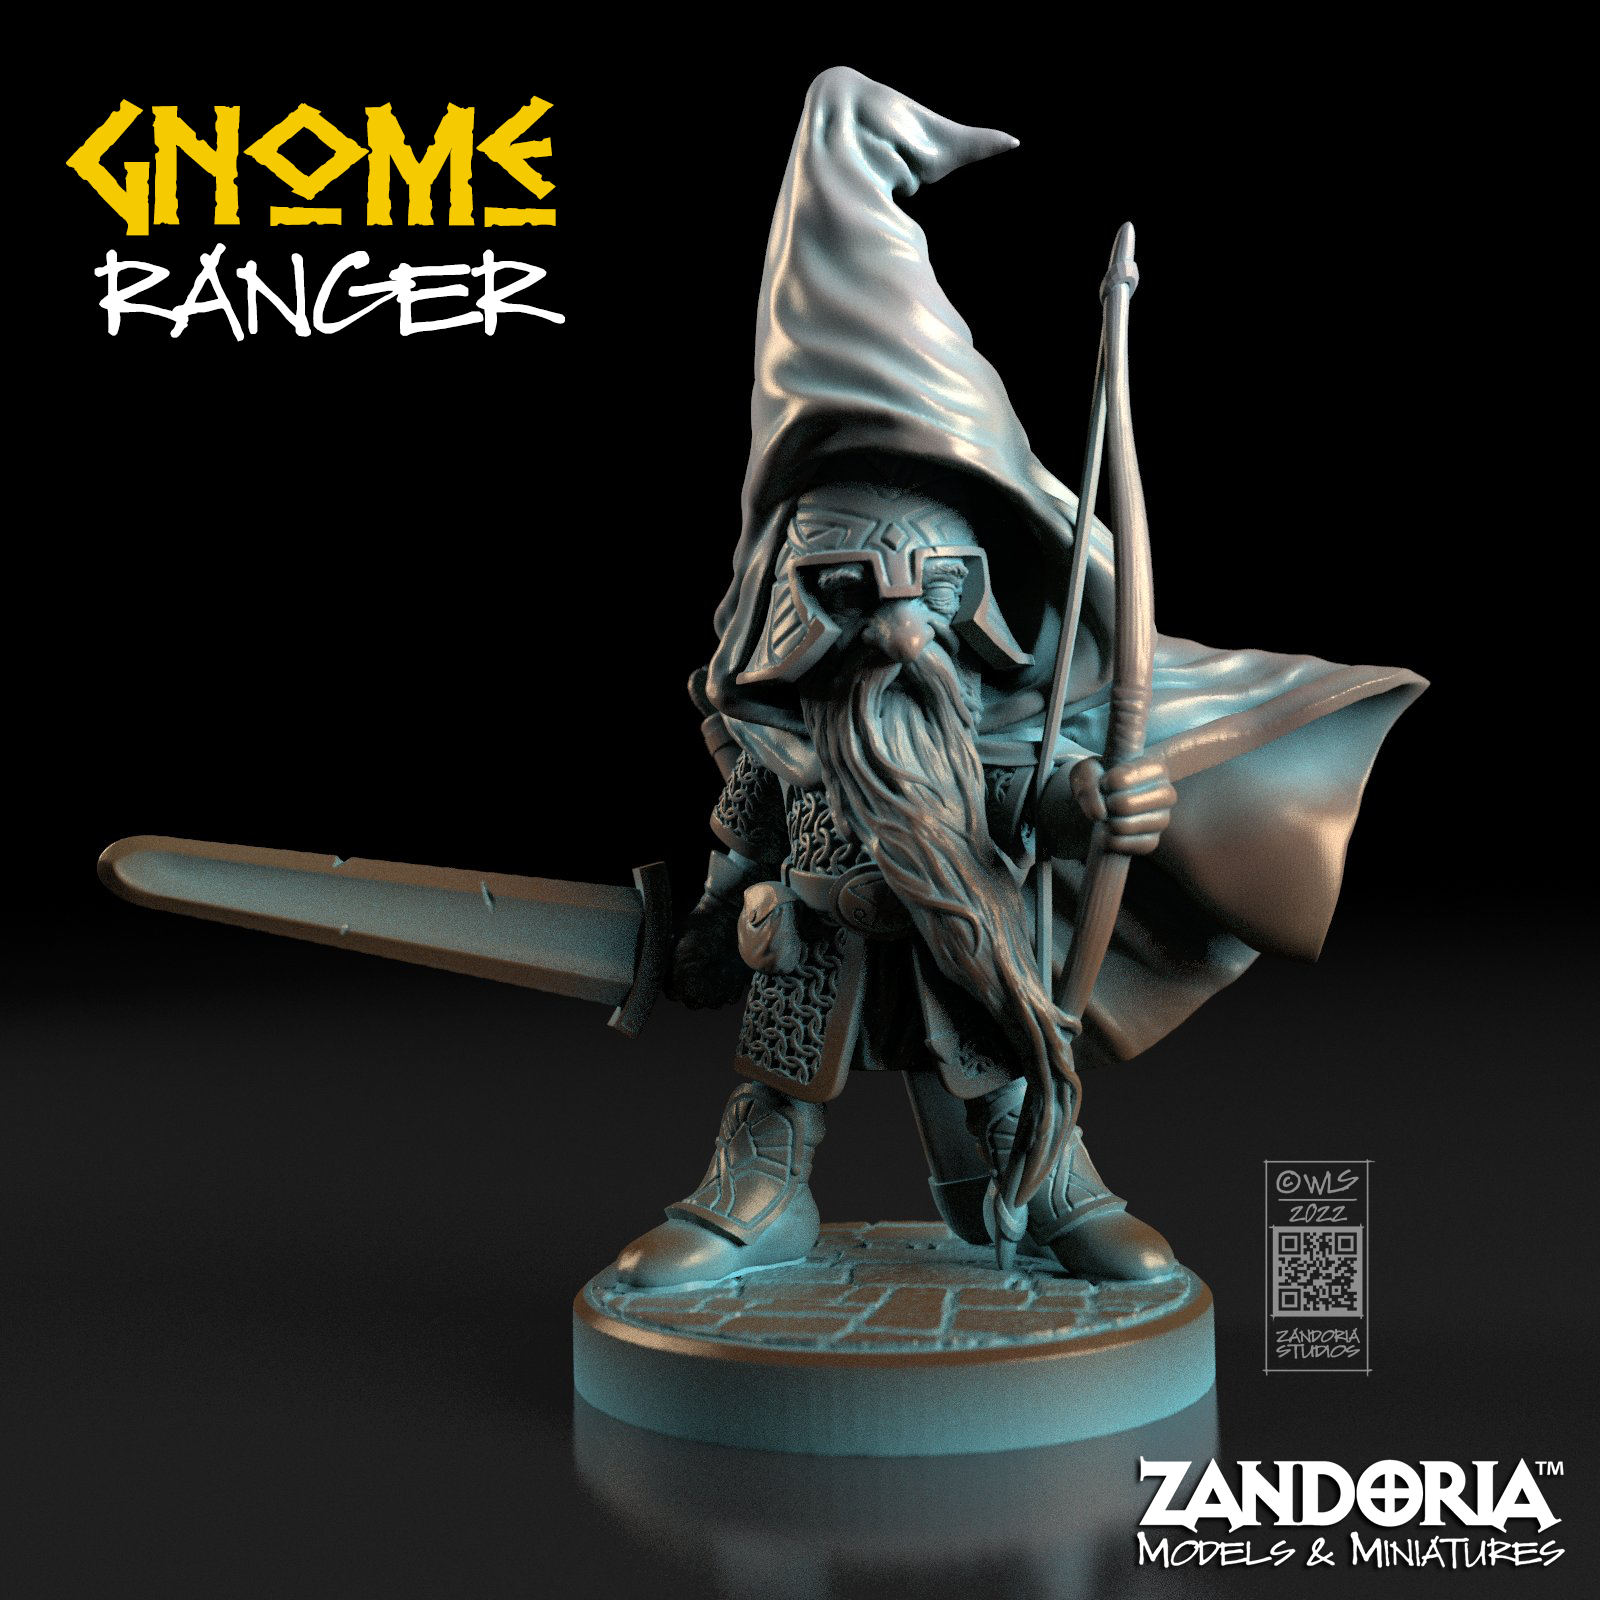
The Gnomess Ranger has studded leather armor, short sword and bow. She is super cute–but I may think so because she looks like my granddaughter!
All of these girl gnomes are available on my Etsy shop. Scales are 28mm D&D, 32mm Heroic, 54mm, 75mm, and 100mm.
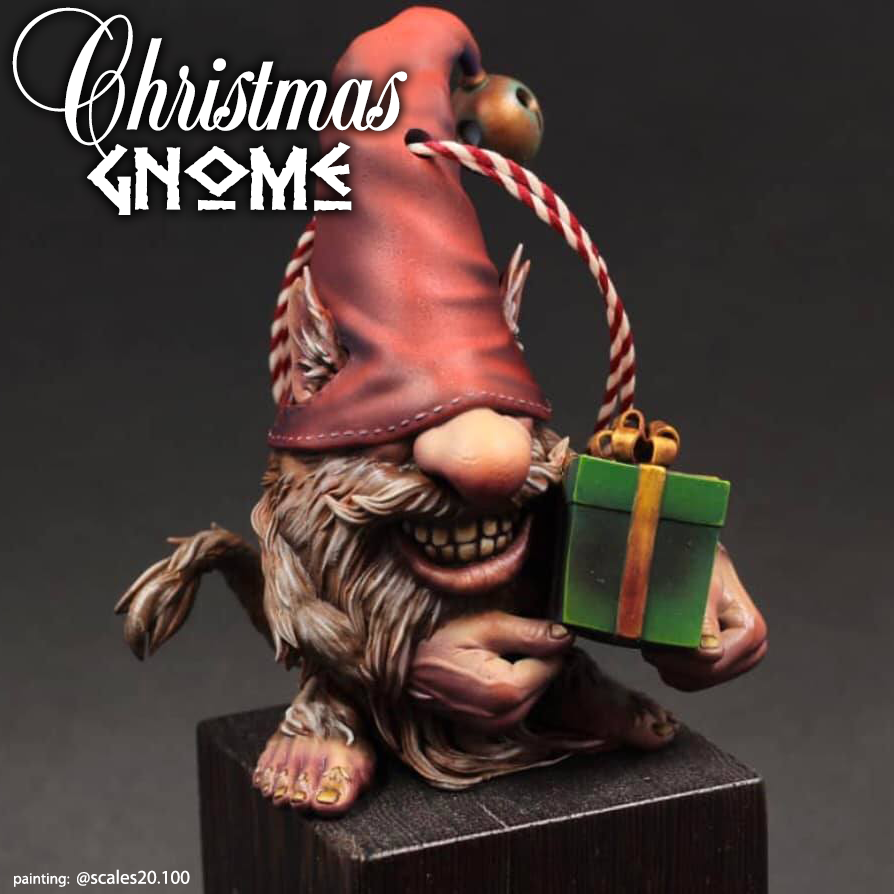
I made these Christmas gnomes last year. This is an example 3Dprinted by Mad Max Miniatures,and Painted by Vincent T. (@scales20.100 on Instagram). I have these Figurines and Ornaments now available on my Etsy shop! You don’t have to learn about 3Dprinting or have access to one, because I take care of that for you!
If you do have a 3Dprinter, you can get the STL files on Cults3D and make gifts for all your friends and family.
These gnomes are available as 4″ figurines or 3″ ornaments. They are solid resin and unpainted. You can paint them with inexpensive acrylic craft paints. This might be a fun holiday project or activity for the family!
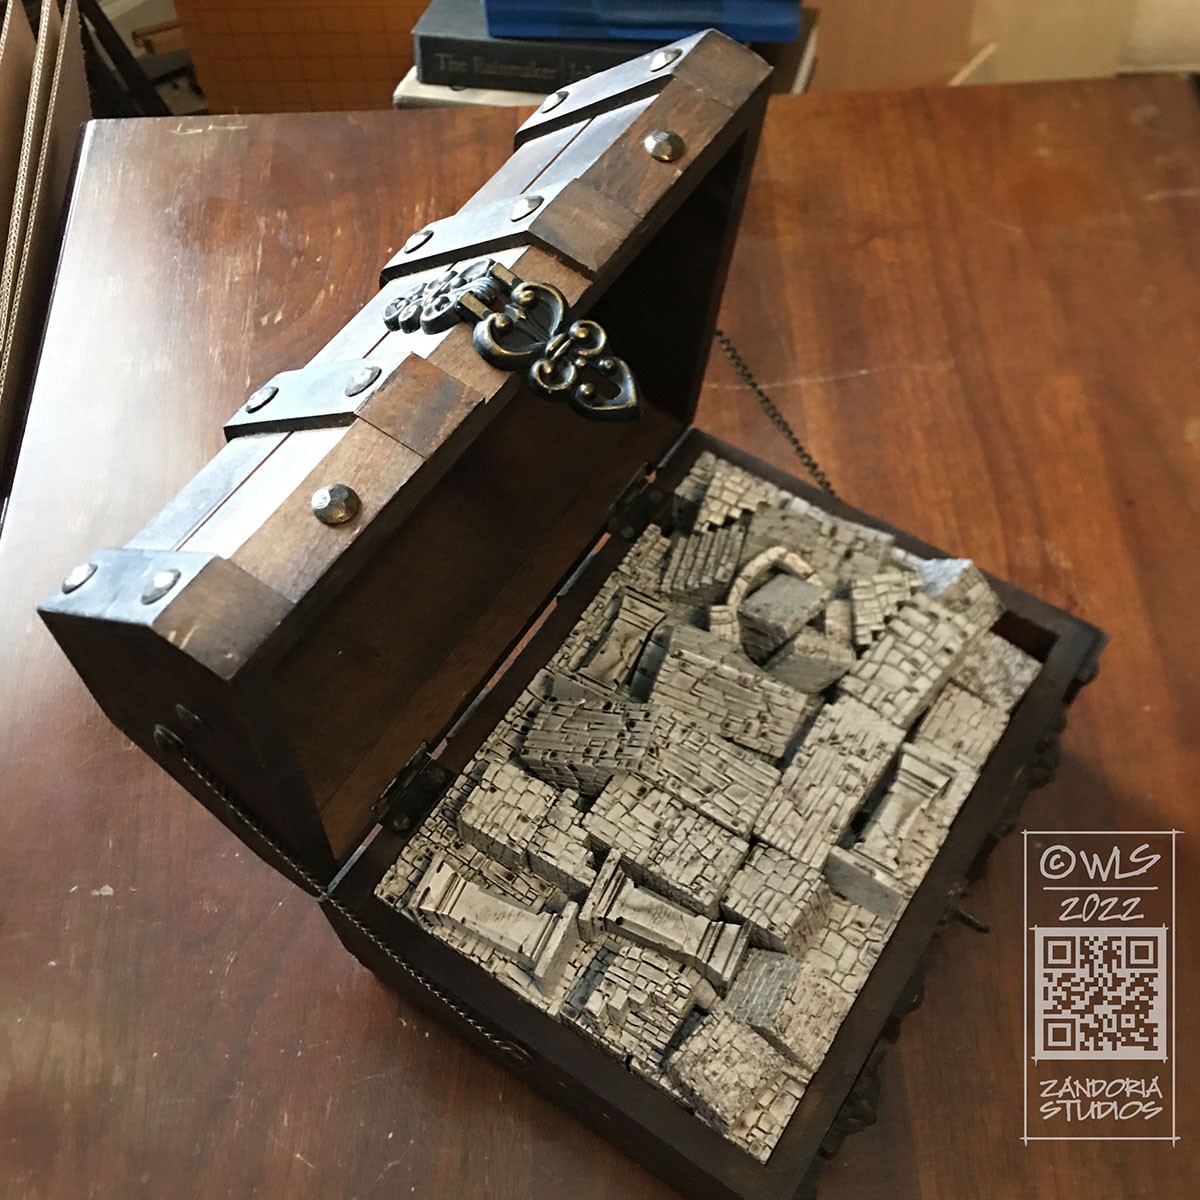
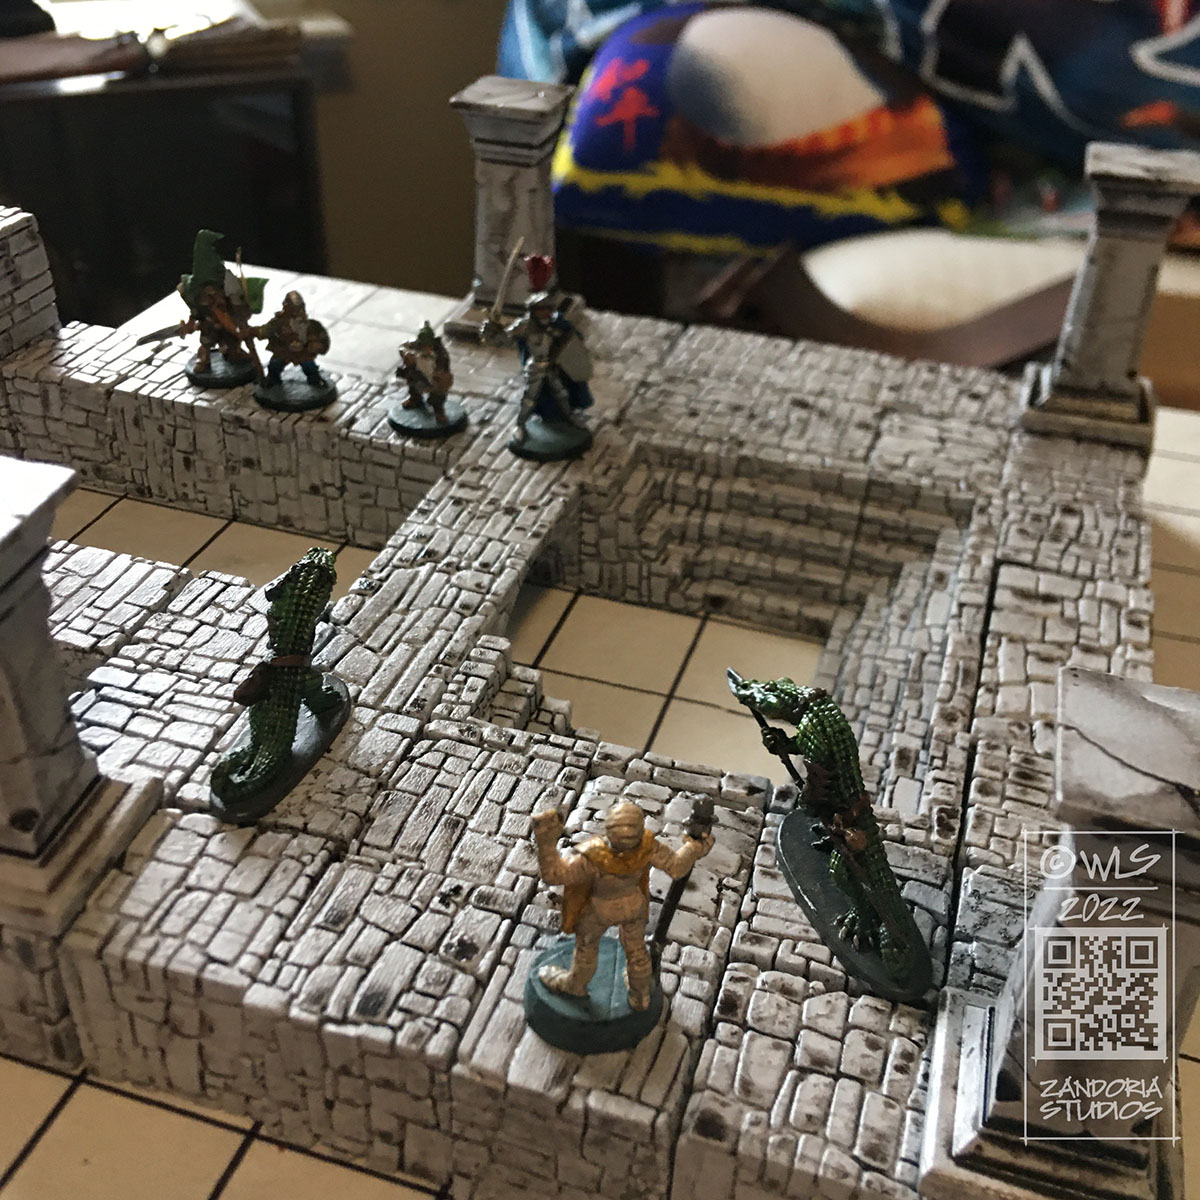
They stack just like children’s blocks, and are hours of fun! You can even play D&D!
The idea for this is pretty simple. Building blocks for tabletop terrain, with stone textures on all sides. Since most Dungeon Masters don’t build elaborate terrain for their games, I wanted to create something better than just marking out the terrain with a dry erase marker, but not as complicated or expensive as buying Dwarven Forge tiles. The DMs that I know either use only theater-of-the-mind or will use minis only for a tactical combat.
dungeon blocks
Another question that I’ve heard from people interested in using terrain is,”how do you store it?” Huge sets of interlocking tiles can be bulky and difficult to transport–I wanted to make a Dungeon in a box. You can fit all of your Dungeon Blocks in a small box (or treasure chest) that is easy to bring to the game!
There are only 10 basic pieces. All 3Dprintable, so that you can make as many as you want. They are all based on a 1″ grid, so they are perfect for Dungeons & Dragons or any other tabletop RPG.
The “Stair Jack” is a small platform for miniatures, which fits the tread pattern of the steps. It will let you place a mini anywhere on the stairs.
The Stair Jack is a platform for miniatures to place anywhere on the stairs!
When I started using 3Dprinting, I saw it as a potential market for selling files that users could print themselves. Over the last couple of years, I have watched the field explode with artists thinking the same thing–all jumping in with their latest Kickstarter or Patreon, seeing this technology as a “gold rush”. There are now thousands of Patreons offering 3dprintable miniatures now!
There are so many STL files being released each month, that you could never print them all (much less paint them…). Many patrons just collect the files, with a fear of missing out driving them. Artist’s are joining this churn trying to offer more and more files/month at lower and lower prices. Most of the files make it onto Telegram or other pirate sites, which drives the value of the STL files even lower. It is a frustrating rush to the bottom…
But what about using the 3Dprinter as the means of production? Not selling a merchant license for other people to sell their prints of your work, but producing your own miniatures and figurines?
There are a number of advantages to this. When you are doing the printing, you remain in control of the quality of your work. Your intellectual property can not be shared or pirated, if you are only selling physical items. 3Dprinting allows for details as fine as a human hair, and geometries that would be impossible for recasters to duplicate.
Another advantage is that there are a LOT more customers who might like your art, than there are hobbyists using 3dprinters themselves.
example of real bronze patina on 3dprinted resin
Using a 3Dprinter to reproduce your work is more efficient than mold-making and casting, and will allow you to offer multiple sizes of the same sculpture.
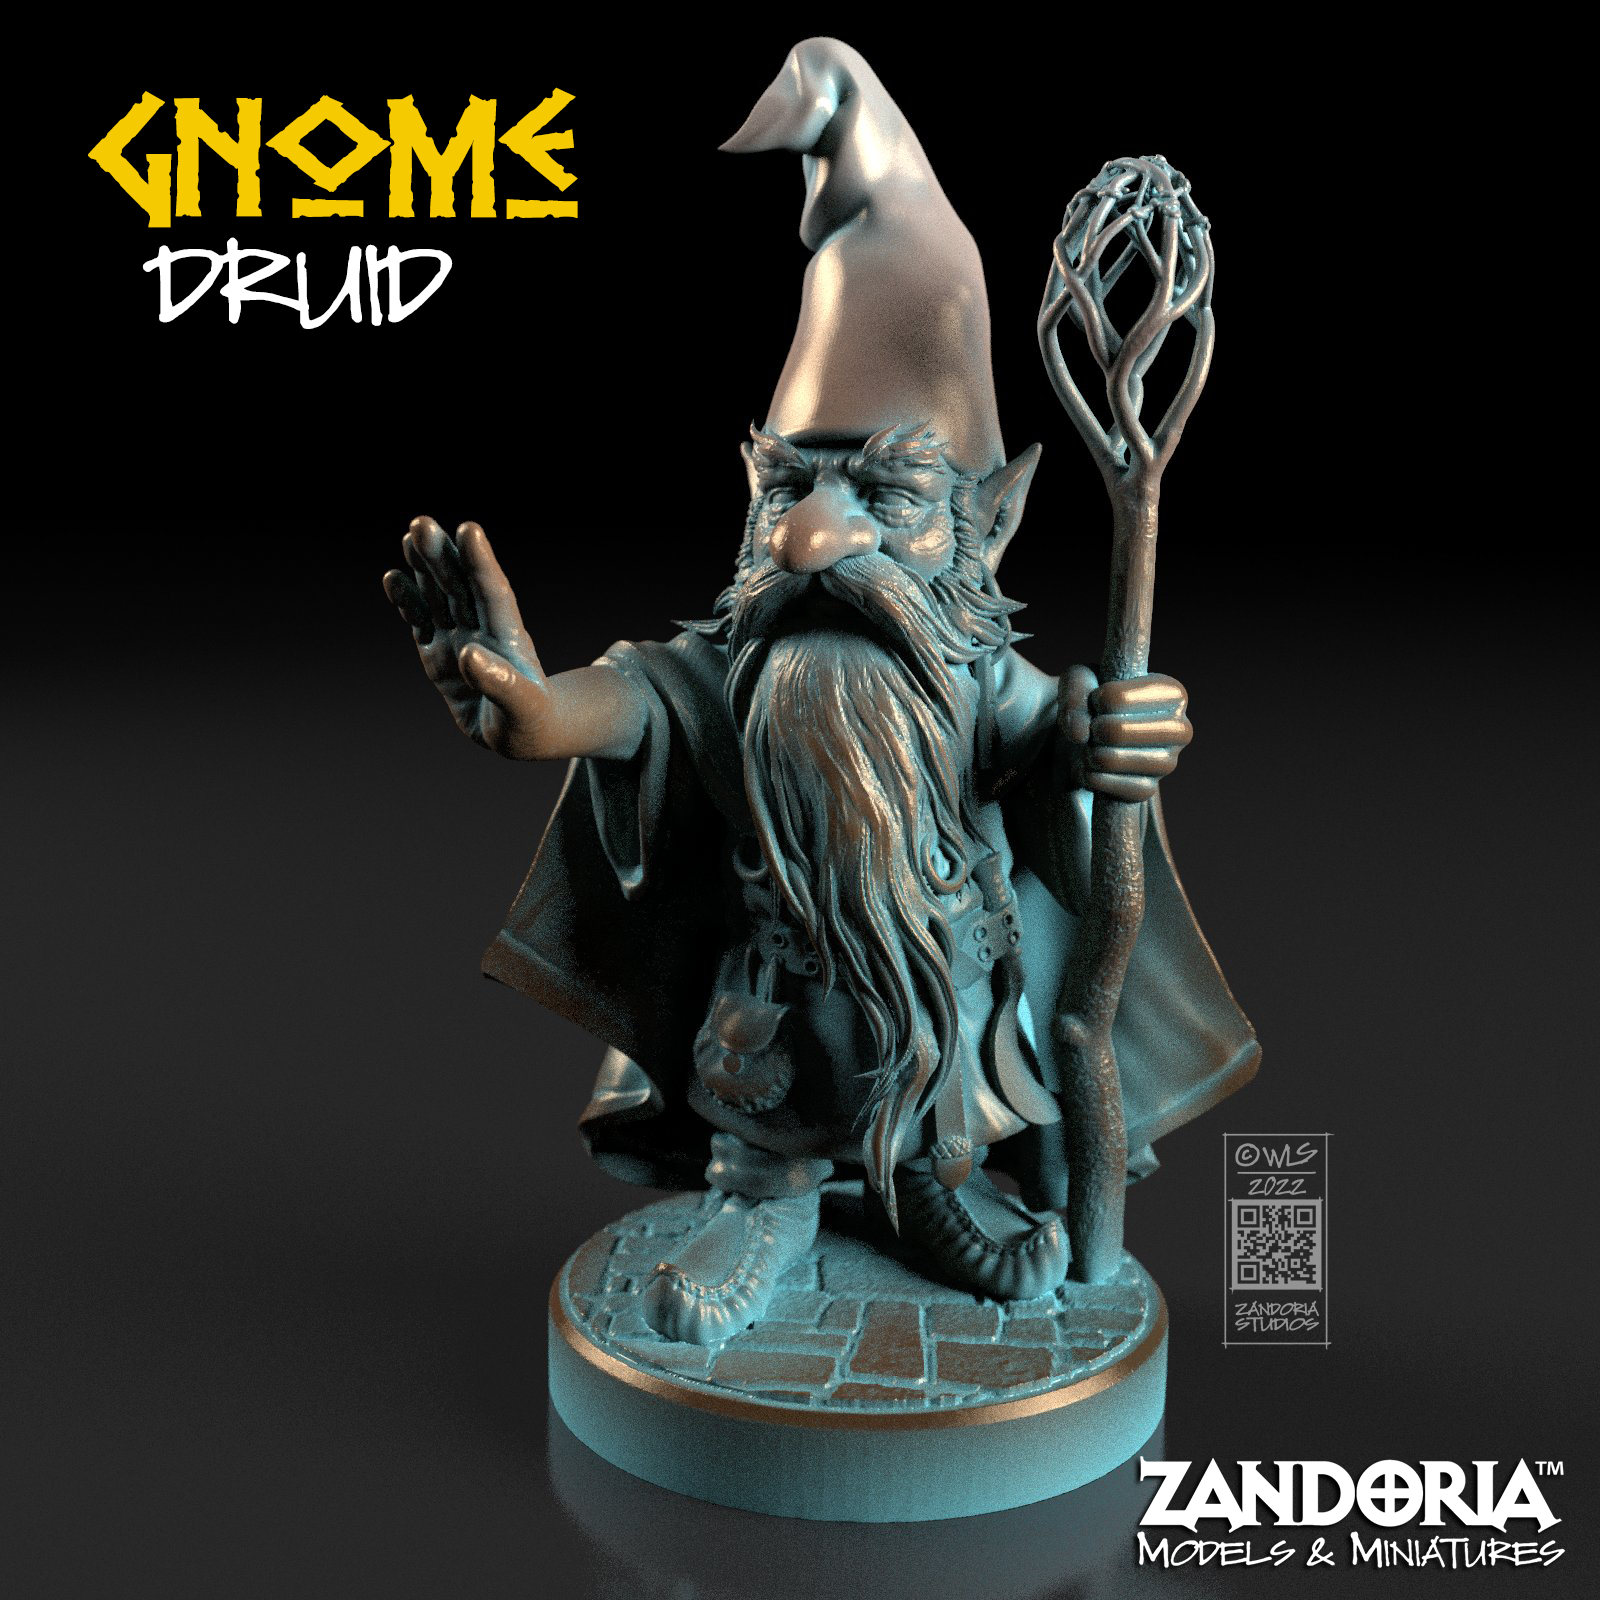
multiple scales of the same Gnome Druid
The learning curve is not that difficult, if you are already sculpting digitally, consider adding a 3dprinter to your studio!
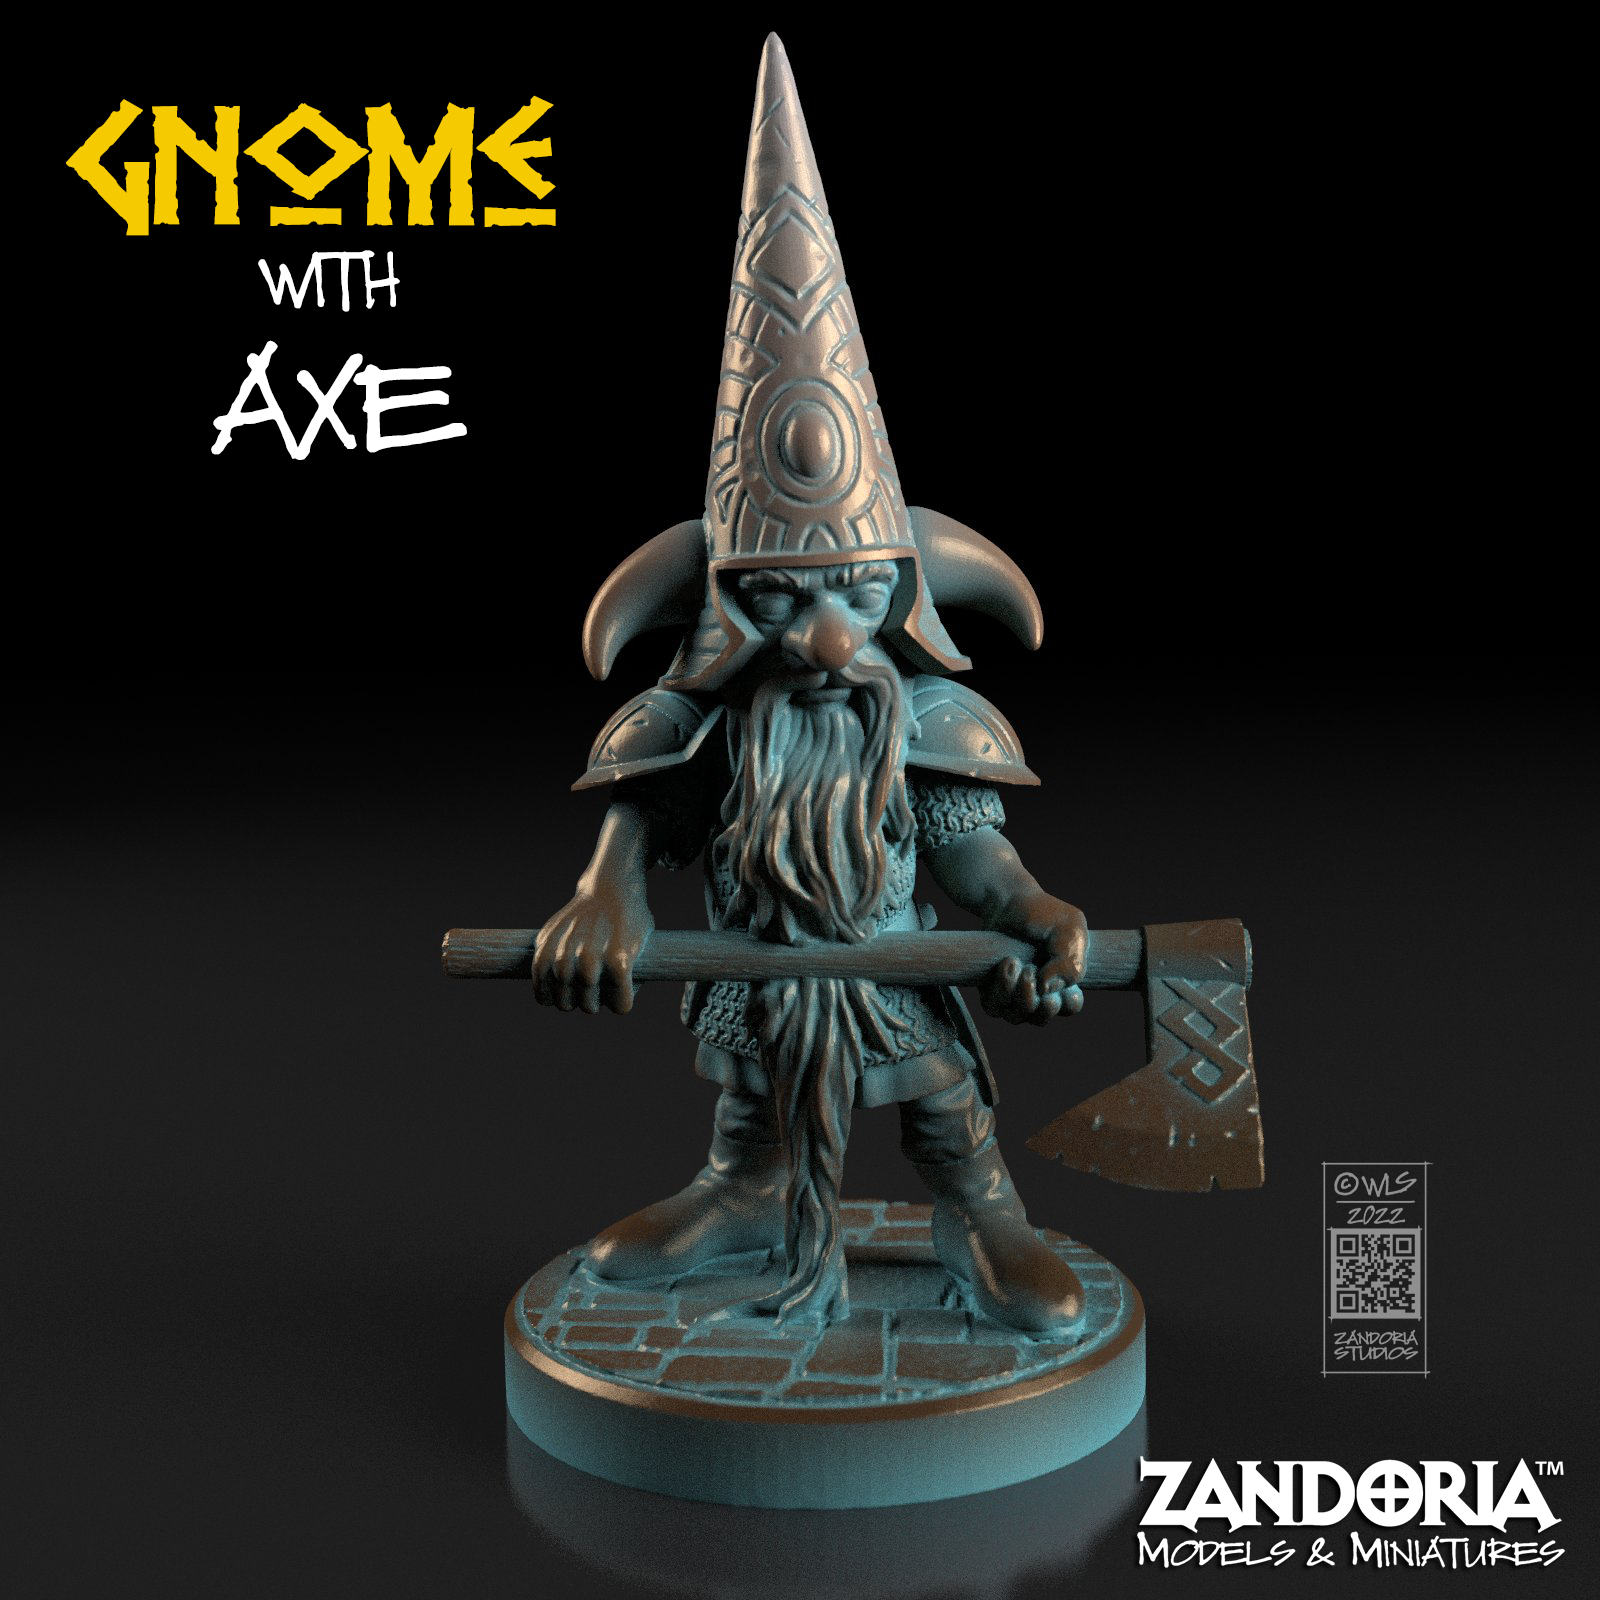
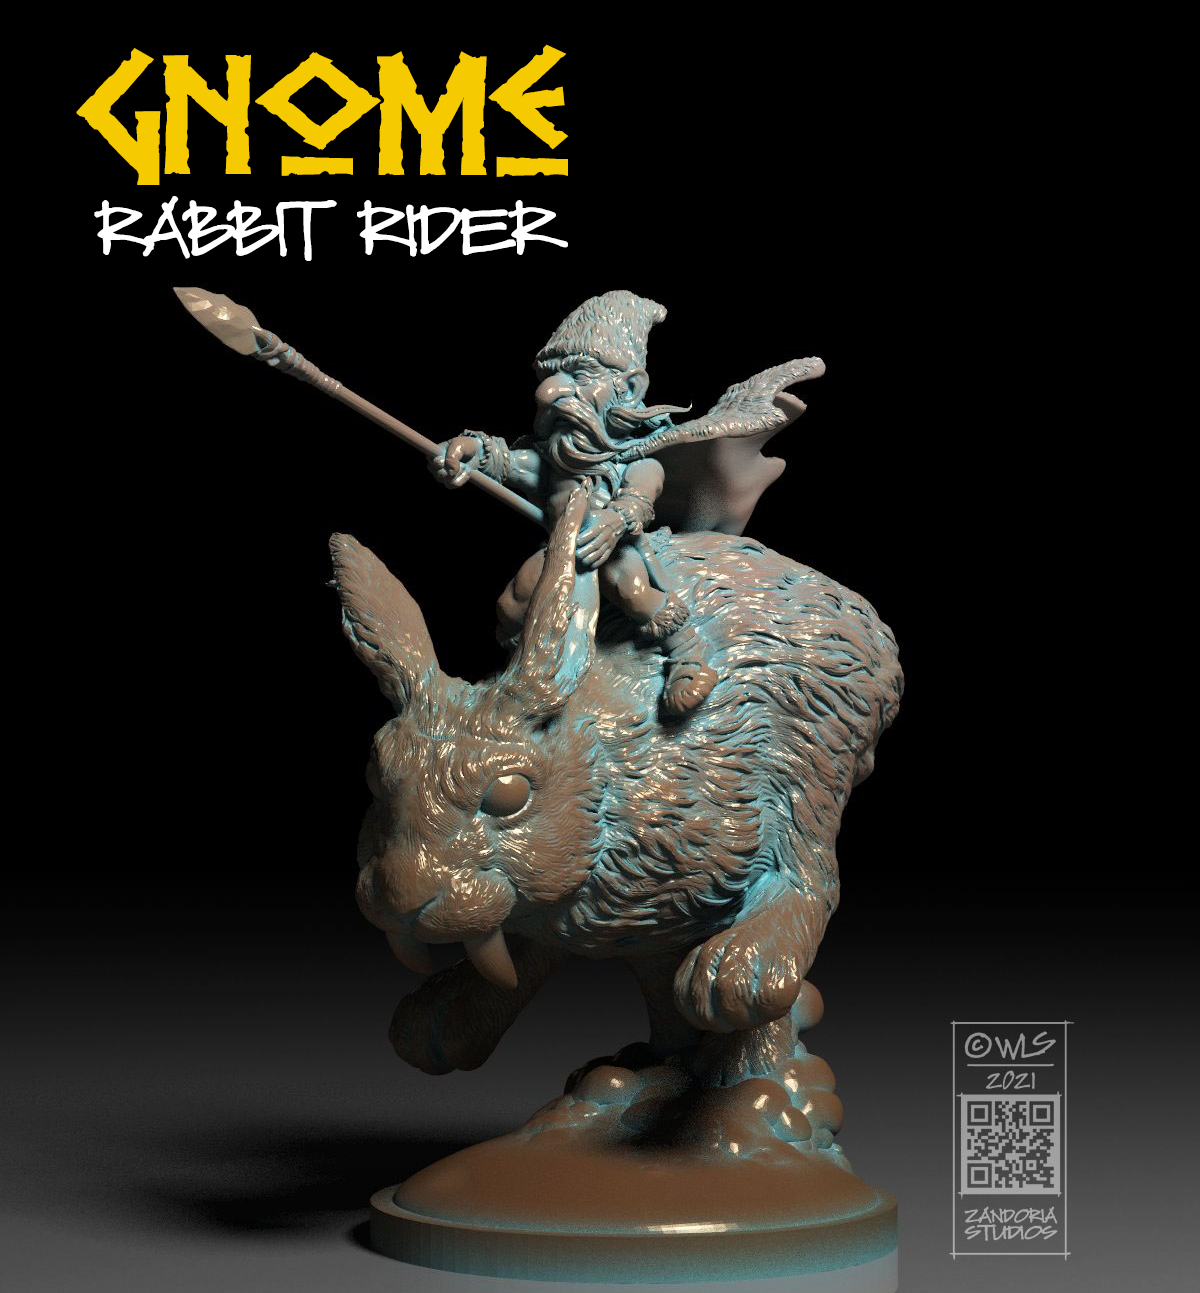
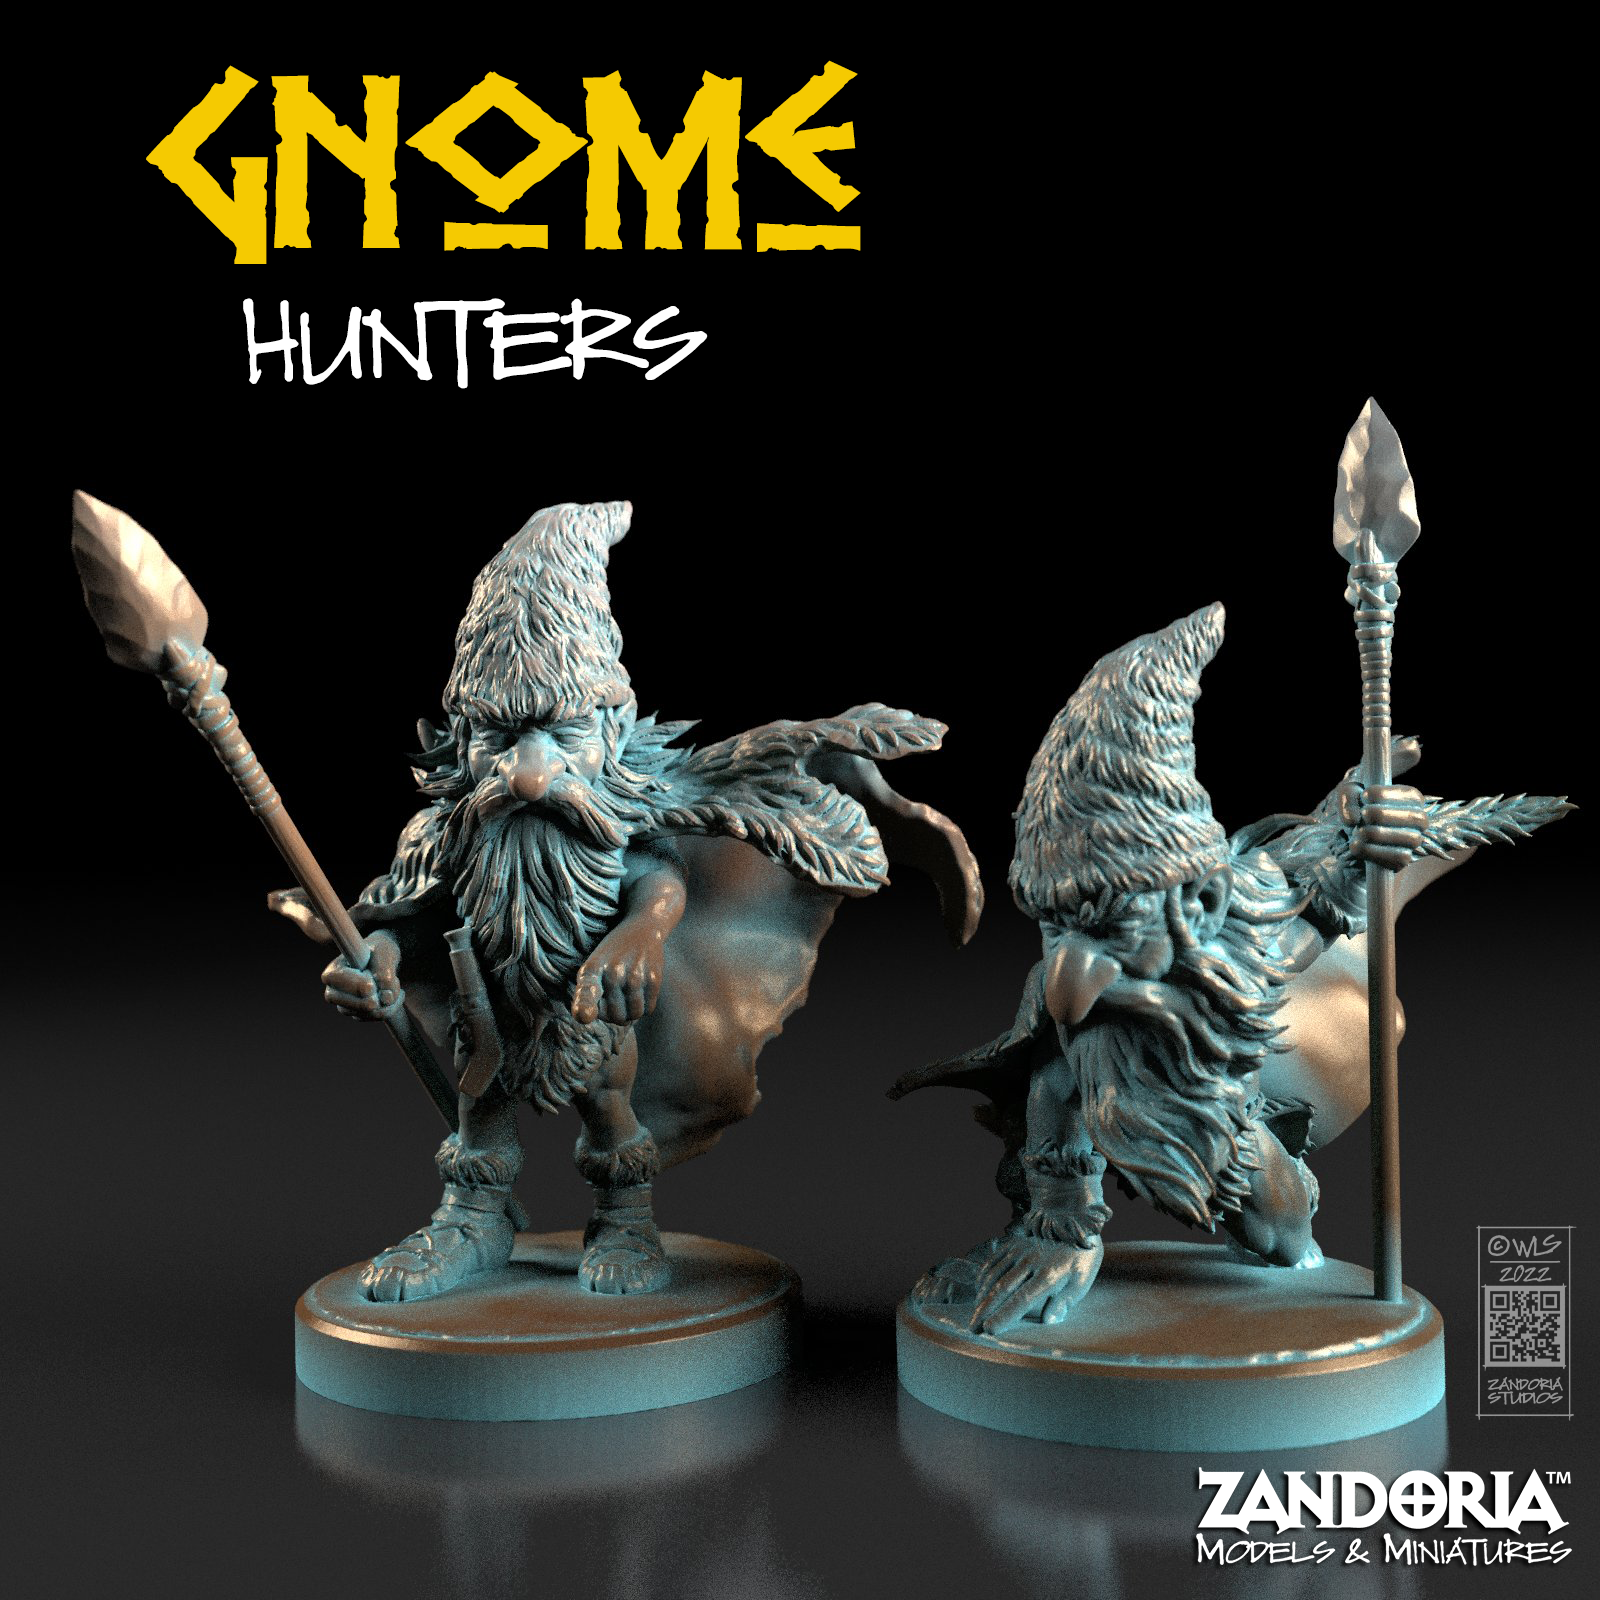
If you have been wishing you could use one of my Gnome miniatures for your next character or campaign, but do not have a 3Dprinter, now you can buy physical miniatures directly from me! I have added a Miniature section to my Etsy shop. These miniatures are printed by me in a durable ABS like resin. They are 28mm scale (1:56) for tabletop games like D&D or Pathfinder.
These are just the first available– I will be adding more as I have a chance to print and paint. Make your next character a Gnome!
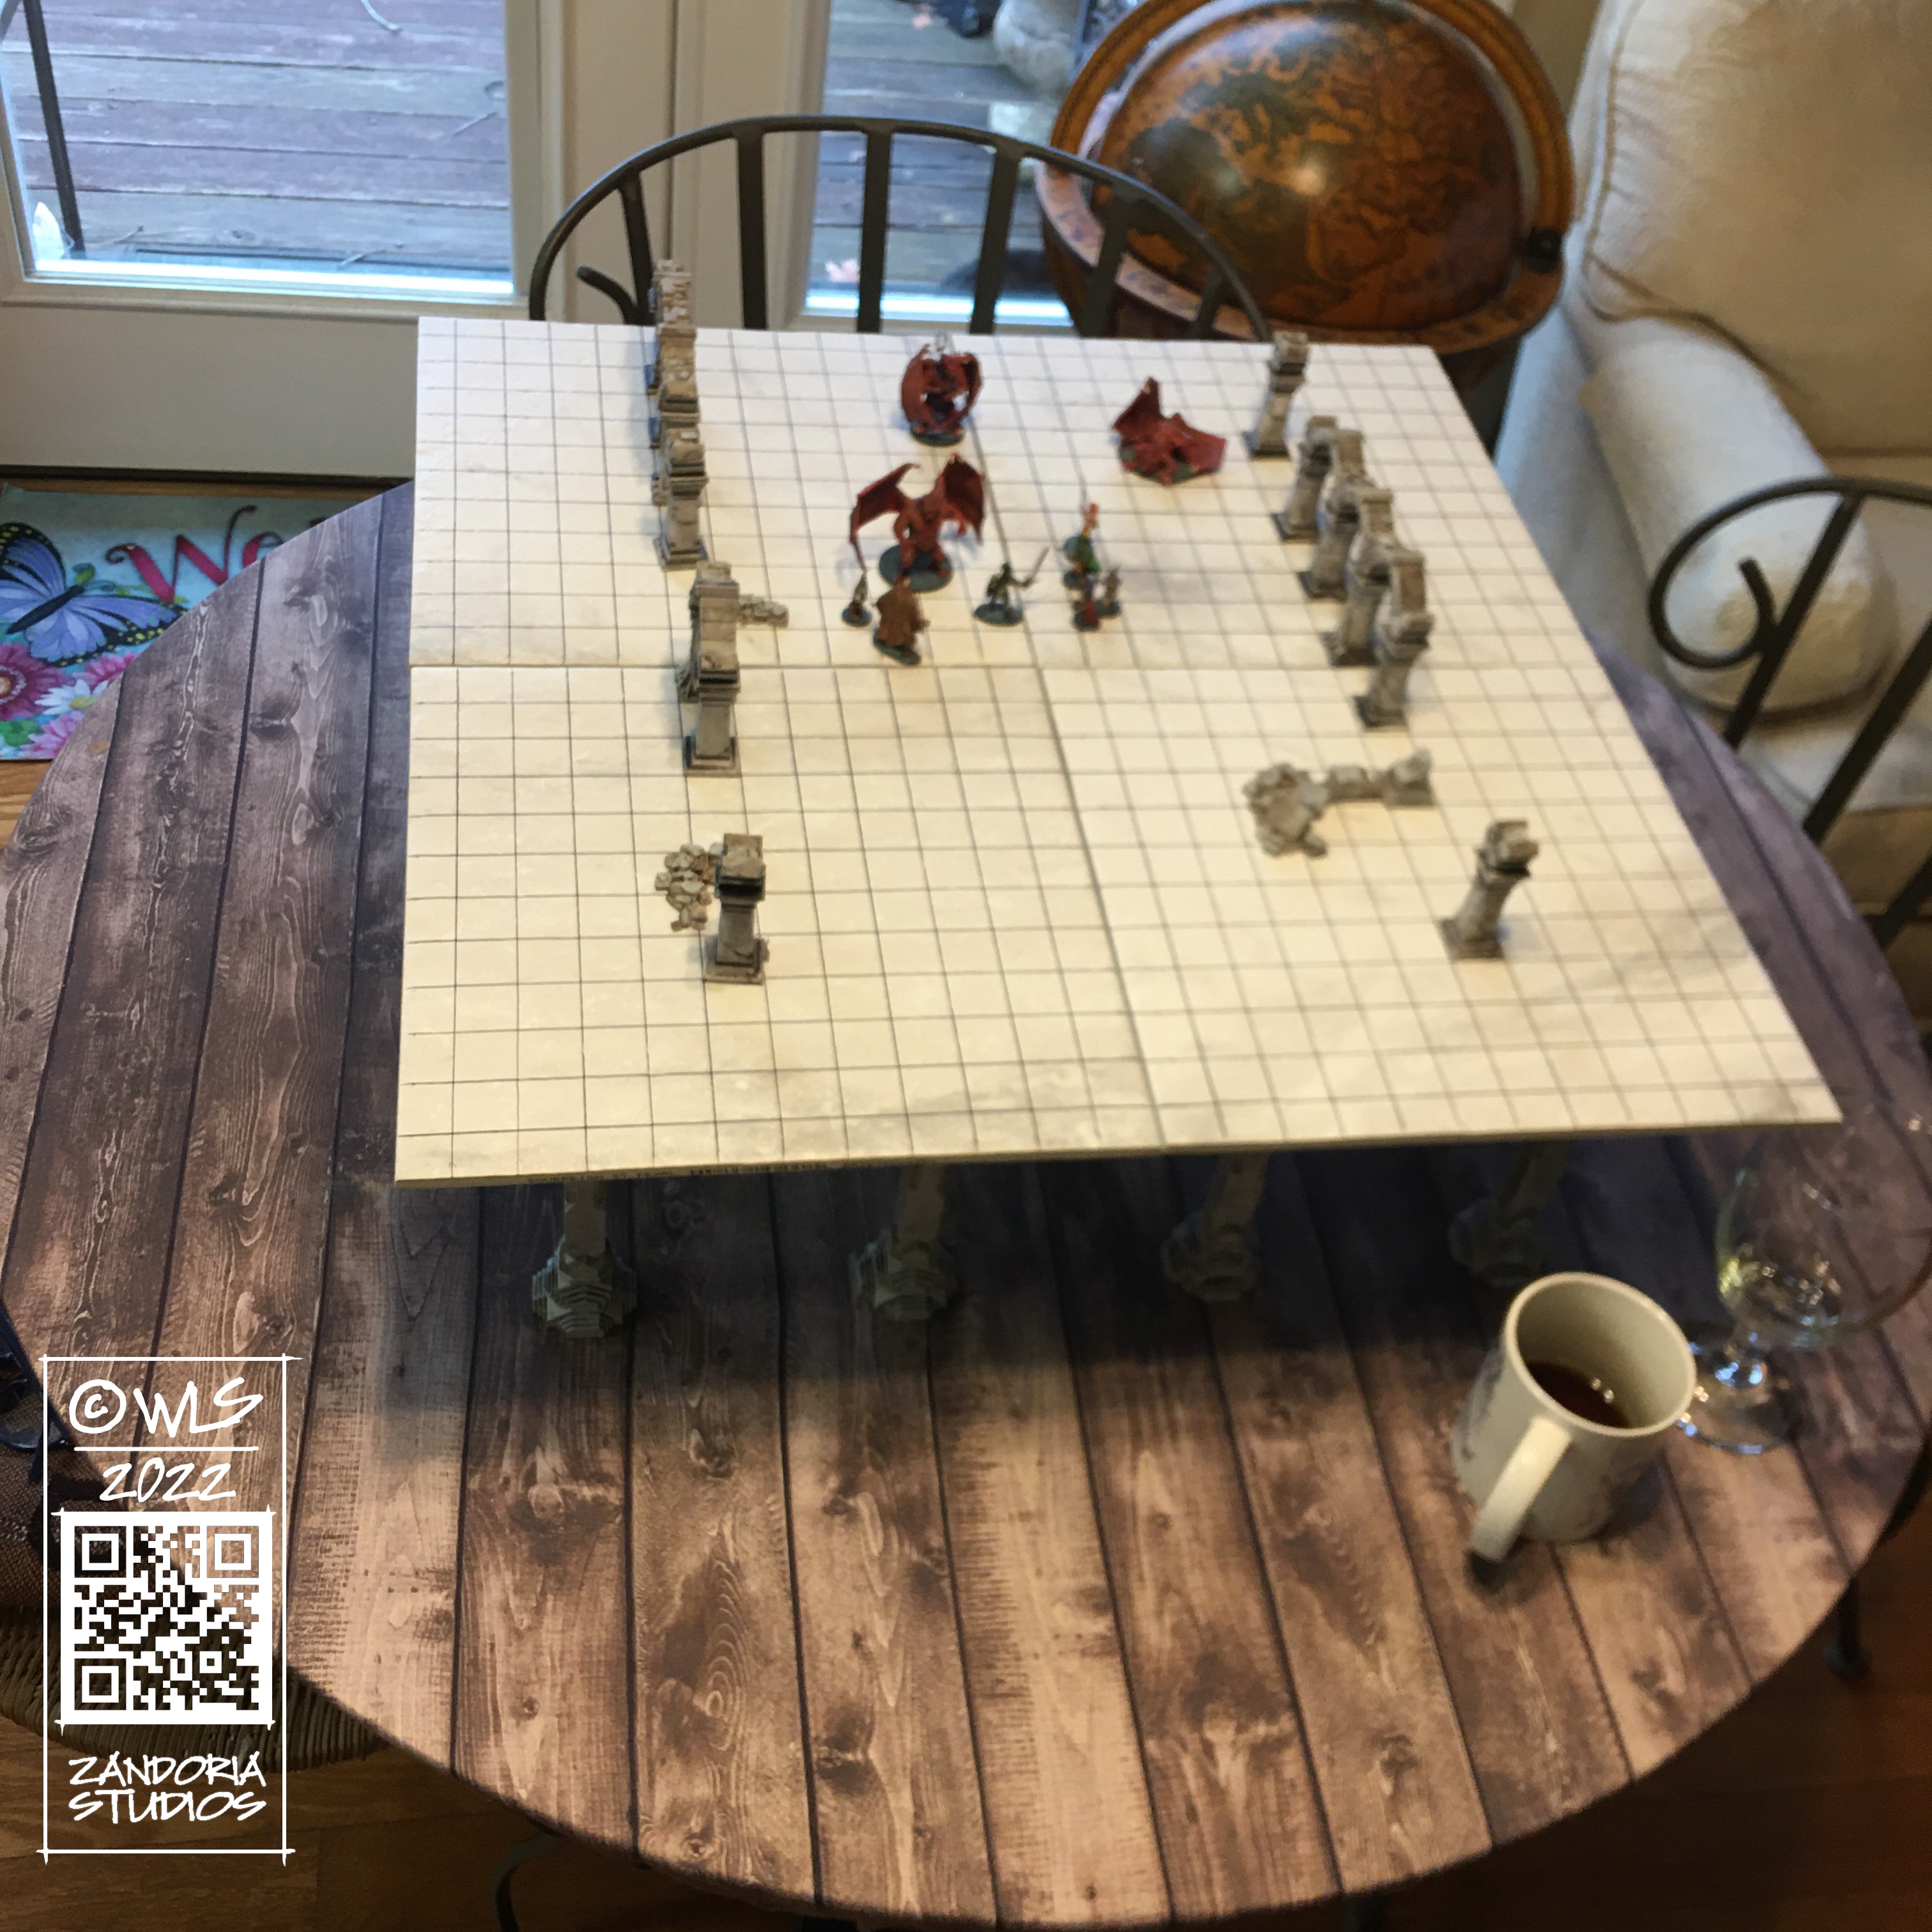
I have been seeing little game tables advertised on Facebook called Level-Up that cost $370 for what is essentially a modular table on skinny little legs… I felt that though the idea is a good one: elevate the map surface above the character sheets, dice towers, drinks and snacks–but the execution wasn’t very inspired….
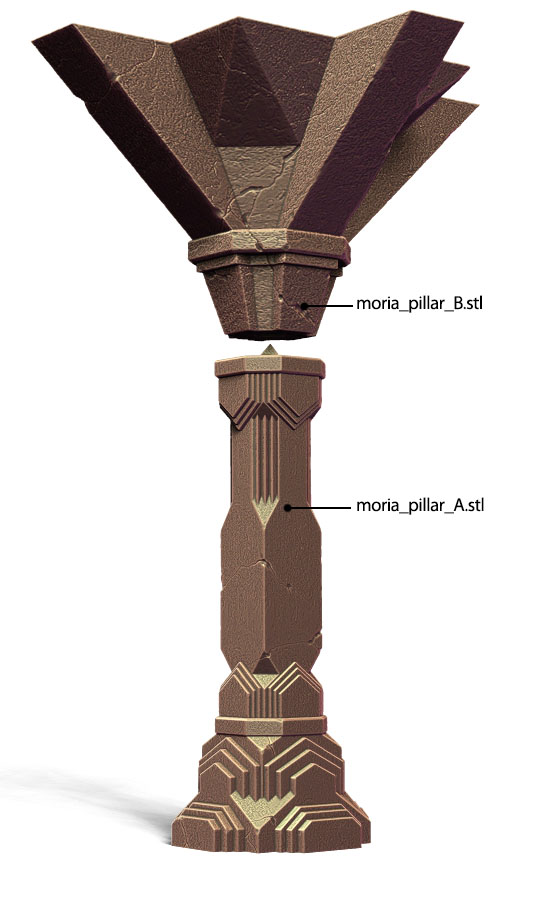
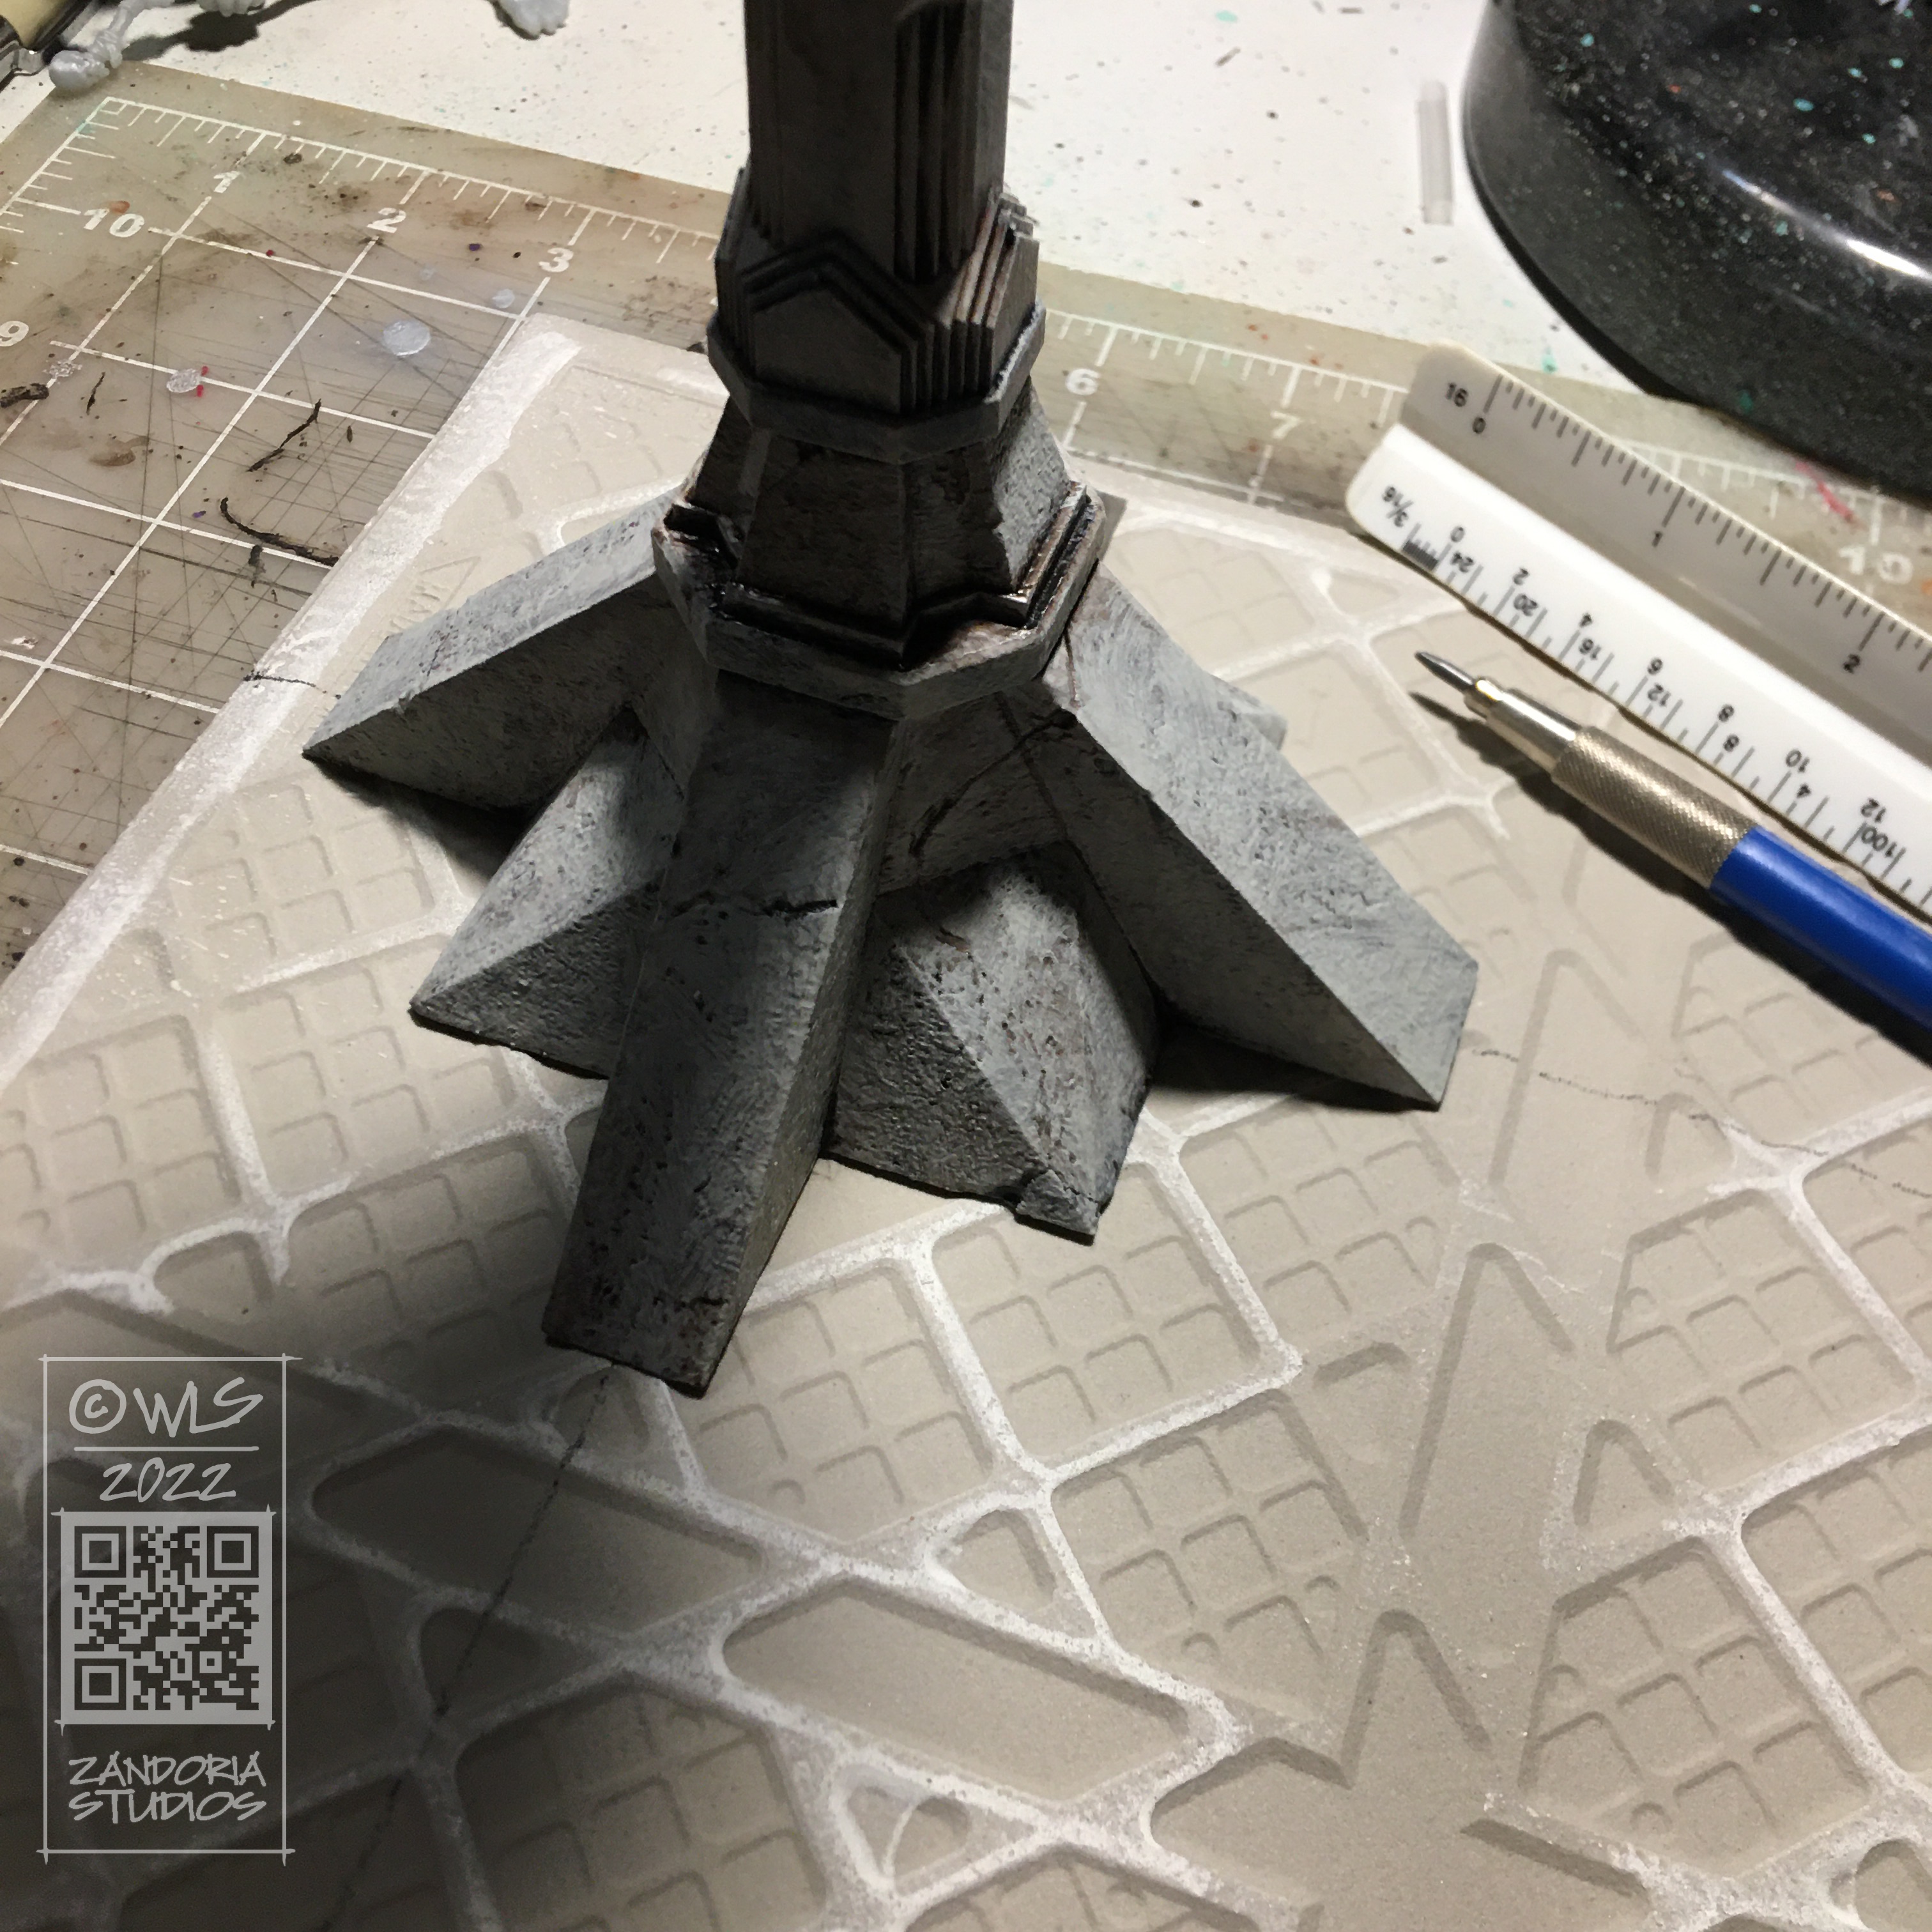
So I took a look at a model that I had originally created in Animation:Master for my Balrog model, and thought about how to modify it to make 3dprintable Moria pillars for table legs.
3dprintable pillars
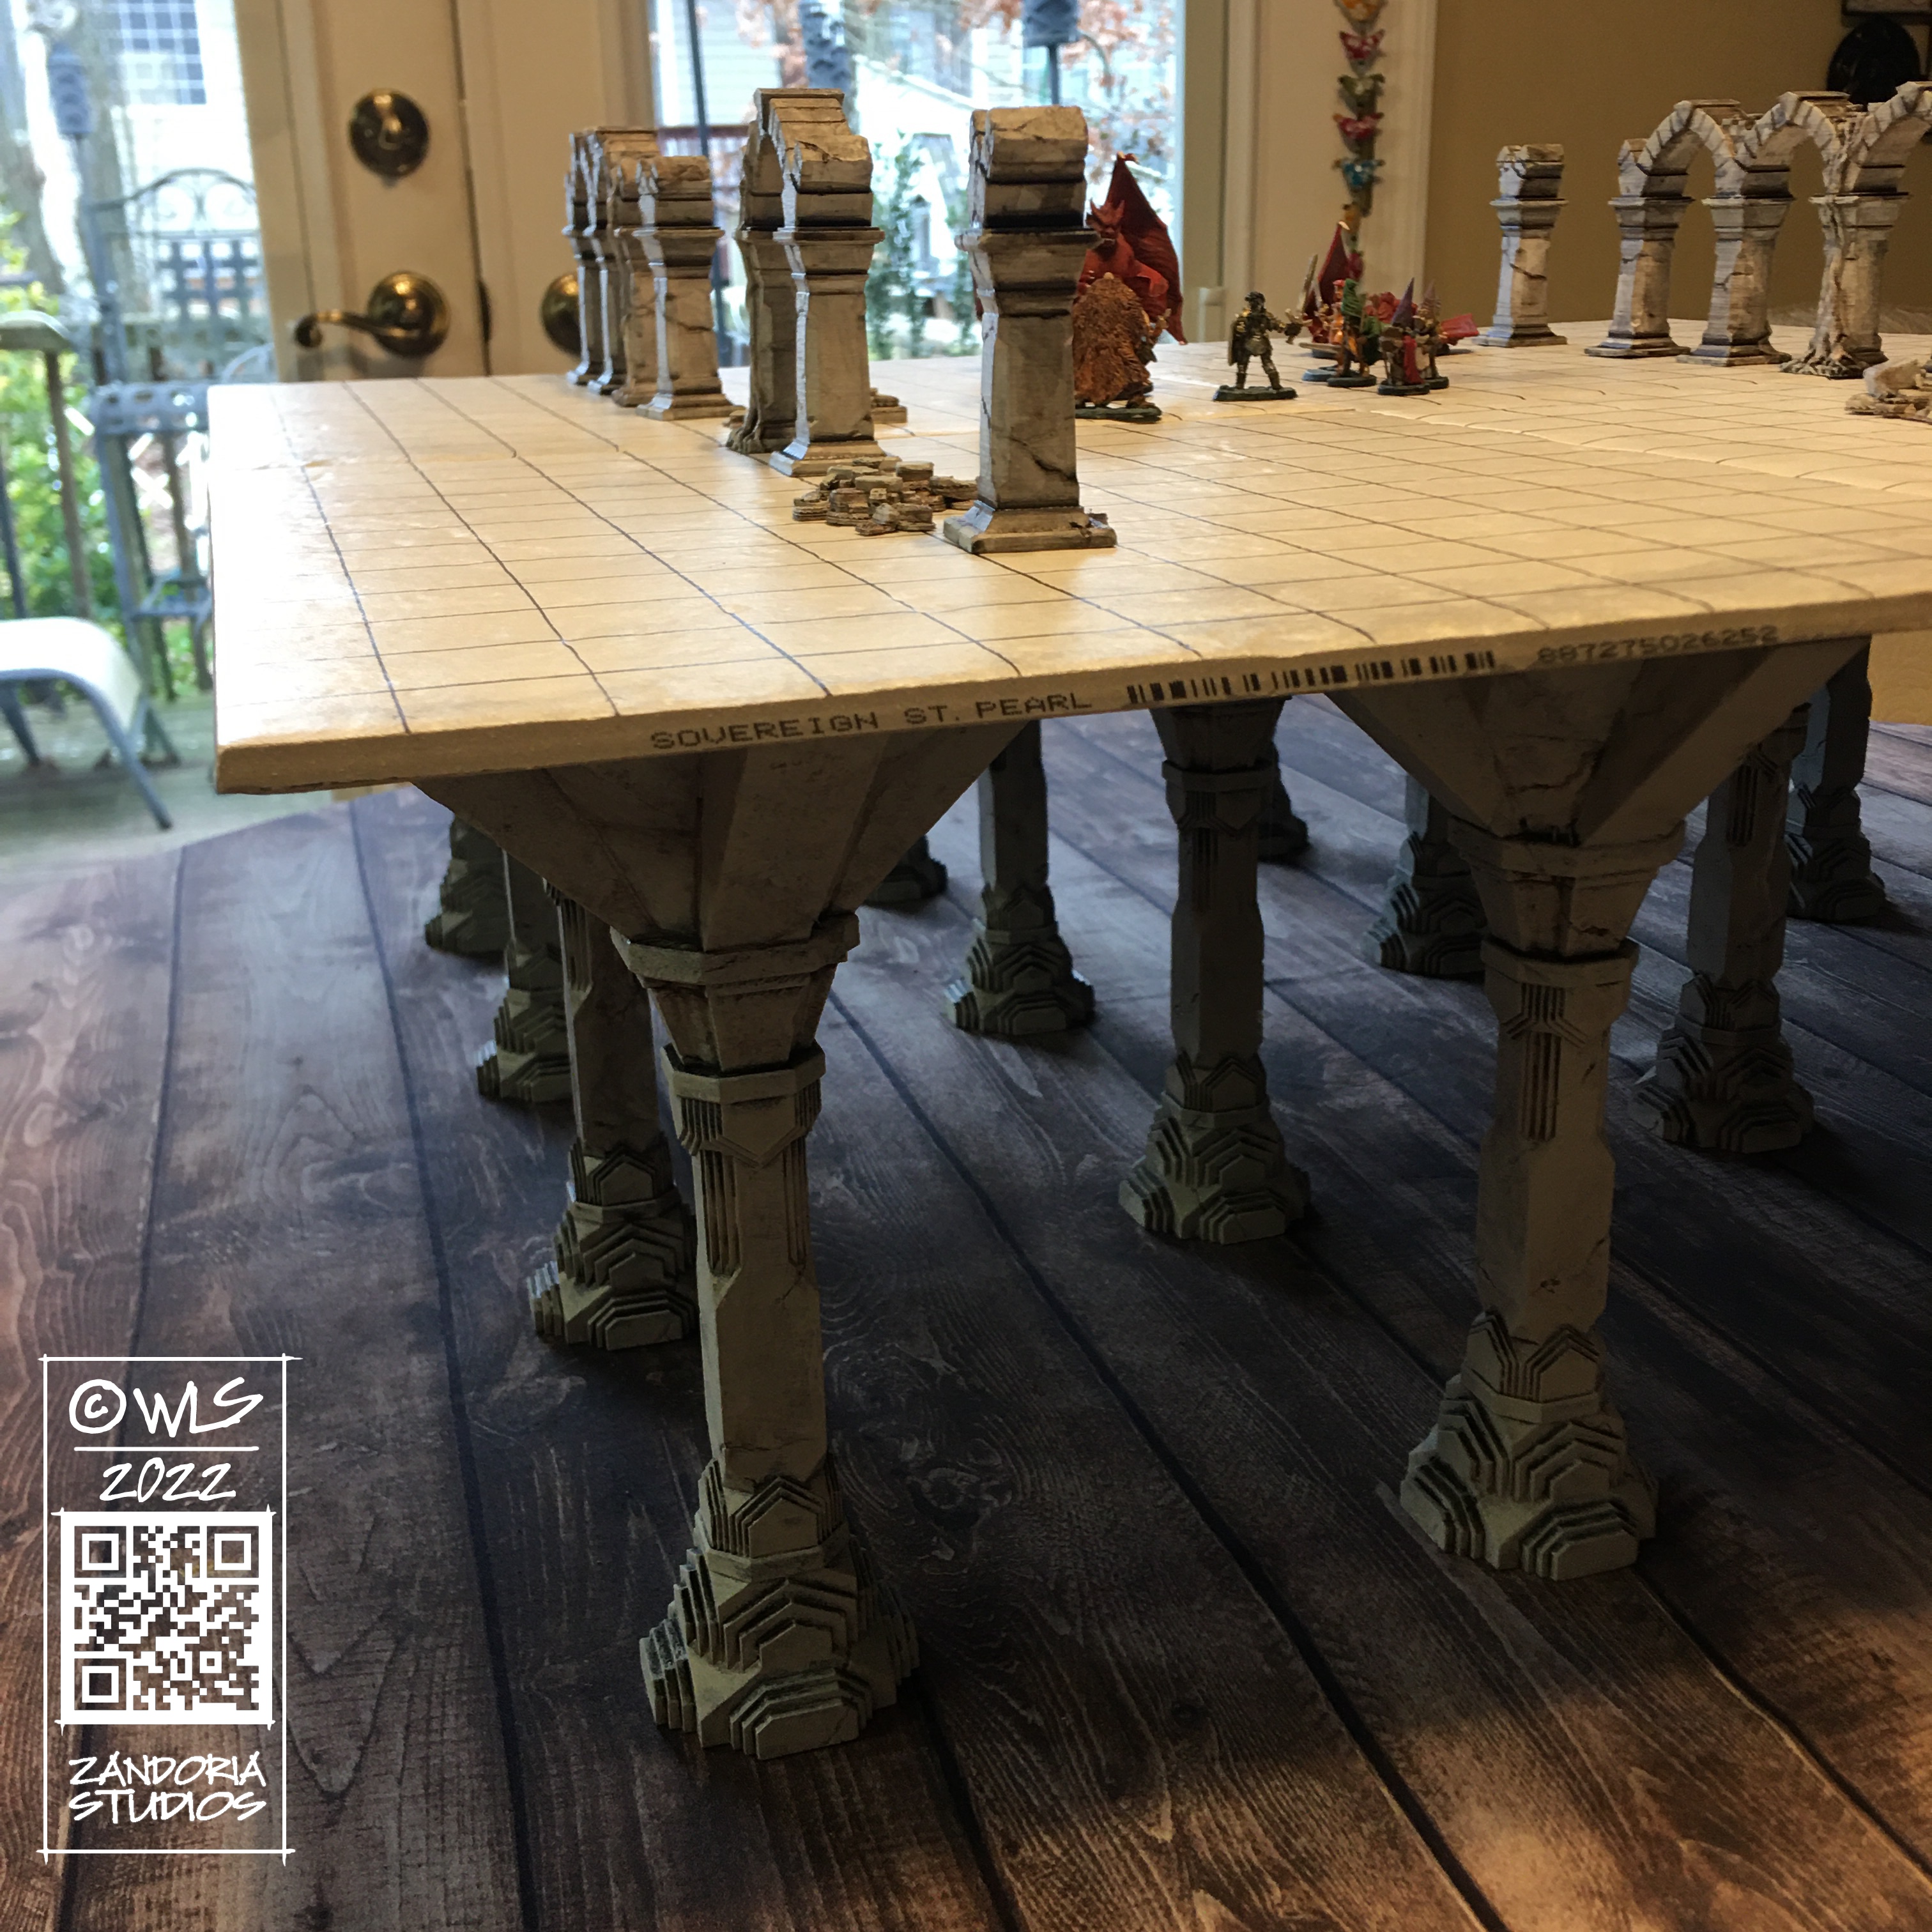
I decided to split the tabletop into 12″ squares with 4 legs. this will allow you to configure different size map tables, and designing the pillars to sit on 6″ centers will let the pattern continue underneath the game surface. I was going to use plywood for the table surface, but it was cheaper and looked nicer to use ceramic floor tiles!
2′ x 2′ tabletopthe table raises the game above the drinking glass!
The tabletop is about 7″ above the table, so it sits above the level of soft drinks and glasses. But is still low enough to give the players an unobstructed view of the game.
3Dprint the pillarsFor resin, use the hollow versionsPrime and paintmeasure the spacingHot glue the pillarsDone!Finished Moria Tabletop
I was really happy with how this turned out! The floor tiles were only $2 a piece at Lowe’s, and the grid was drawn with a Sharpie! The pillars for each table were about $10 worth of resin, but it was much faster than printing on my FDM printer (at fine resolution, my Ender3 took about 20 hours for 1 pillar, while the Mighty4K printed 6 of pillar A in about 10 hours)
If you like this project and would like to make your own, you can get all of the files for $12 at Cults3D.