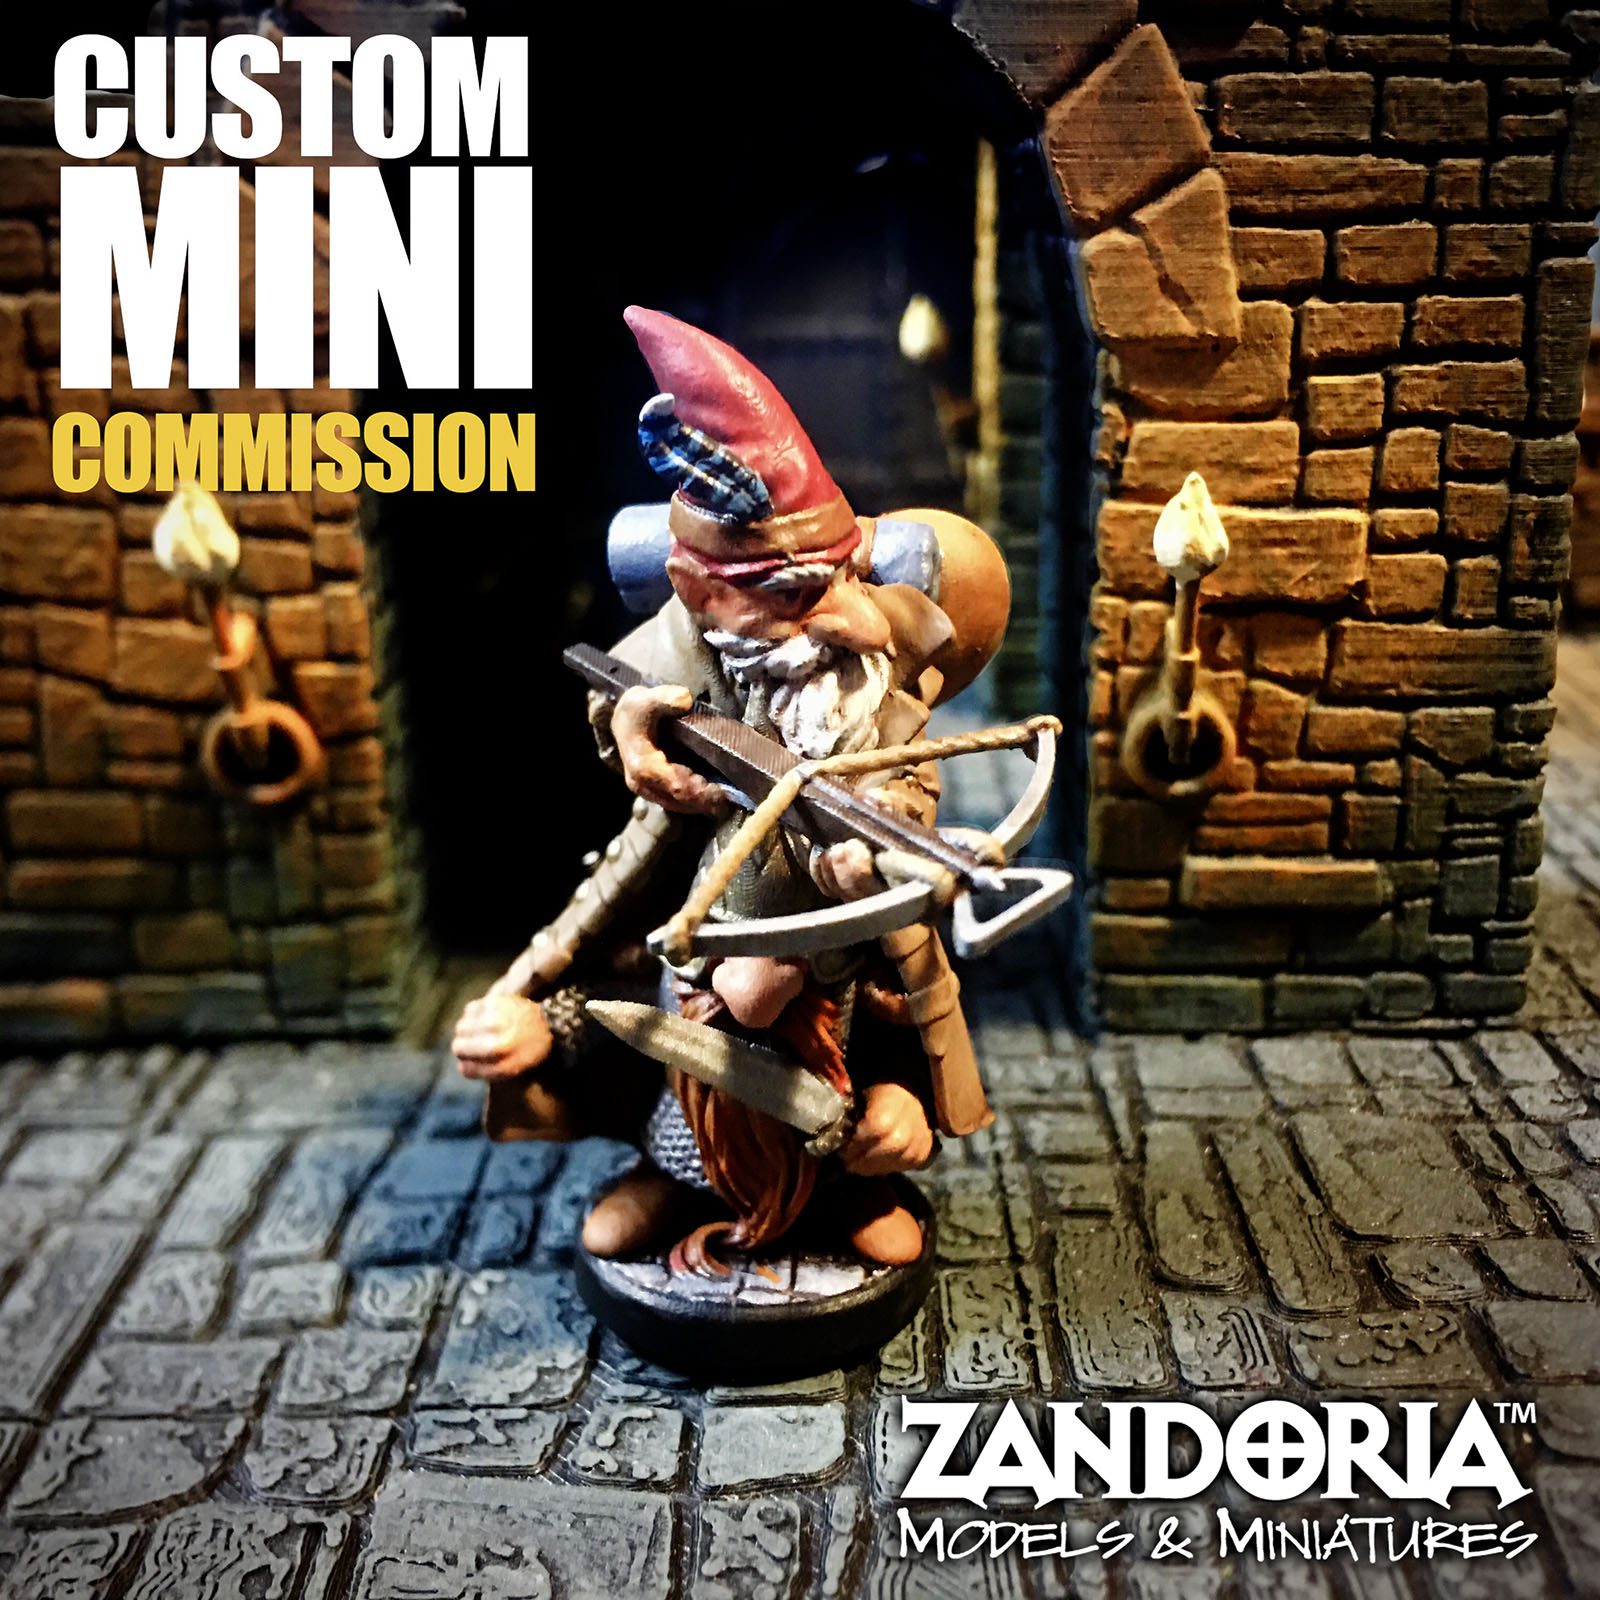
Tired of trying to find a mini to match your favorite character? I will sculpt your character from scratch, and create a one-of-a-kind miniature of your character!
Based on your character description, I will sketch out your mini for approval, and then digitally sculpt to bring your character to life!
Since I have to draw your character as part of my process, you also get a character sketch as well as a mini!
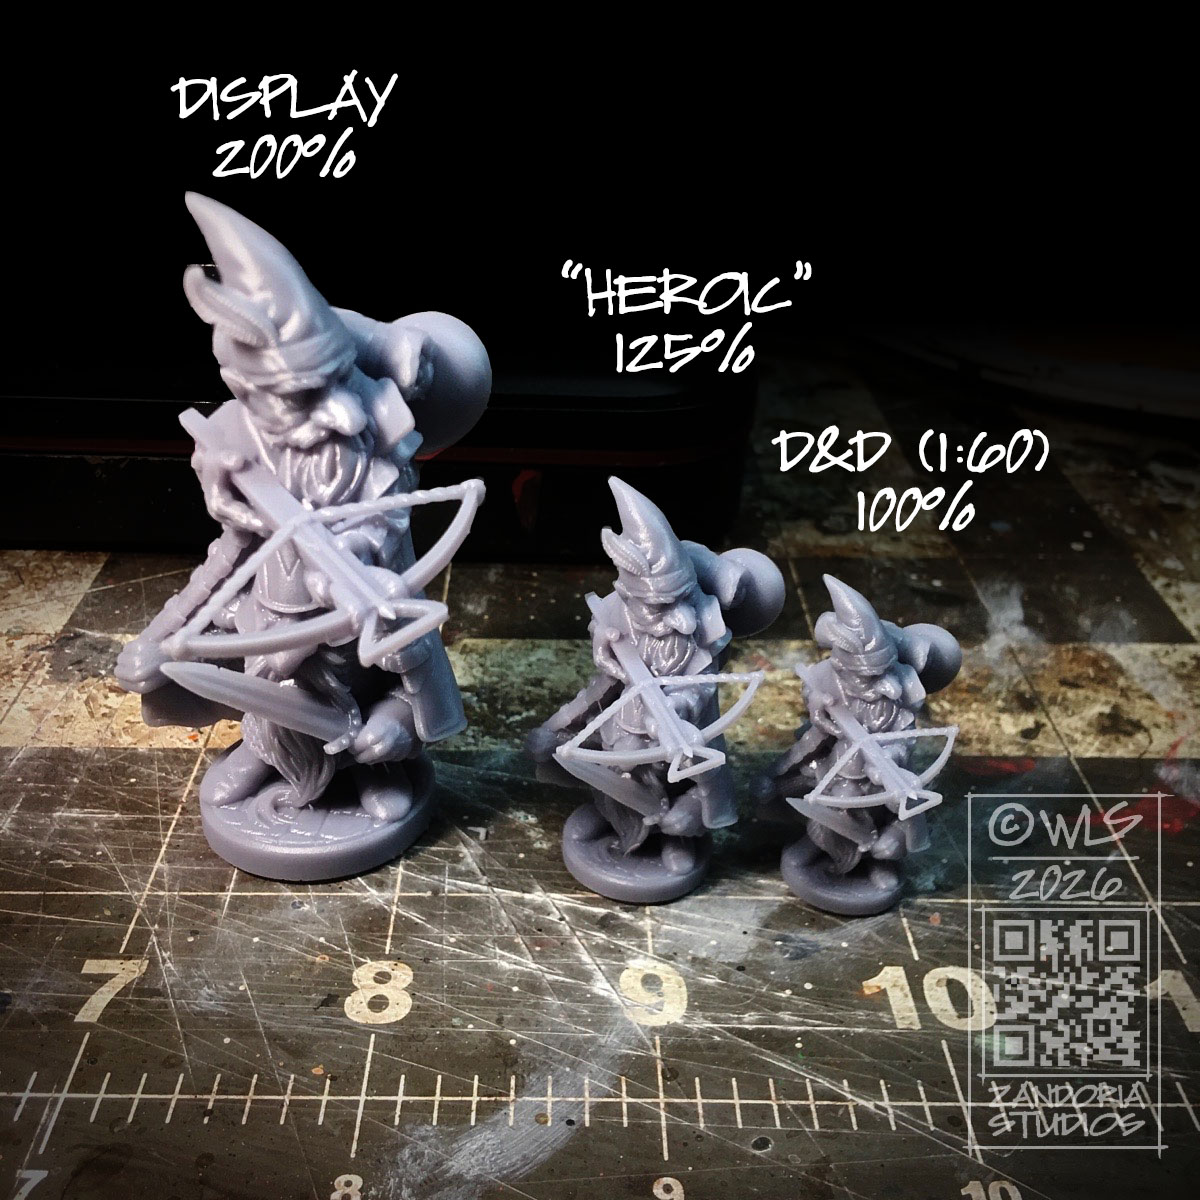
I sculpt the miniatures in 1:60 scale which is perfect for Dungeons & Dragons characters. 1:60 means that 1 inch equals 5 feet–this is often referred to as 28mm scale. Because the sculpture is digital, I can also 3Dprint it at different sizes.
With your order I will print a tabletop, D&D sized mini (If you prefer what is know as “Heroic” sized, let me know) as well as a larger 200% sized one for display. I will also provide a copy of the STL file for your personal use.
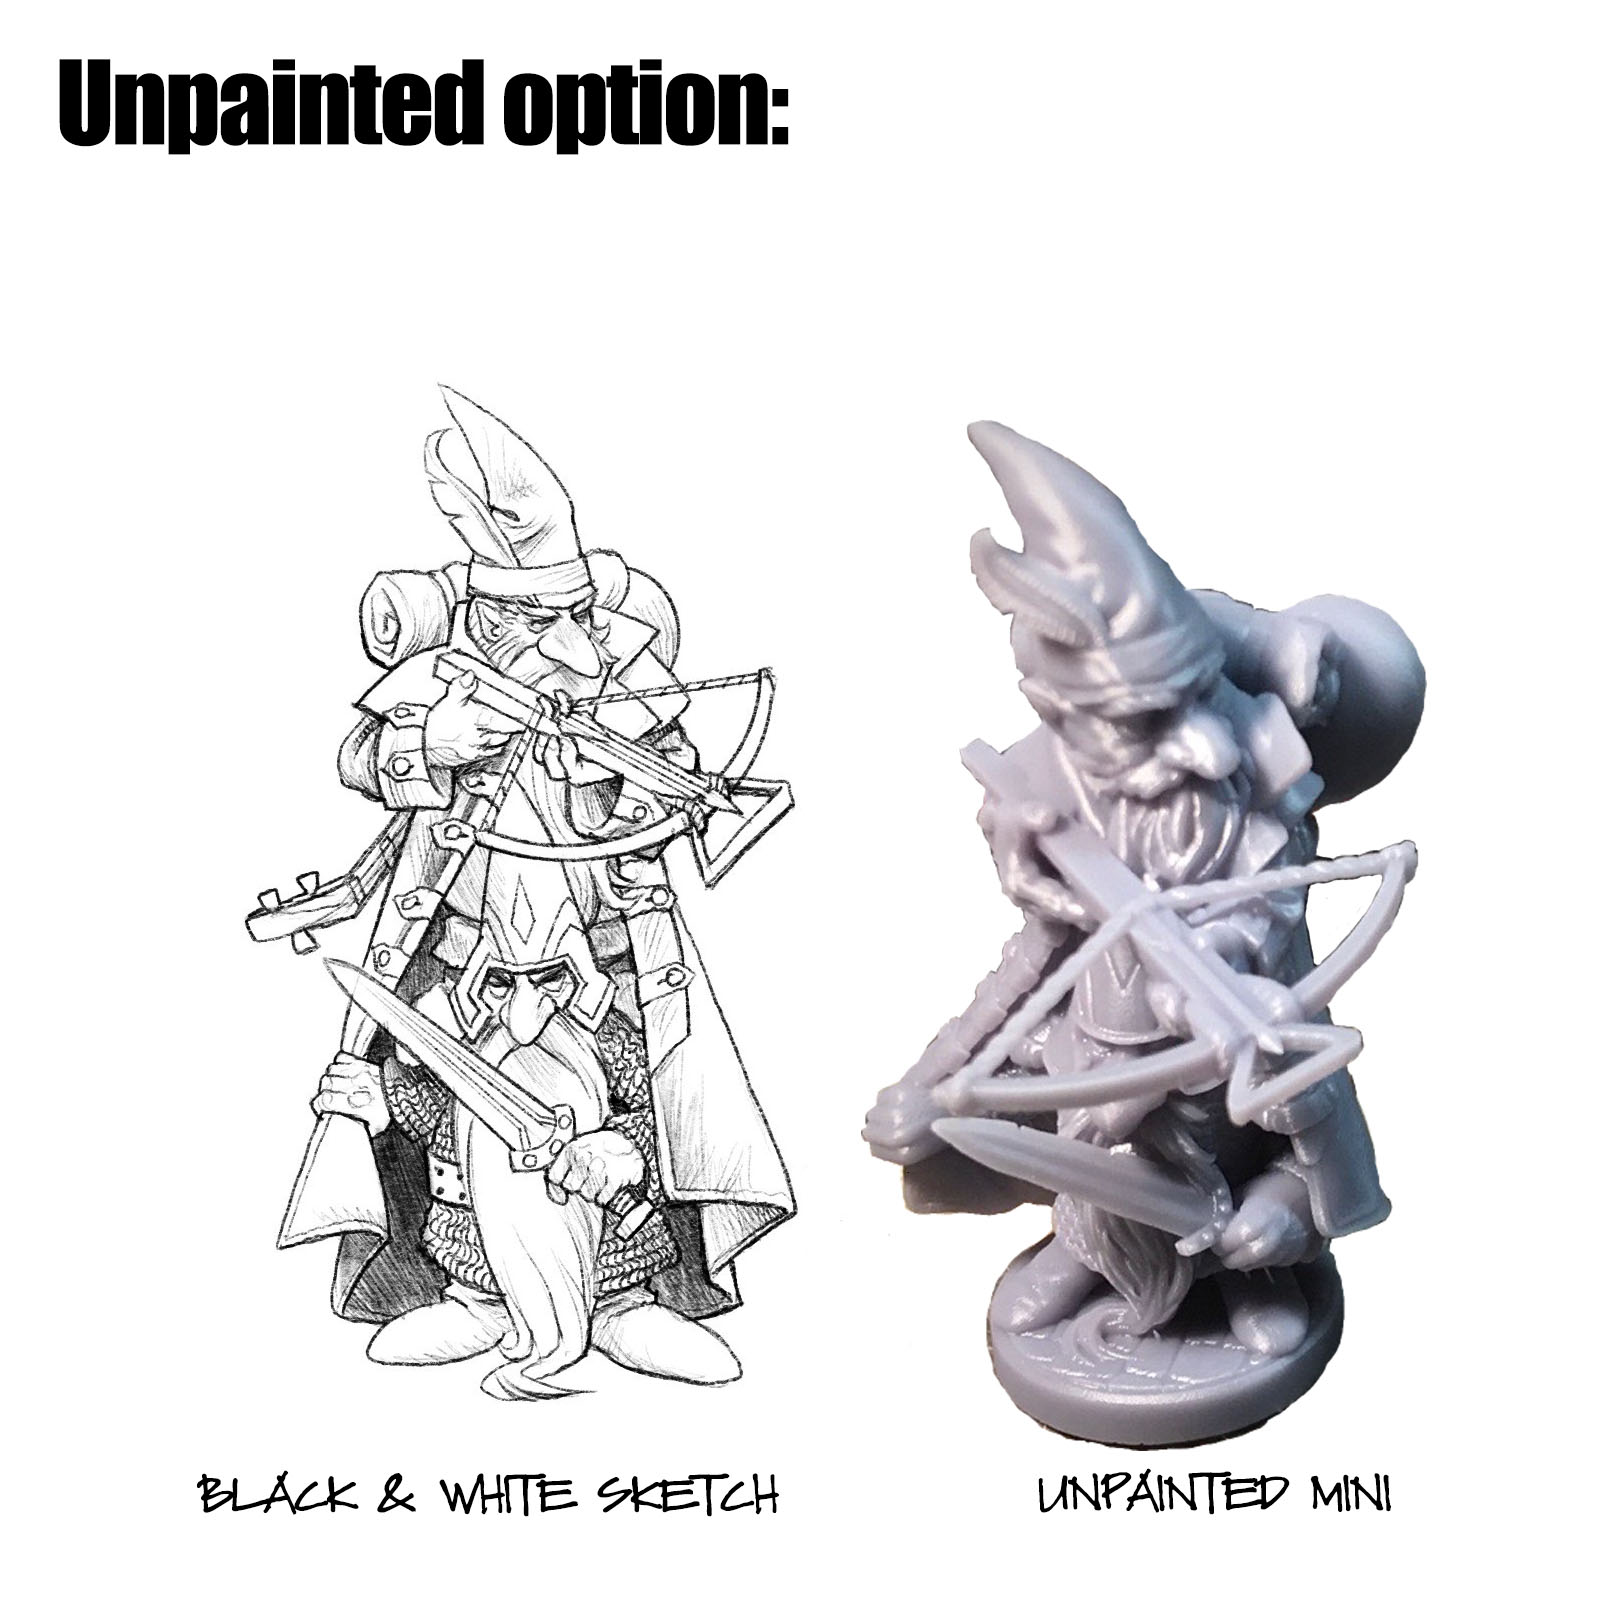
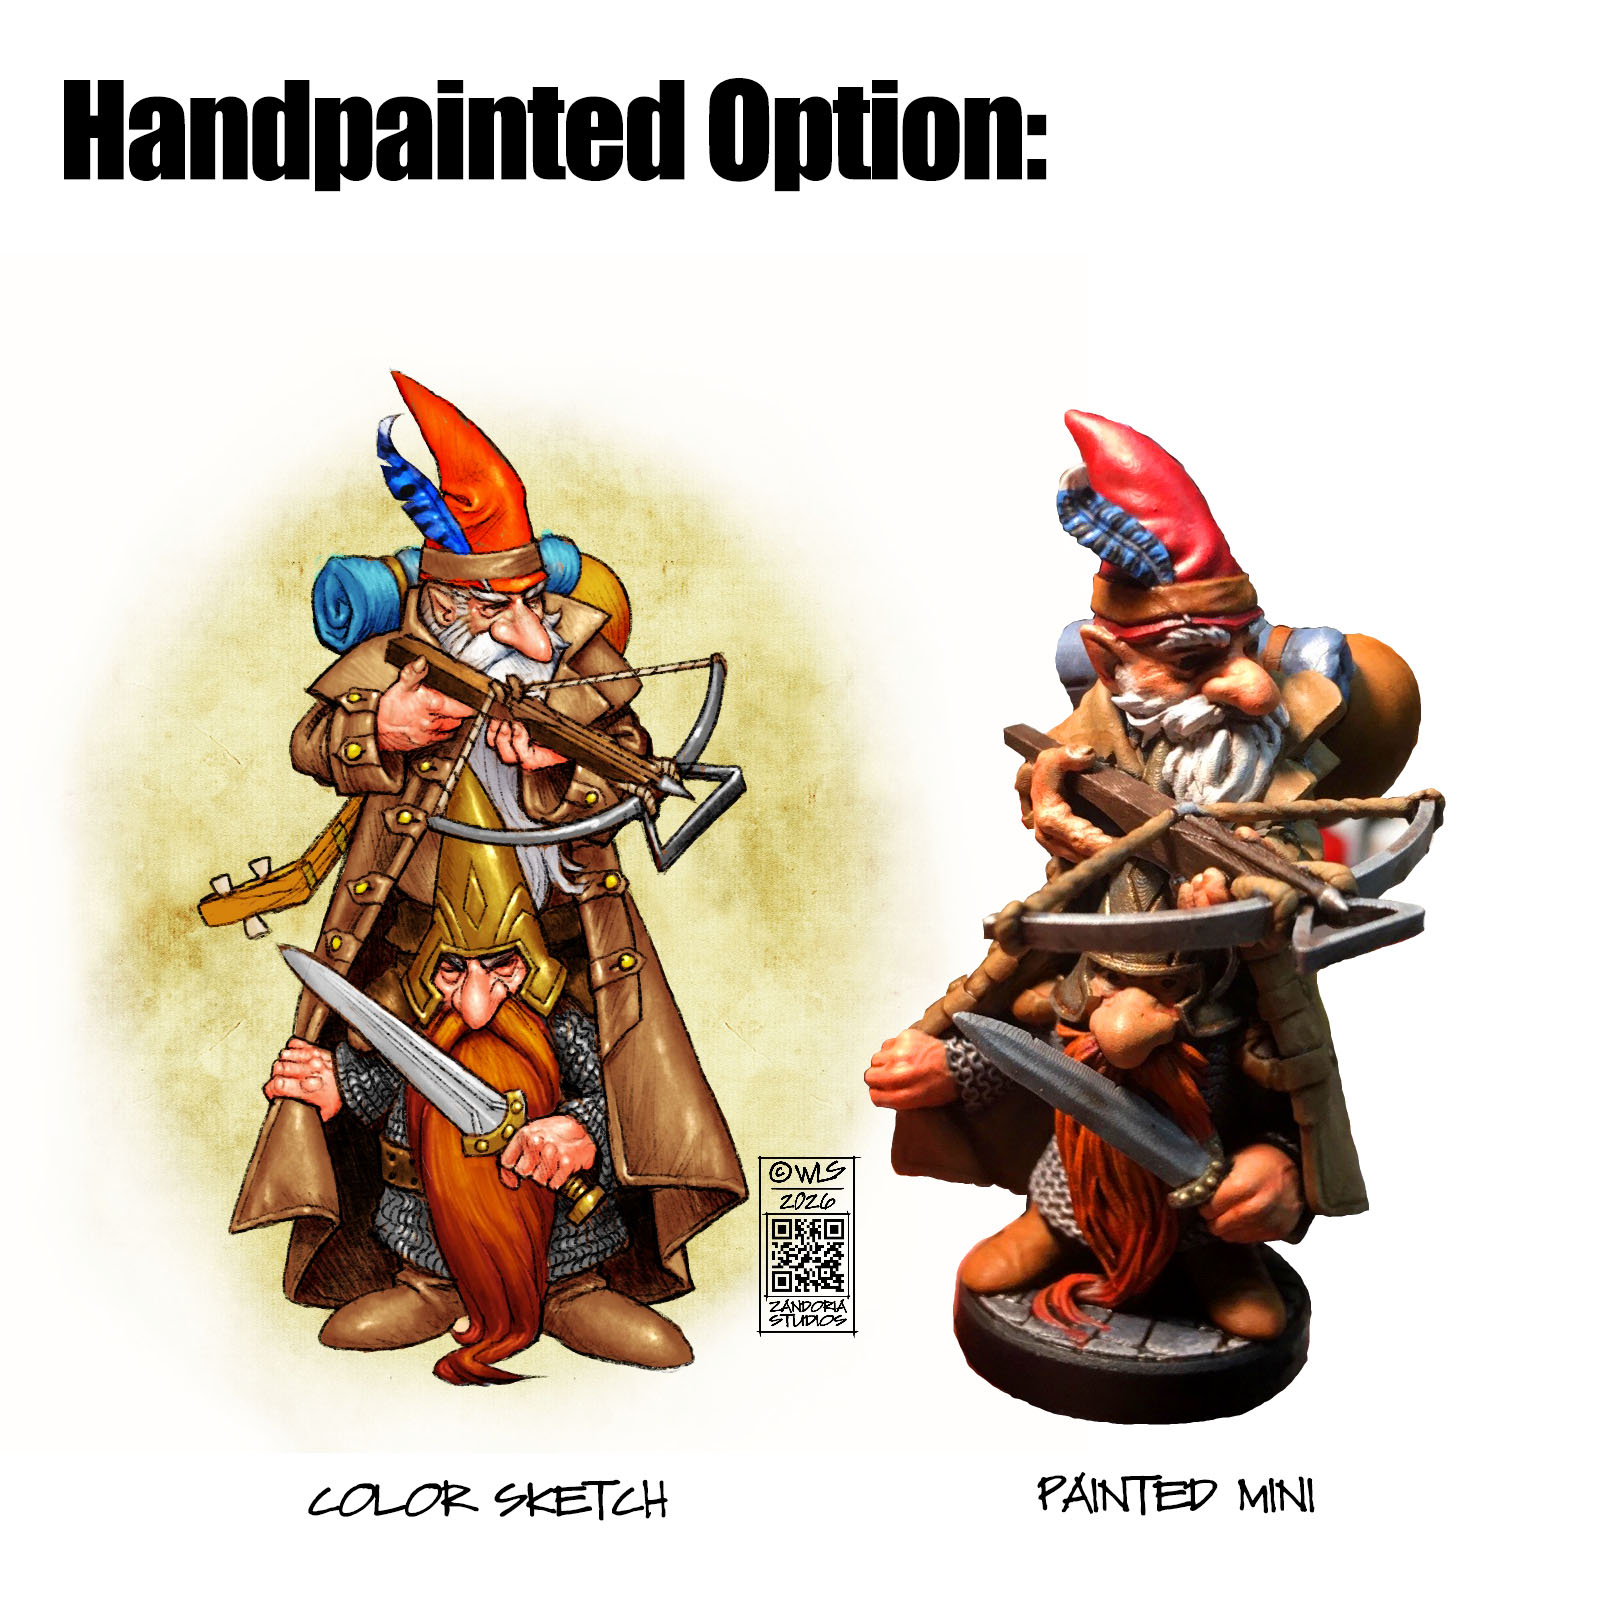
I’m offering this custom mini commission in an UNPAINTED or HAND-PAINTED option. If the listing is SOLD-OUT, just check back the next week–I am limiting the QTY so that there is only 1 spot available at a time.
When it comes to 3Dprinting there is a lot of confusion about resolution. It is important in different contexts, so I hope this post can help to demystify it.
Scanning is a method to capture geometry from real world objects to create a digital model. Here is a scan of my head, using a structured light scanner attached to an iPhone. On the right hand side, you can see a triangulated mesh of polygons. This mesh is the 3D model. Notice the lack of details in the face, especially the eyes. the Mesh is composed of 53,000 polygons.
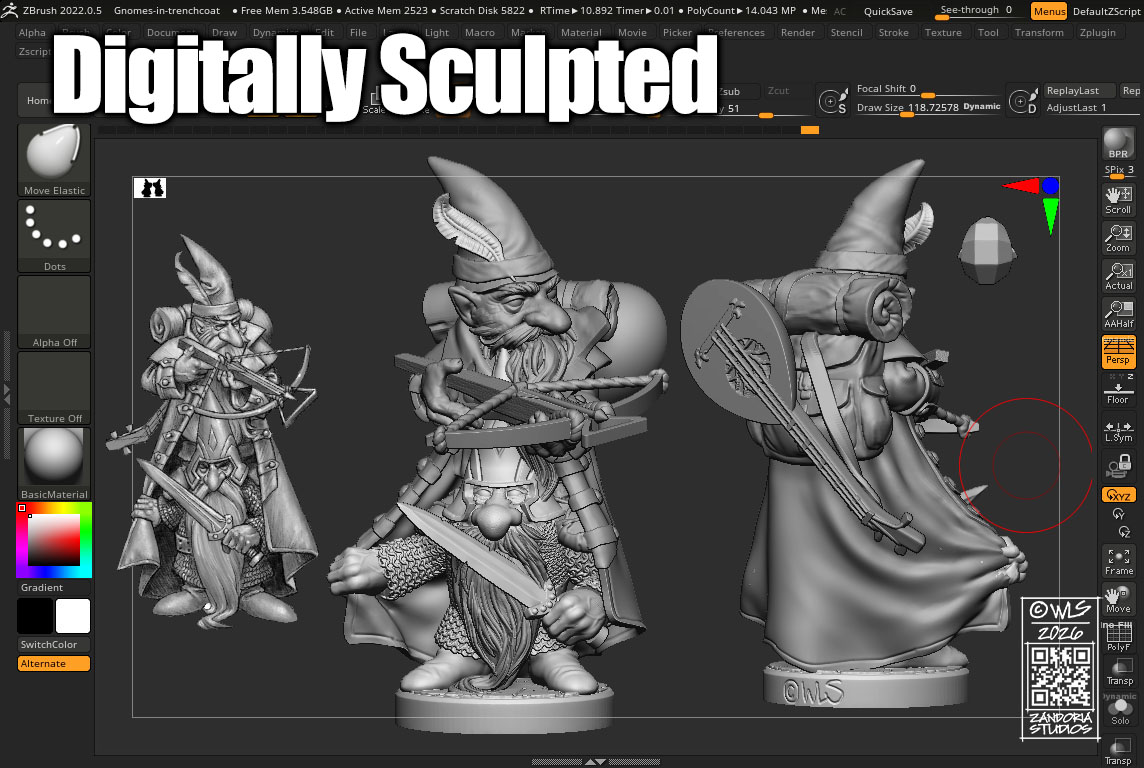
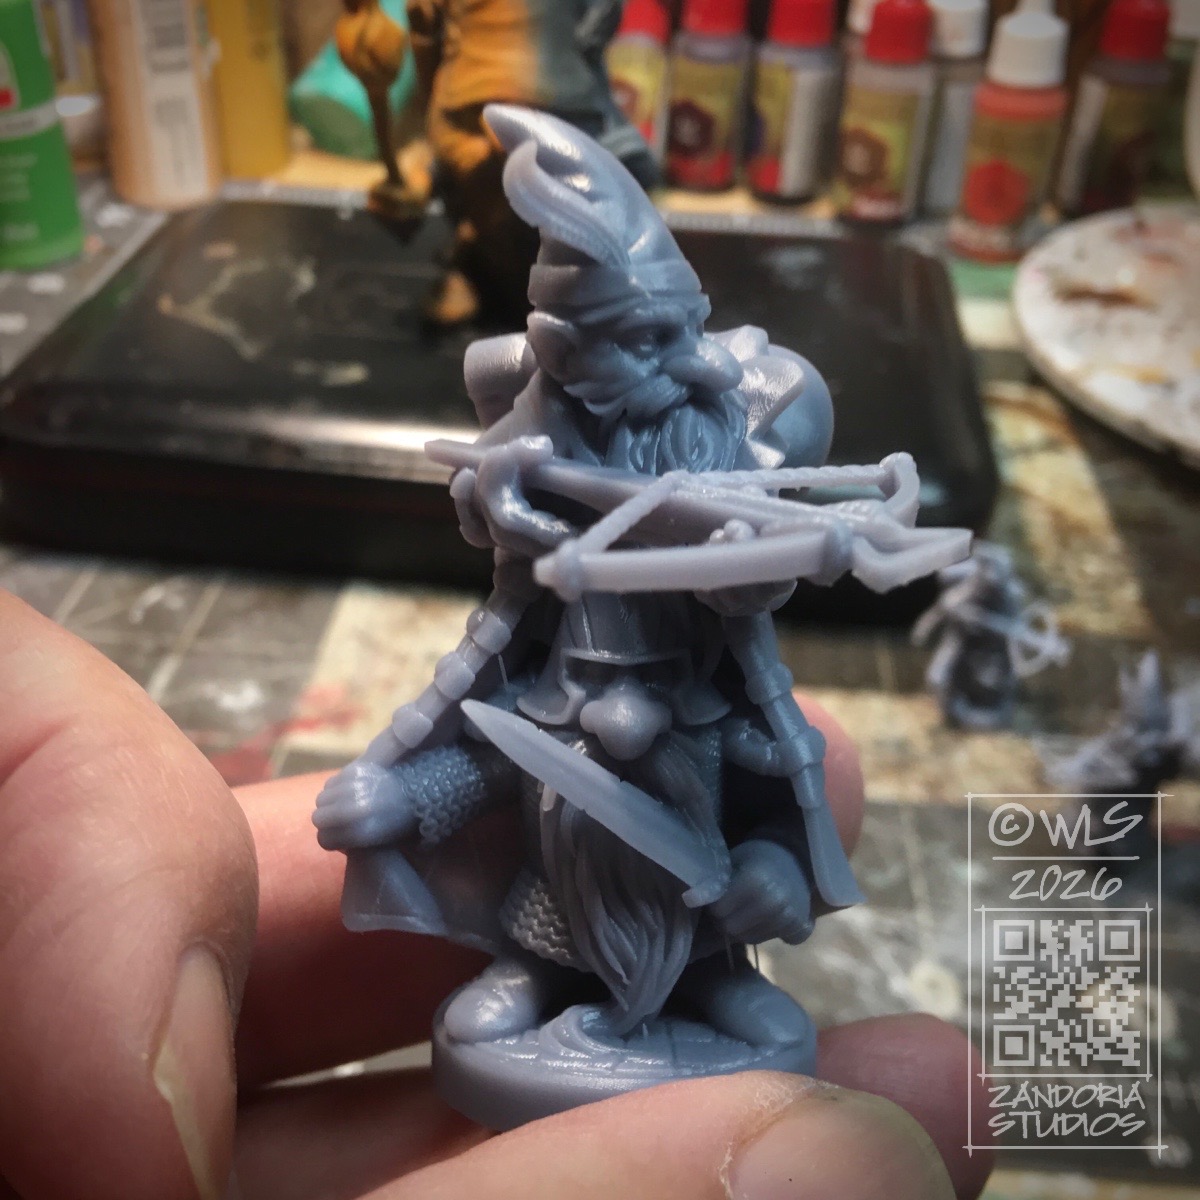
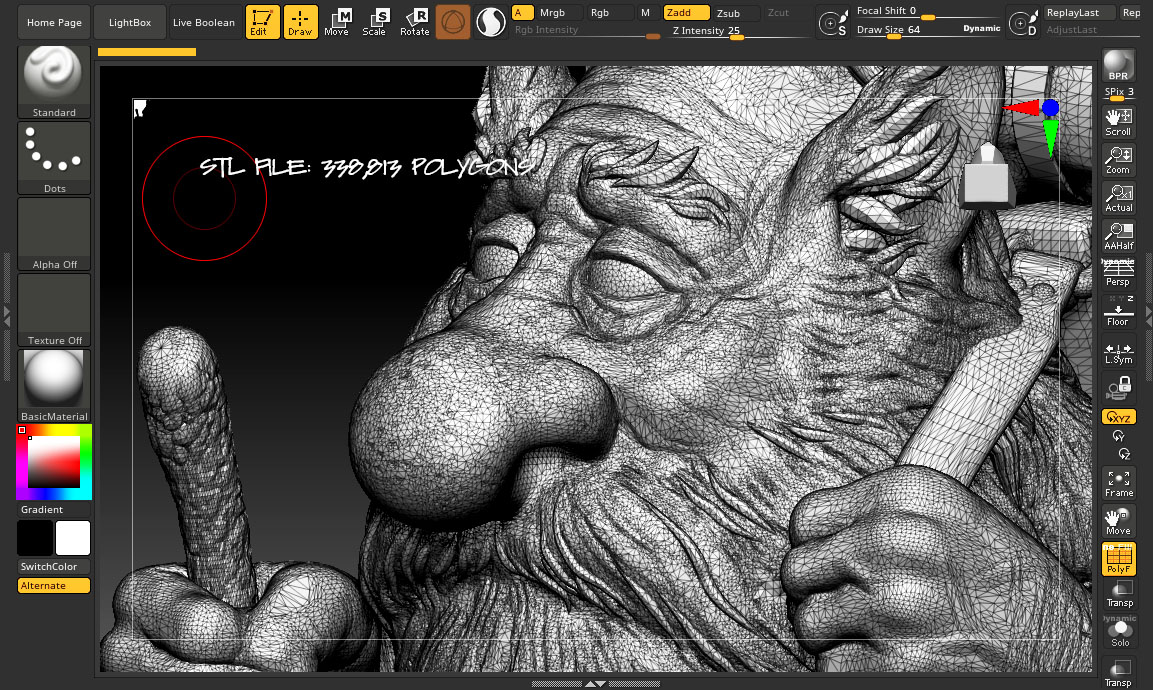
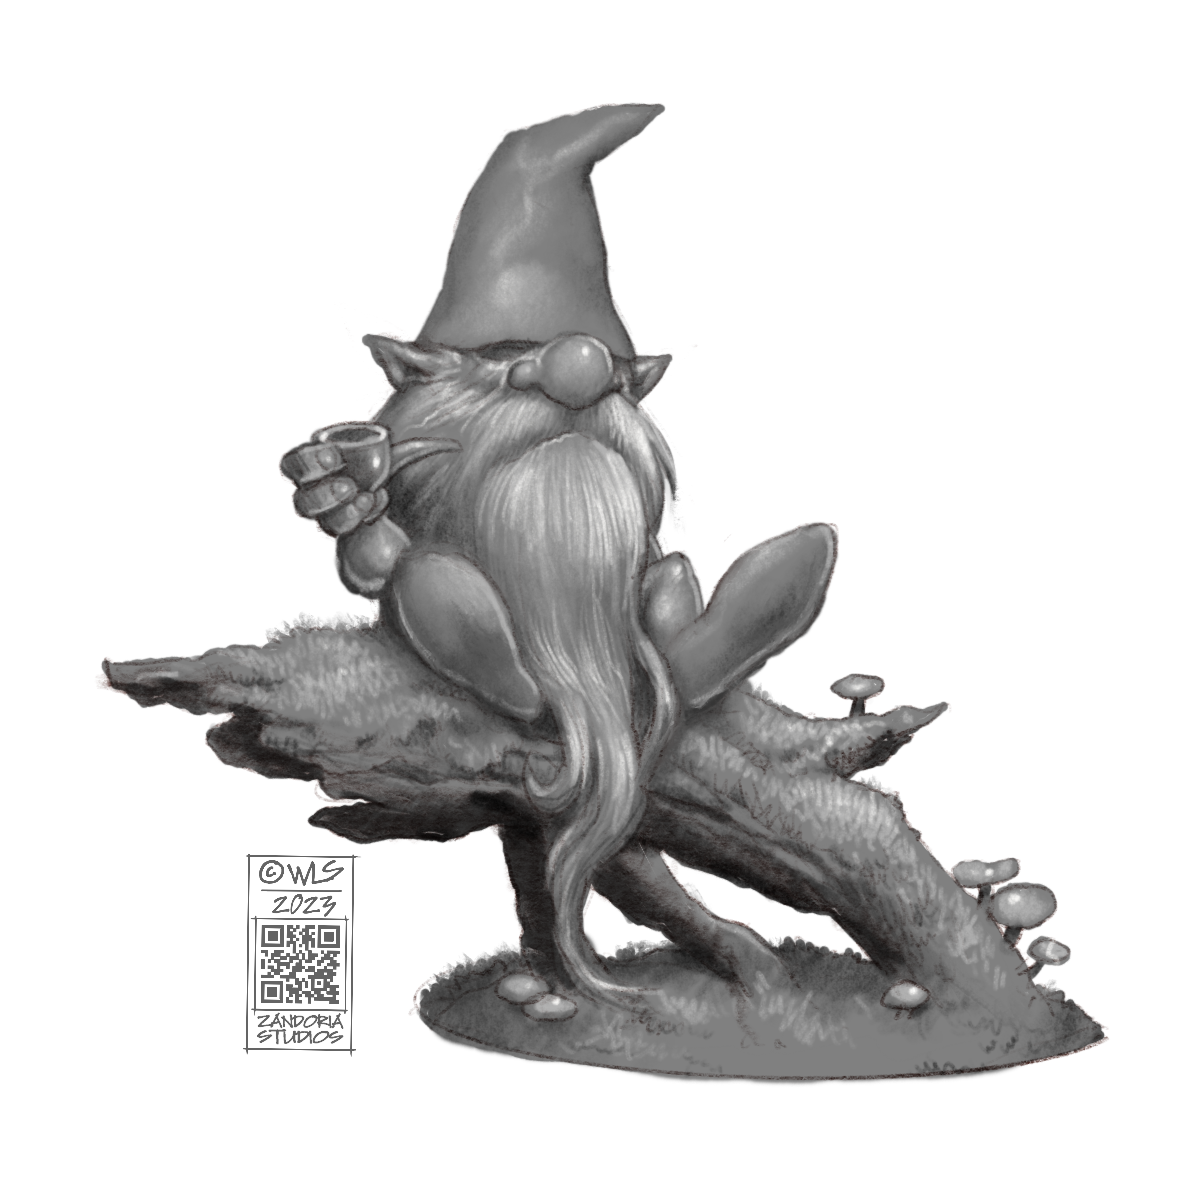
This Gonk Gnome is a digitally sculpted model for 3Dprinting. The STL file is what is used by the slicer to output the instructions to the printer. This polygon mesh is 338,813 polygons. The resolution is higher than the scan–meaning that the triangles are smaller, and denser.
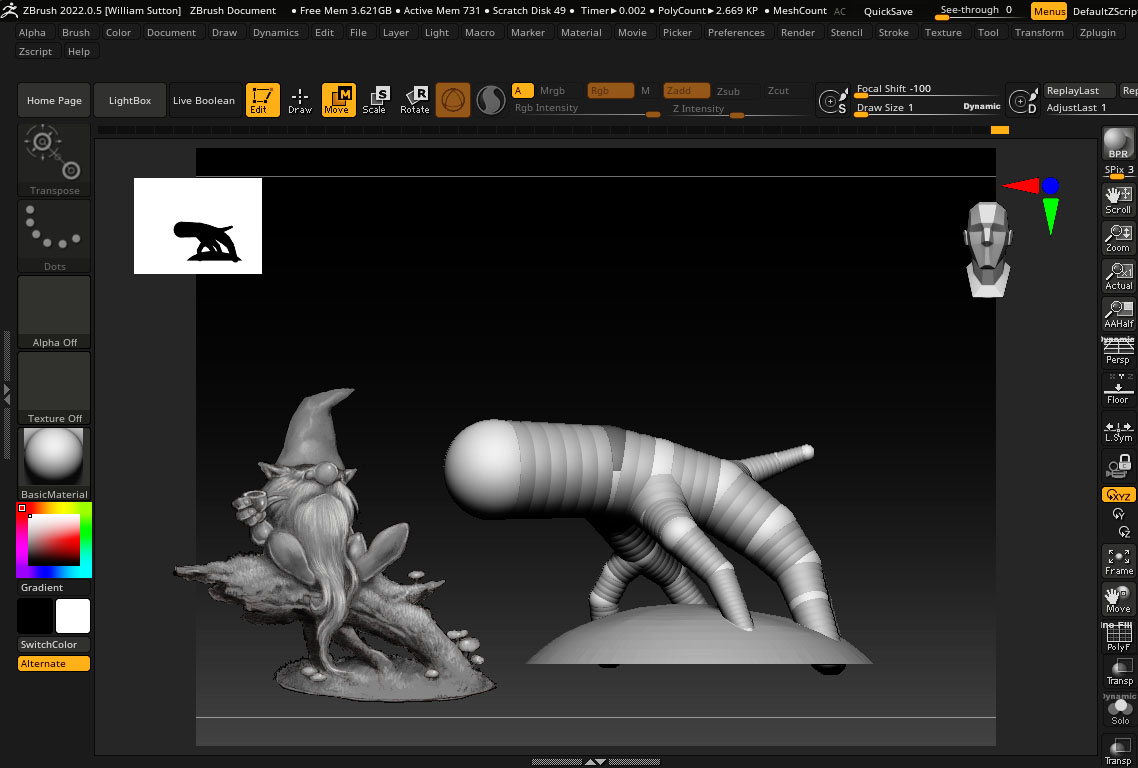
In ZBrush, the original mesh that is the actual digital sculpture, is over 4 MILLION polygons! If you notice those darker gray areas around the eyes, those are even denser polygons than the rest of the mesh. Sculpting digitally, you can zoom in and add more detail, and resolution (to the limits of the computers memory).
The reason that the STL file is less polygons is that it is decimated from the higher resolution mesh. A 3Dprinter slicer will have a hard time with a mesh over 1 million polygons, so you have to balance the amount of detail you can reproduce with those constraints and the intended size that you will print.
Here is a picture of that model 3Dprinted in resin. the layer thickness for a resin printer is .05mm (about the thickness of a human hair), so you need a magnifying glass to be able to see the layer lines…
3Dprinters are advertised with 2K, 4K, 8K, 12K (even higher has been announced), which is referring to how dense the pixels in the LCD screen are. This can get confusing, because a small screen size that is 2K might have the same density of pixels as a larger screen that is 4K. So, in choosing between the different resolutions offered in 3Dprinters, it is important to choose a size that fits your needs, then worry about how much resolution in in that LCD screen. Ideally, the XY resolution (the LCD screen) and the Z (the layer height) should be the same.
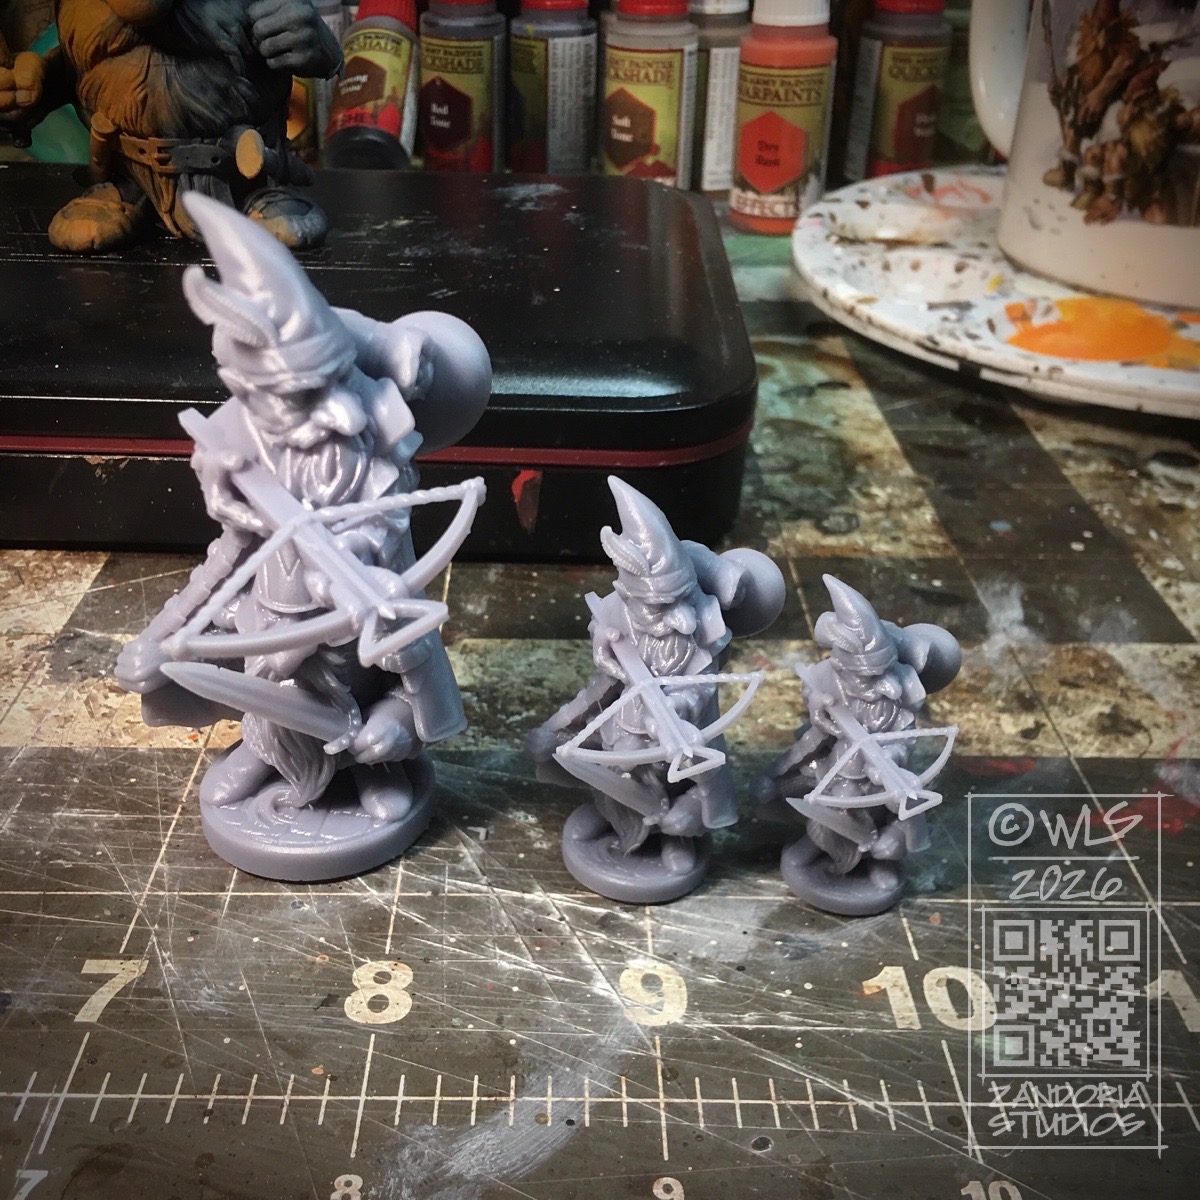
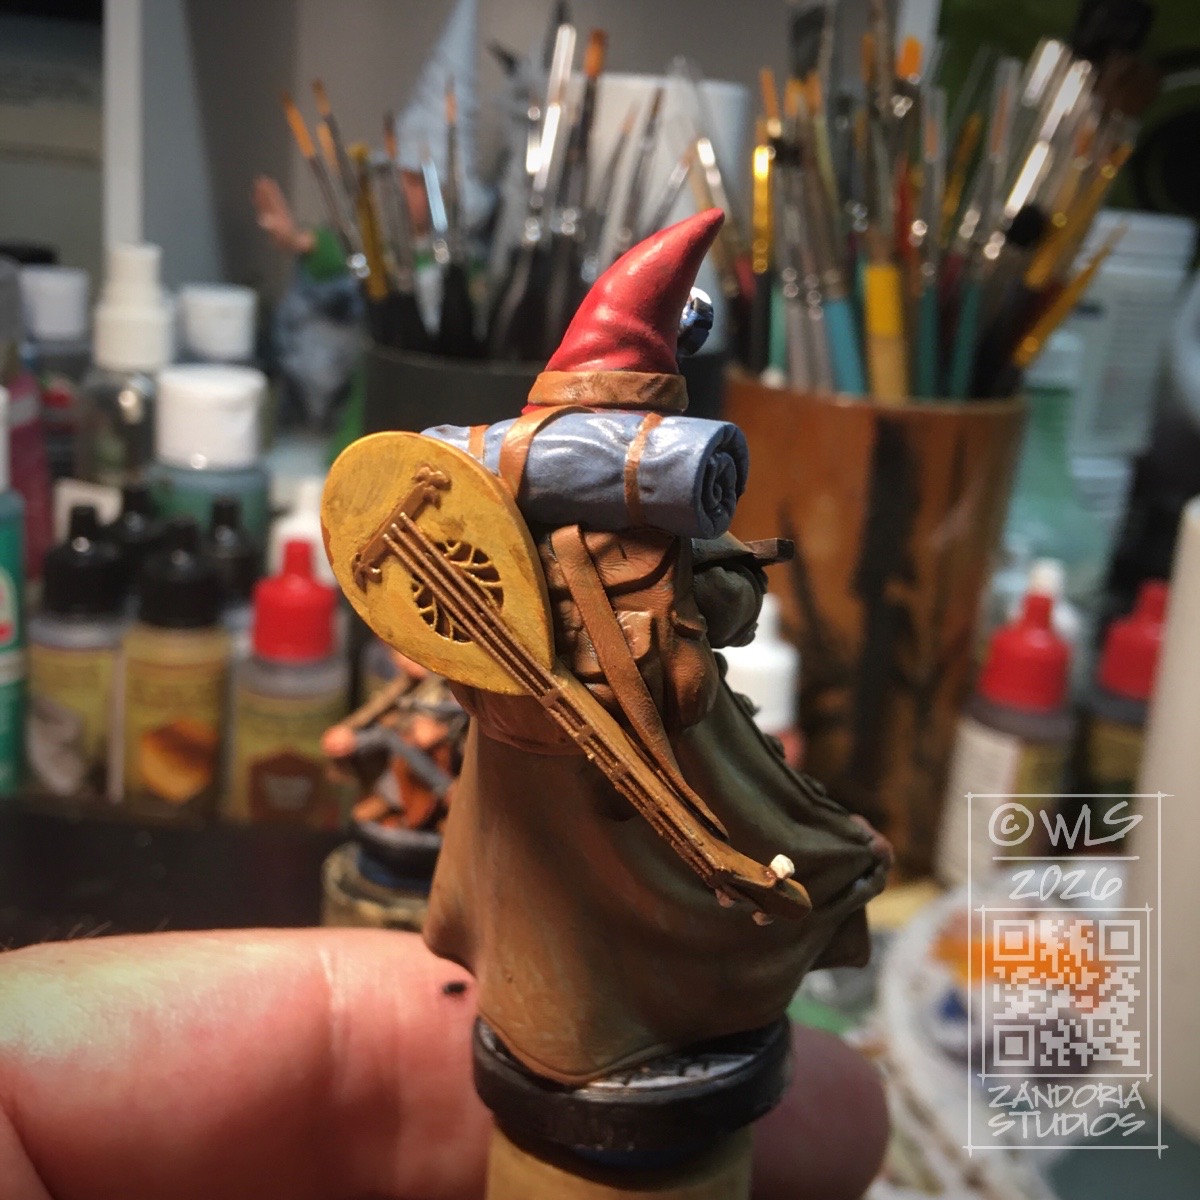
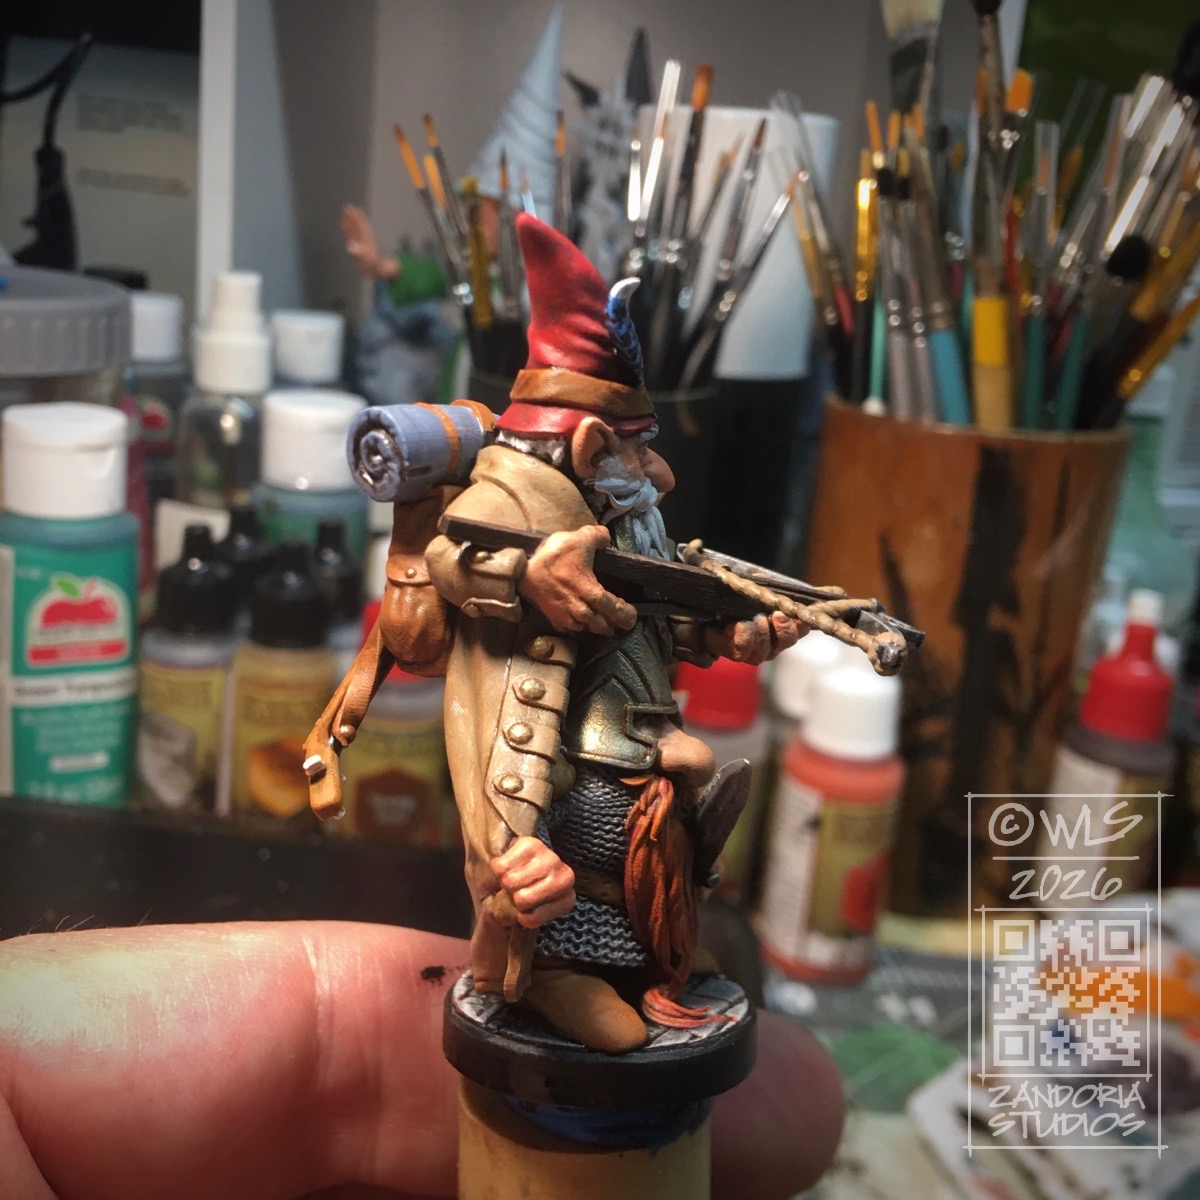
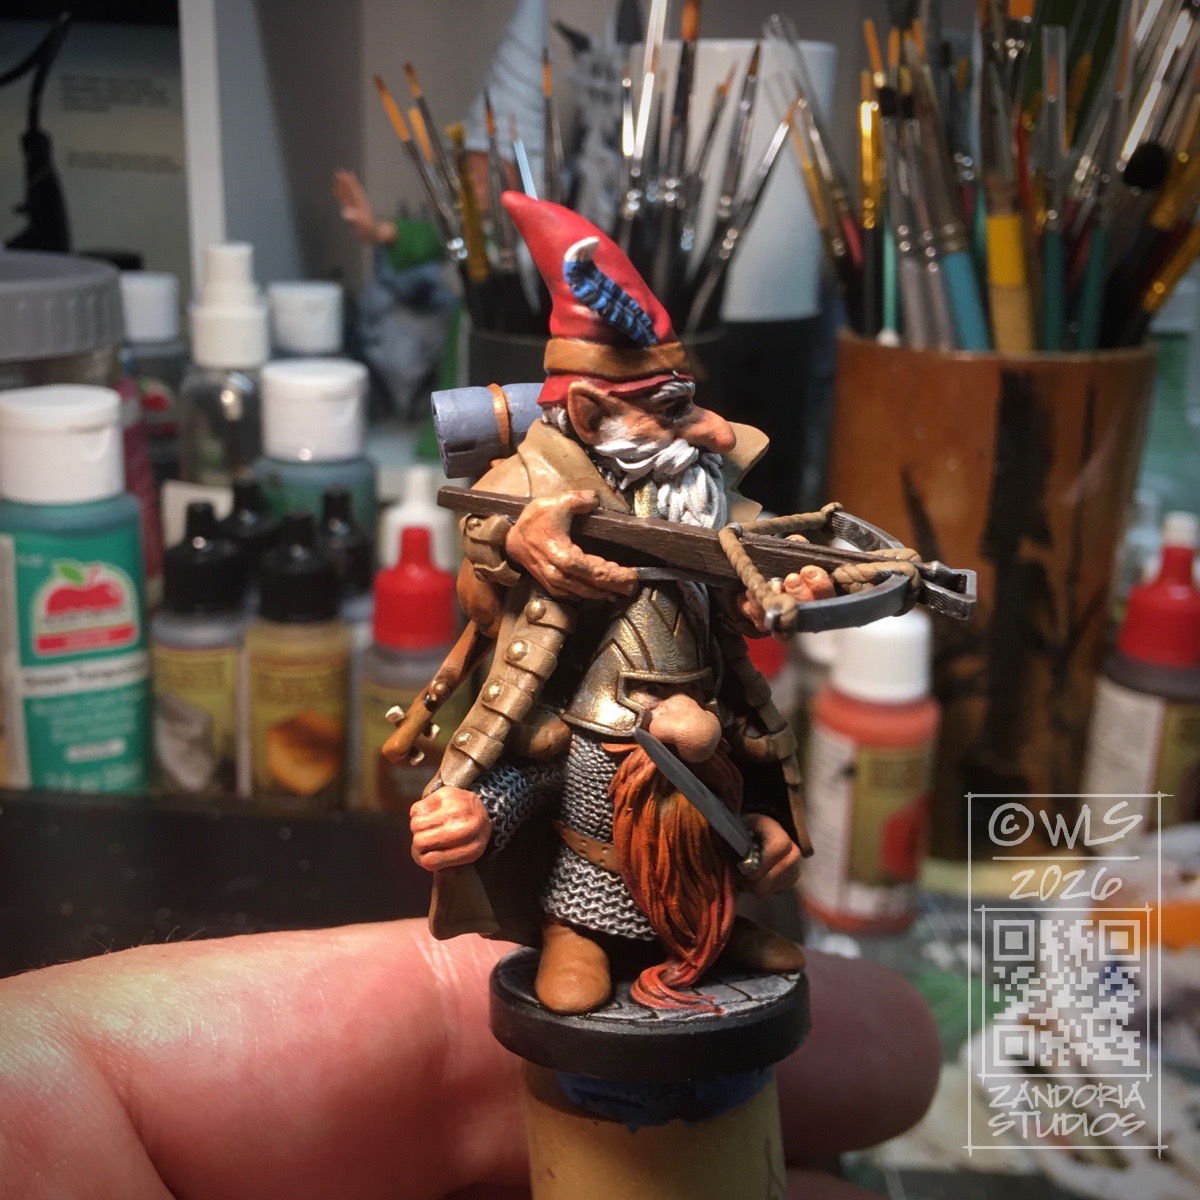
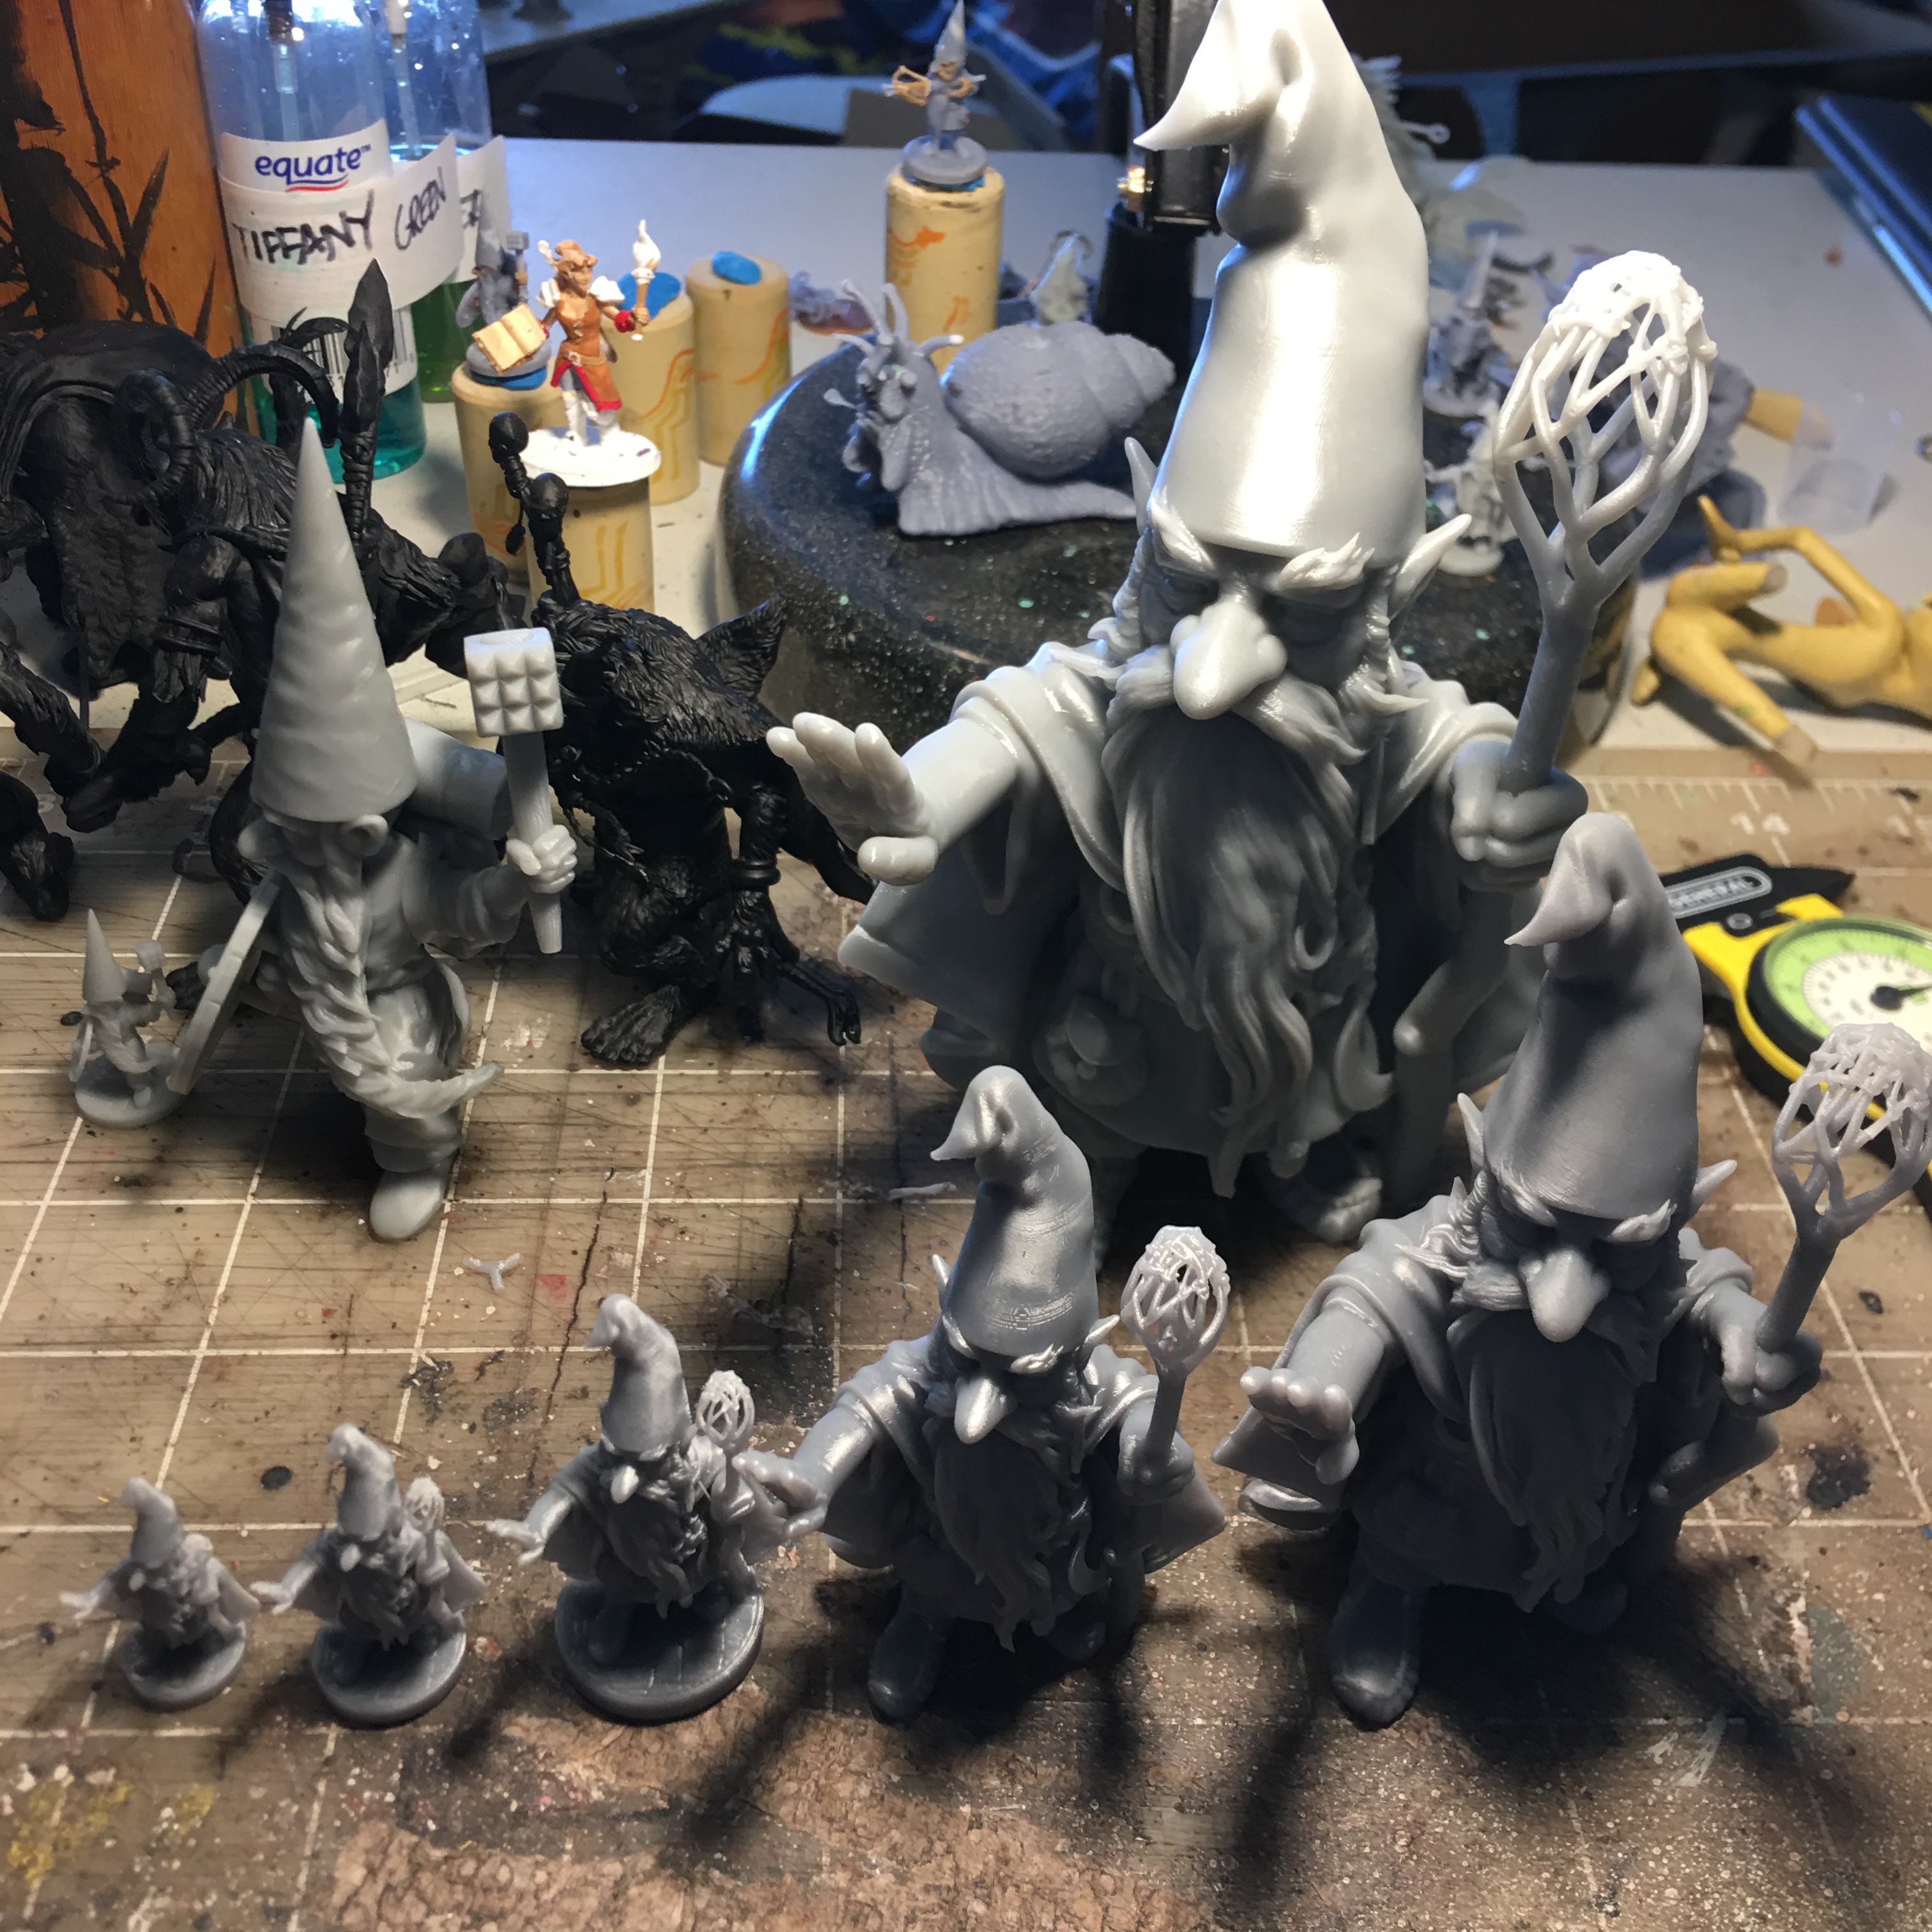
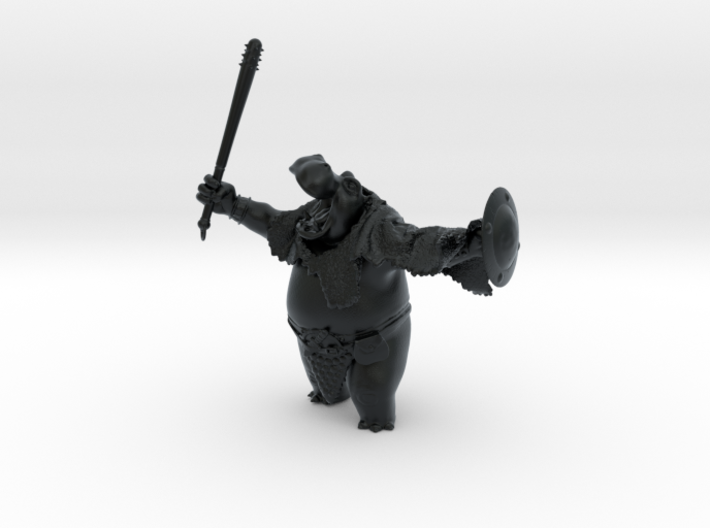
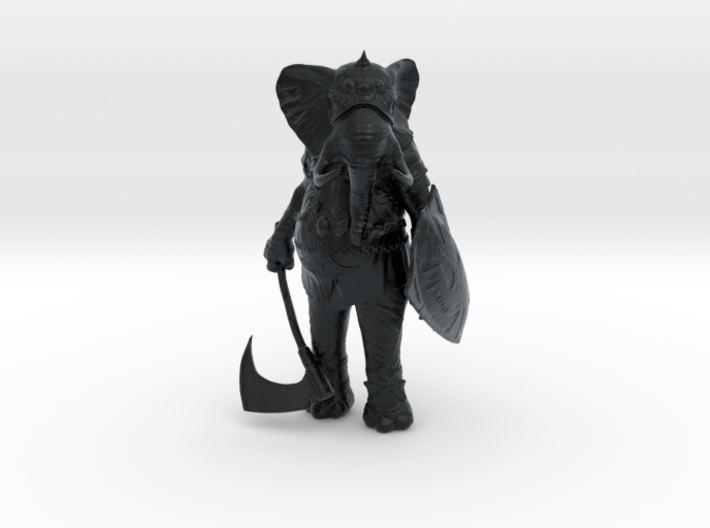
This Gonk adventurer is the same model, but at different scales. the density of the polygons is high enough that even when printed larger the detail is there. If the gonk was printed even smaller than a D&D miniature, you will start to lose the finer details as the size of the triangles of the polygon mesh become smaller than the XYZ resolution of the printer. If you printed larger than a figurine, like a 4′ or taller statue, the size of the triangles of the polygon mesh would become visible.
Because there can be so much variation in size for the 3Dprints, I usually will decimate the mesh to between 300,000 and 600,000 polygons. That provides enough resolution to the polygon mesh, so that the detail is there even if you need some 2′ Guardin’ Gnomes.
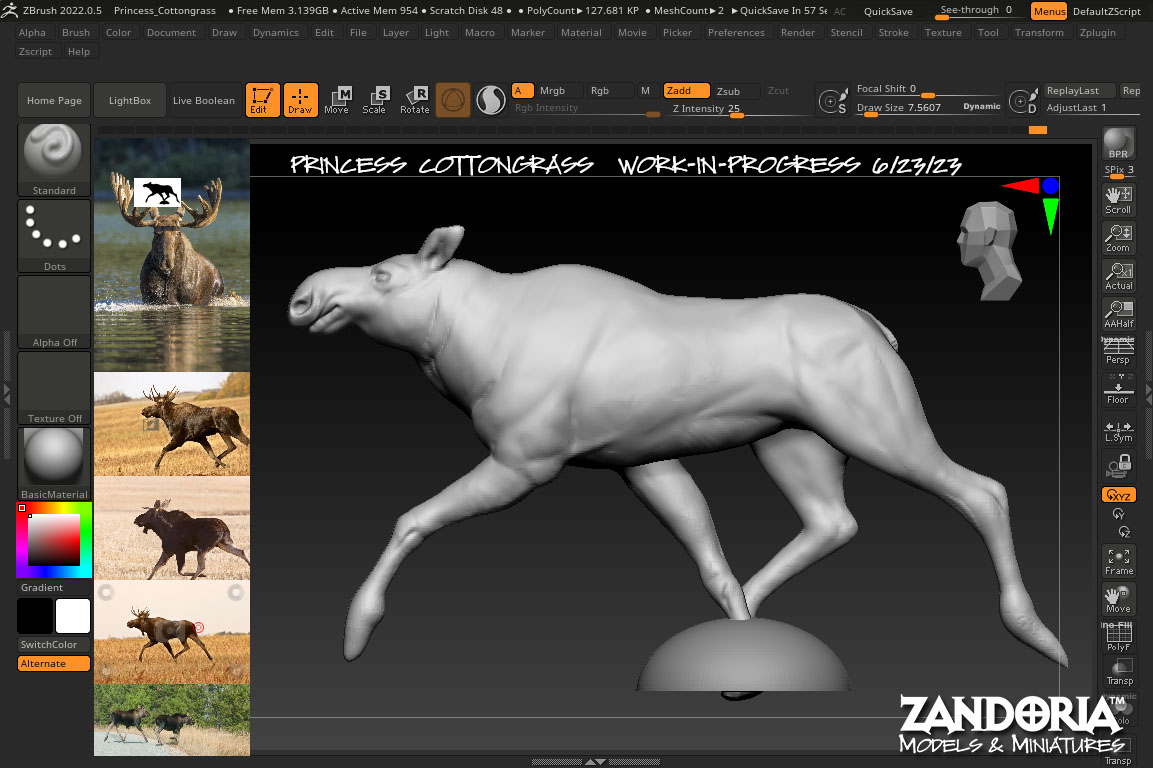
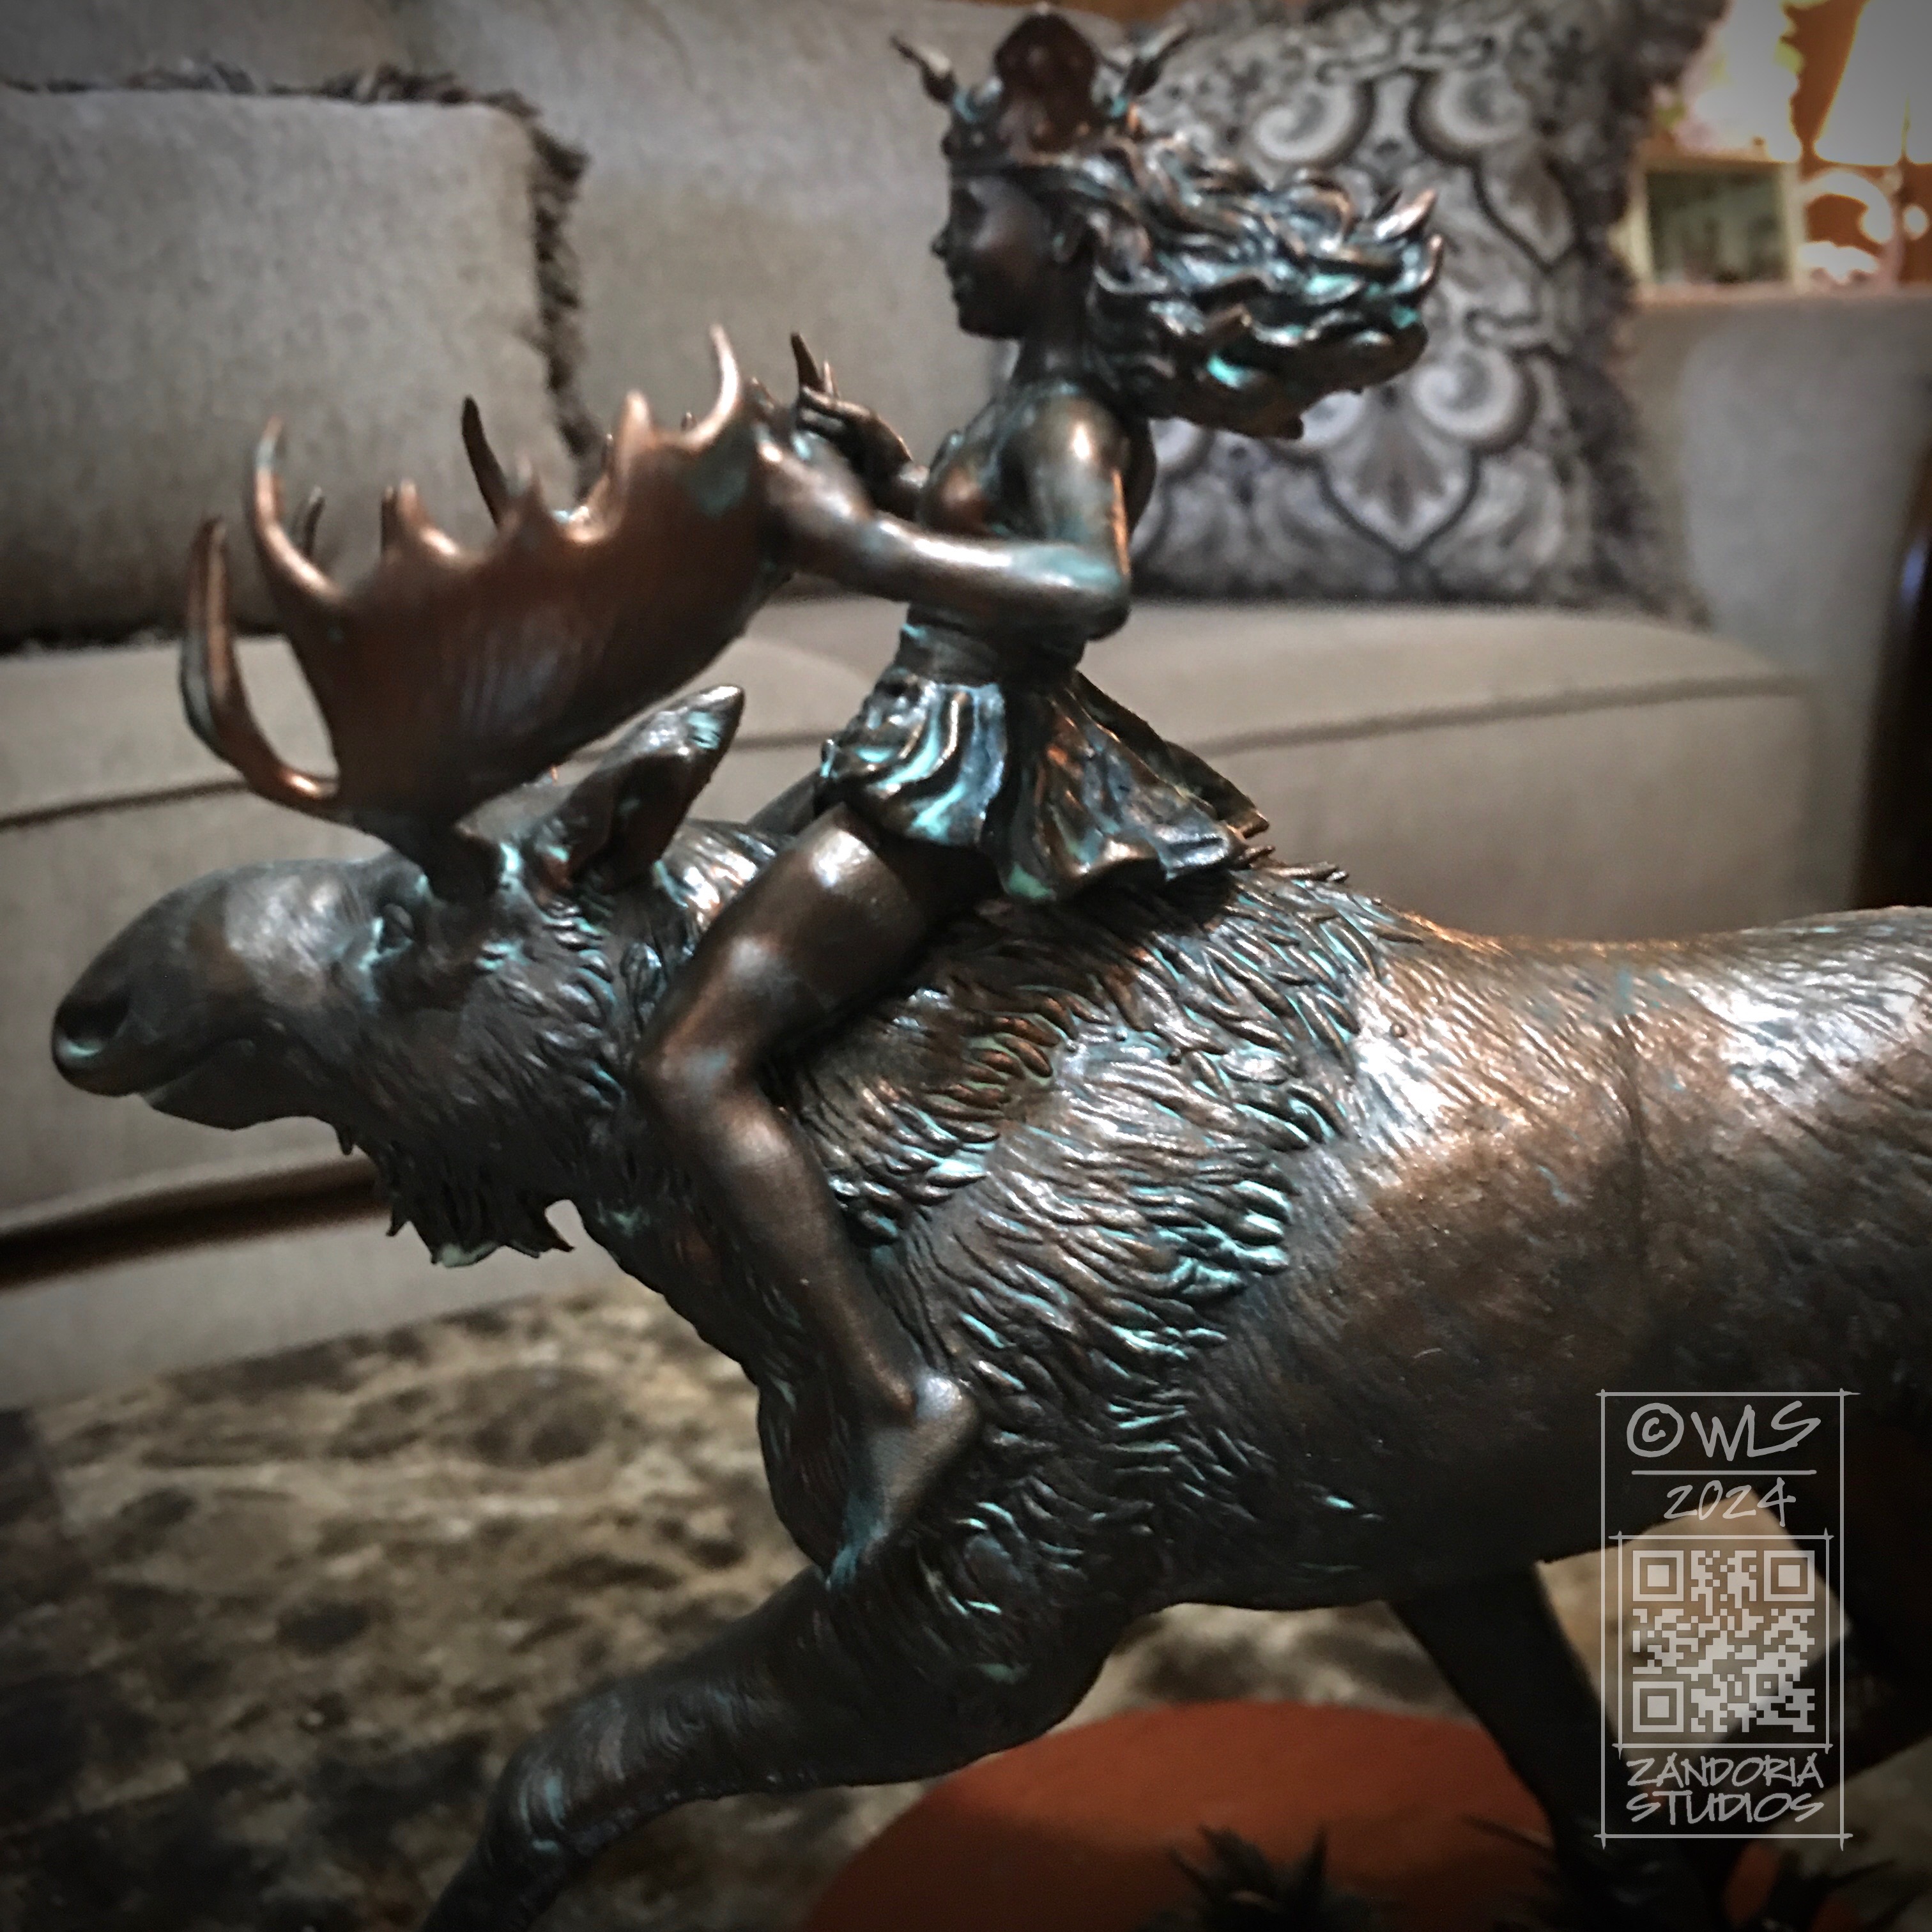
This is an illustration by John Bauer from a fairytale about Leap the Elk and Little Princess Cottongrass, written by Helge Kjellin and illustrated by John Bauer (1913). I thought it would be a fun project to try to make a sculpture based on this story.
concept sketch
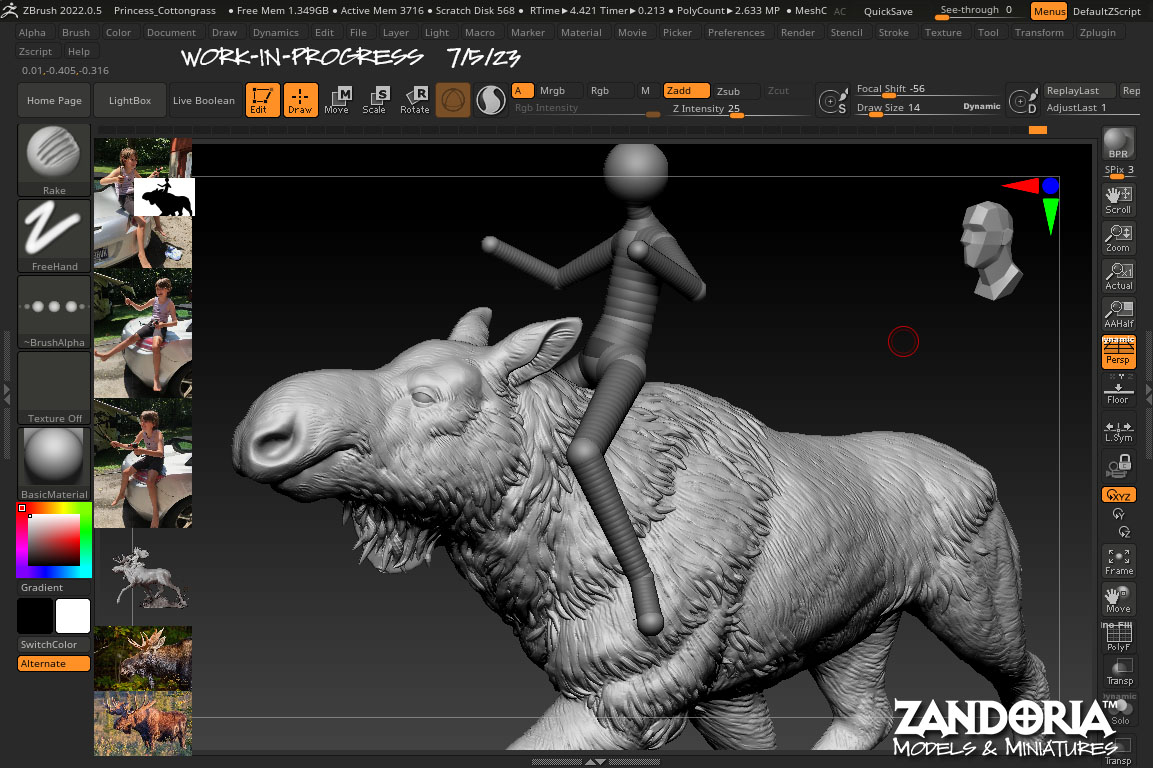
I started with some mesh balloons in ZBrush to block out the basic moose shape. Next I used Dynamesh to merge it together and sculpted the details. I made a ZSphere armature for the princess to give myself a basemesh to sculpt.
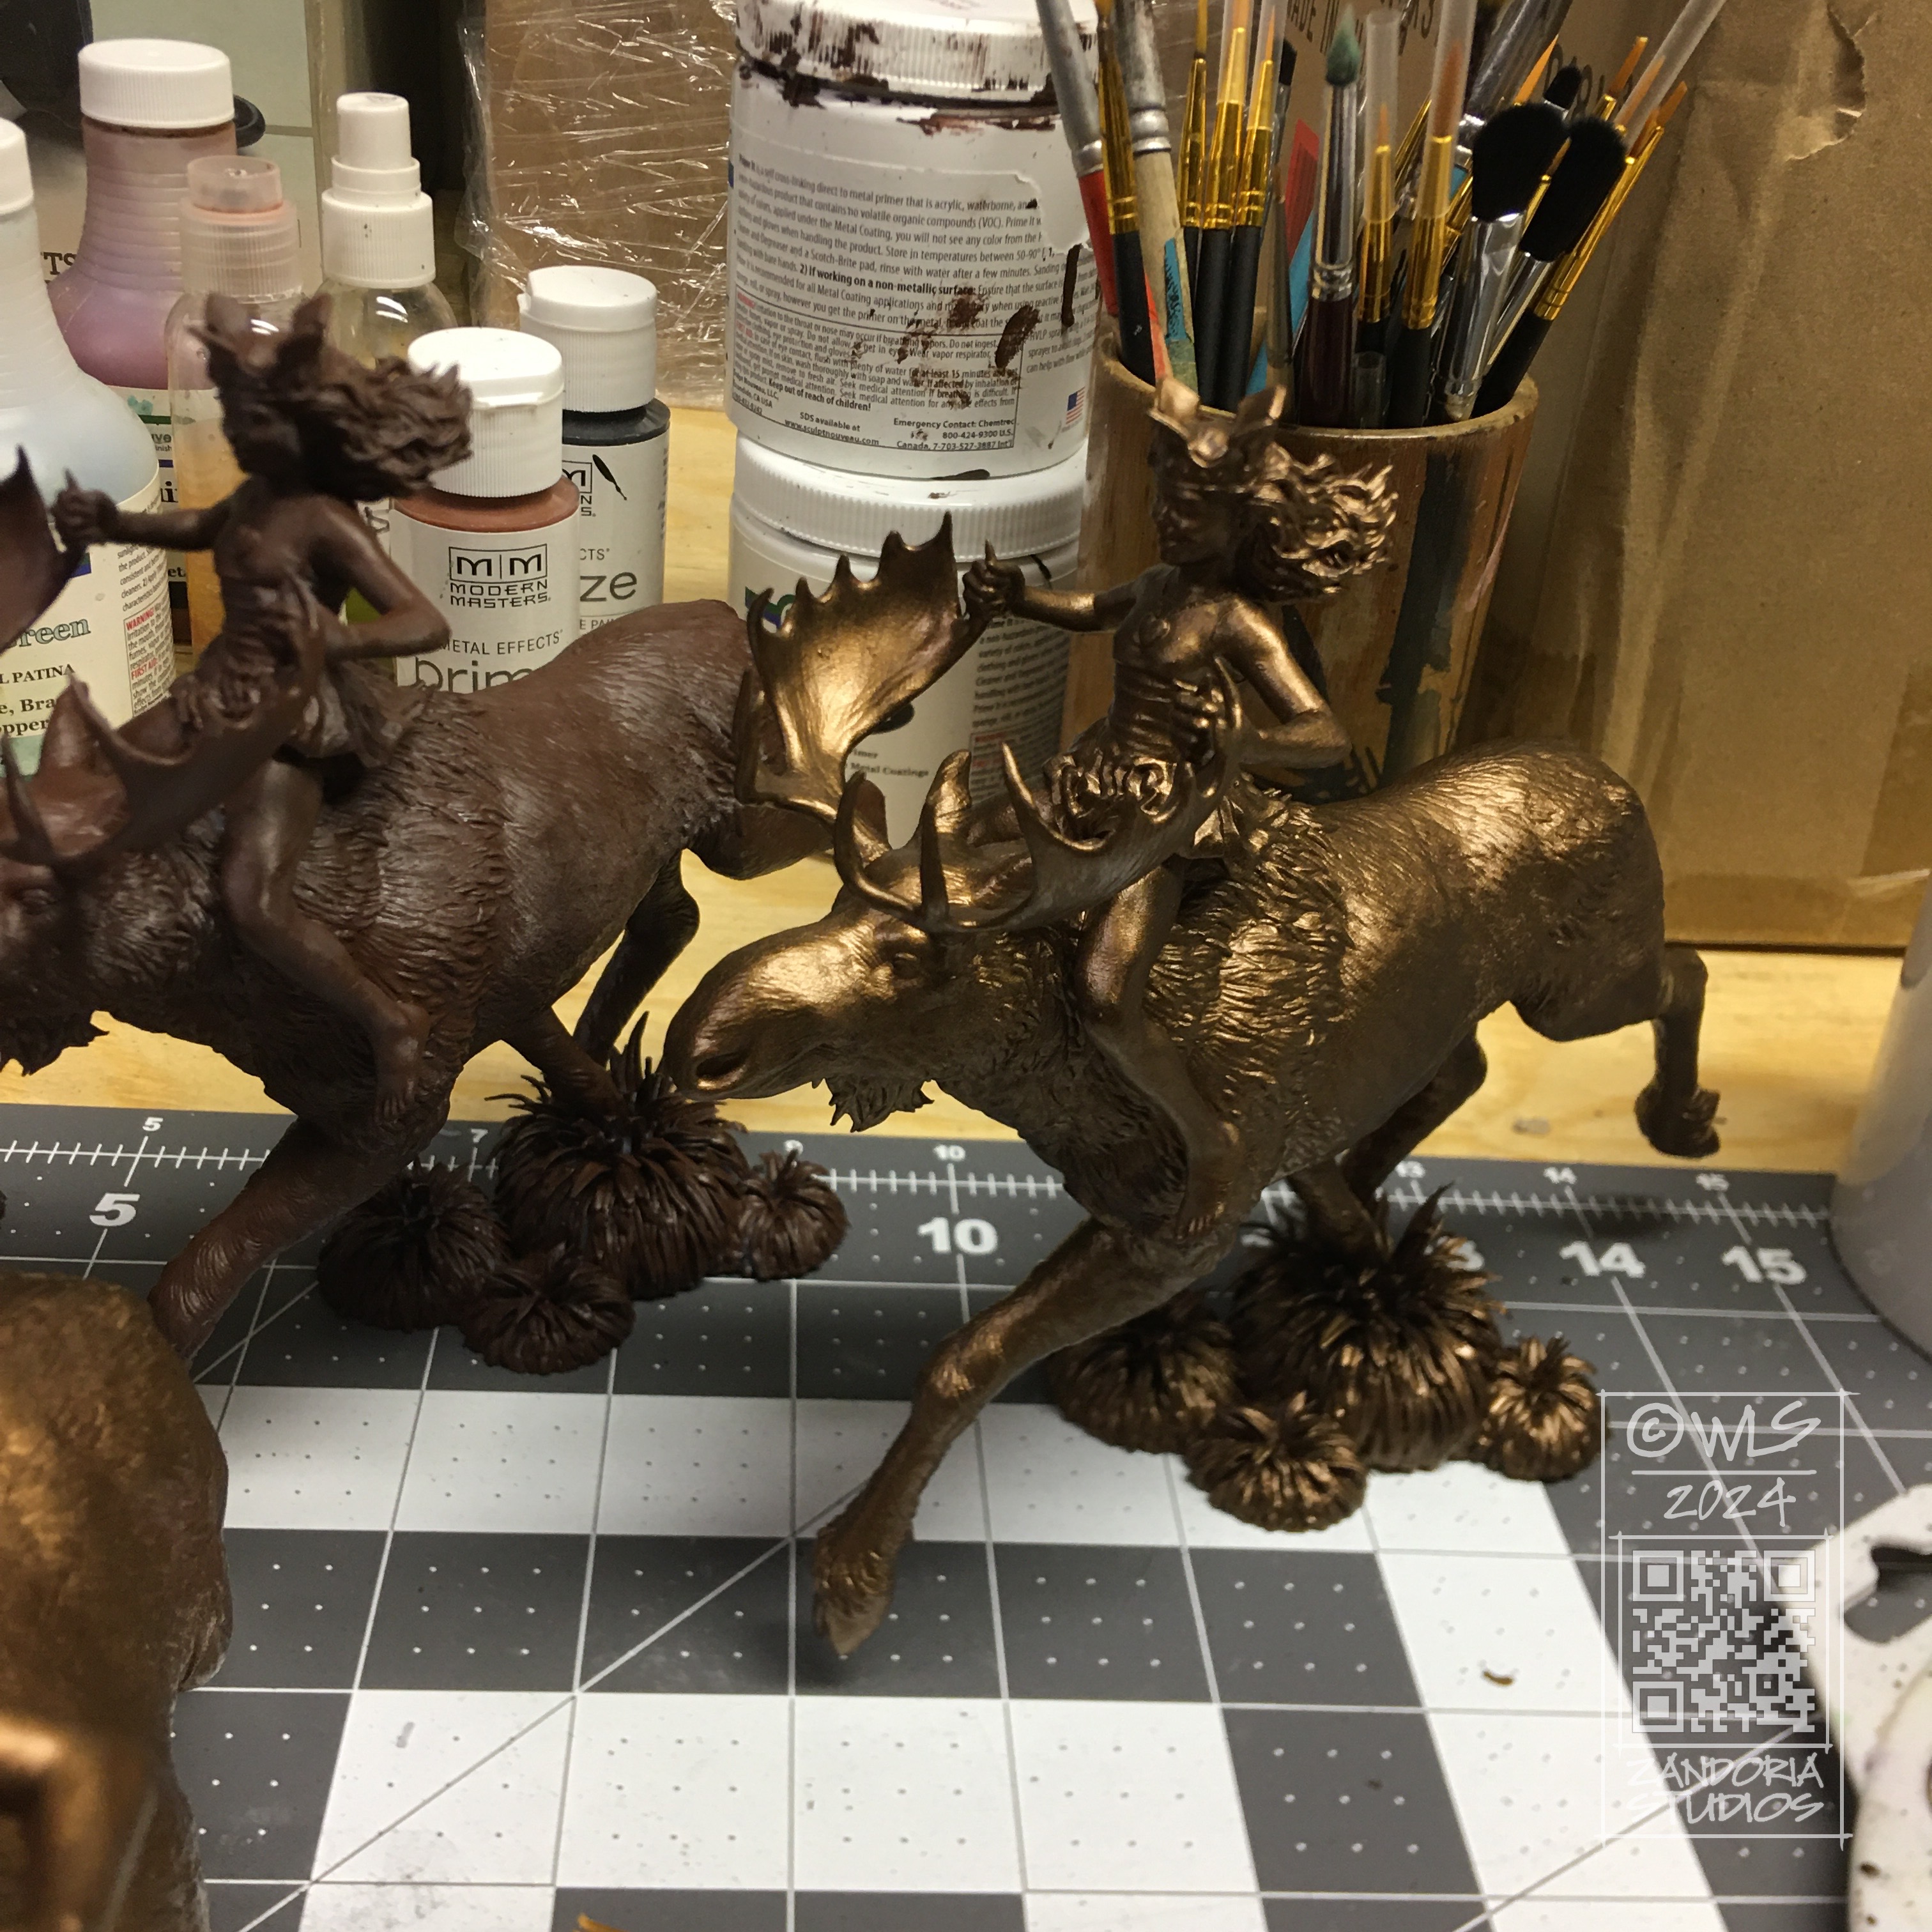
After the digital sculpture is finished, I use a resin 3Dprinter to reproduce. Next is a 3 step process of applying a bronze metal coating and acid patina.
This edition is limited to only 20 pieces, and comes with a certificate of authenticity. It is 6″ tall and about 8″ from end to end.
I was sitting on the edge of the woods, smoking my pipe. listening to the wind in the trees and watching a couple of squirrels. I had work that I needed to do, but I decided that I also needed a break.
That became my inspiration for a new gnome. I did a few doodles and came up with a pose that I liked. I also wanted to have him on a mossy log or branch, so I adjusted the sketch until I had a final concept.
The first thing that I did in ZBrush was to rough in where the gnome would be sitting, and also match the diameter of the base with a 3″ wood base that I planned to use.
I exported my sketch from Procreate with a transparent background as a .PNG file. This allows me to load the image into Spotlight inside of ZBrush and float it above my workspace as a reference, without the background obscuring my viewport. The Stump is drawn with Zspheres to match the sketch.
After converting it into a mesh, I sculpted the wood and extracted some bark. then once that was ready, I masked and extracted the areas that I wanted to be covered with moss. To create the moss texture, I used surface noise and inflate.
I started blocking in the gnome with two spheres and a cone. I used the curve tube brush to draw the legs and arms (you can see the right arm in this screenshot is still just a tube). Those simple shapes are subdivided and dynameshed so that the details can be sculpted. the beard area is just roughed in, because I know I will be building it later.
Here is a closeup of that arm. The arm and hand are finished, holding the pipe. I’ve extracted geometry to make the sleeve. I will use the cloth move brush to shape it before sculpting the details and stitching…
The beard is made using the Alpha curve brush. Each lock of hair is drawn as a curve, with an irregular shaped black and white image defining the cross-section of the lock of hair as it is extruded along the curve. The lock is tapered at one end, and because the stroke is a curve, you can manipulate it, twist it and move it into place before you commit to it.
Here is the model, 3Dprinted in resin. I was very pleased that all of my mushrooms printed and nothing broke off! Printed with Mighty4K using 3DRS Hard Grey resin.
Using an airbrush, I primed the model in black. Then I used grey primer at a downward angle to simulate ambient lighting. The “zenithal” priming brings out the details and will enhance the painting, even though it will be covered.
I have made a step-by-step tutorial, if you are wanting to paint your own gnomes–Here is the link
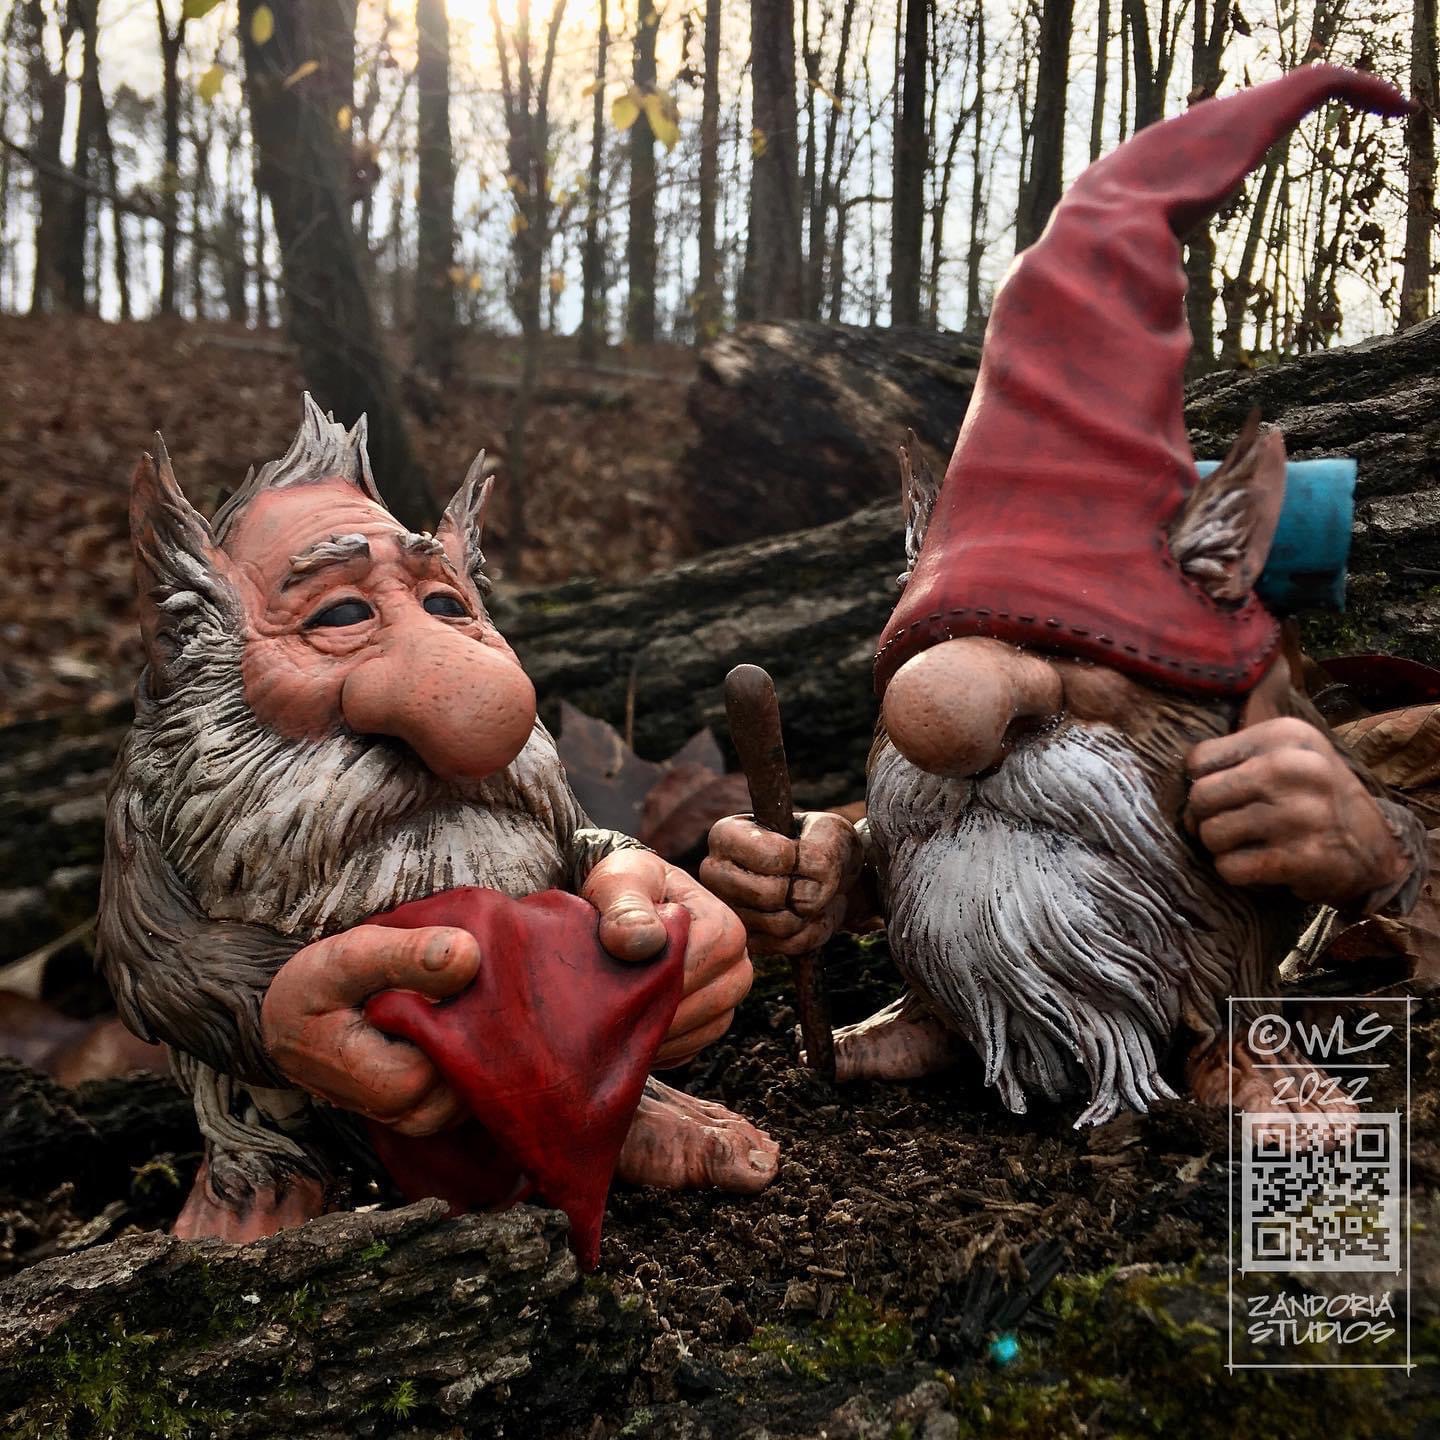
Here is the finished gnome, enjoying his pipe!
I hope that you enjoyed this look at the process. If you are into 3Dprinting, you can get the STL to print your own on my Patreon. If you would like to just buy the finished figurine, I have them available (unpainted, bronze, hand-painted) on my Etsy shop.
I was talking to a friend of mine today about a 3Dprinting project. He was unaware that I had a 15 year background in design for manufacturing, and I realized that maybe it would be a good idea to talk about CAD (Computer Aided Design), and how I integrate it with some of the work I create for 3Dprinting.
When creating an object that is to be manufactured, or that has to mate up with other components, It is critical to use CAD to make sure that all of your dimensions and tolerances are going to work. Much of my freelance work combines CAD with digital sculpting, allowing me the best of both worlds–especially when dealing with 3Dprinting.
Part of a Tap Handle designed in RhinoIncendiary Tap Handle for Big Bridge Manufacturing
For this tap handle for Big Bridge Design, which is manufactured with resin 3Dprinting, the handle needs to mate up with a brass insert nut, so that the handle can be screwed onto the beer tap. Using Rhino I am able to utilize the clients 2D Illustrator file (.ai) to create a 3D model with the basic graphic design elements at the precise size, and also create the threads to receive the metal insert. The skulls are sculpted in ZBrush.
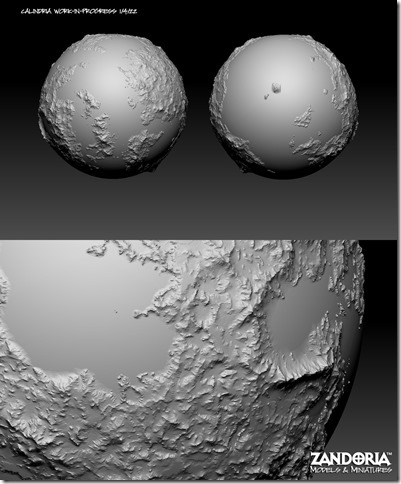
Turning the World of Calindria into a 3D model
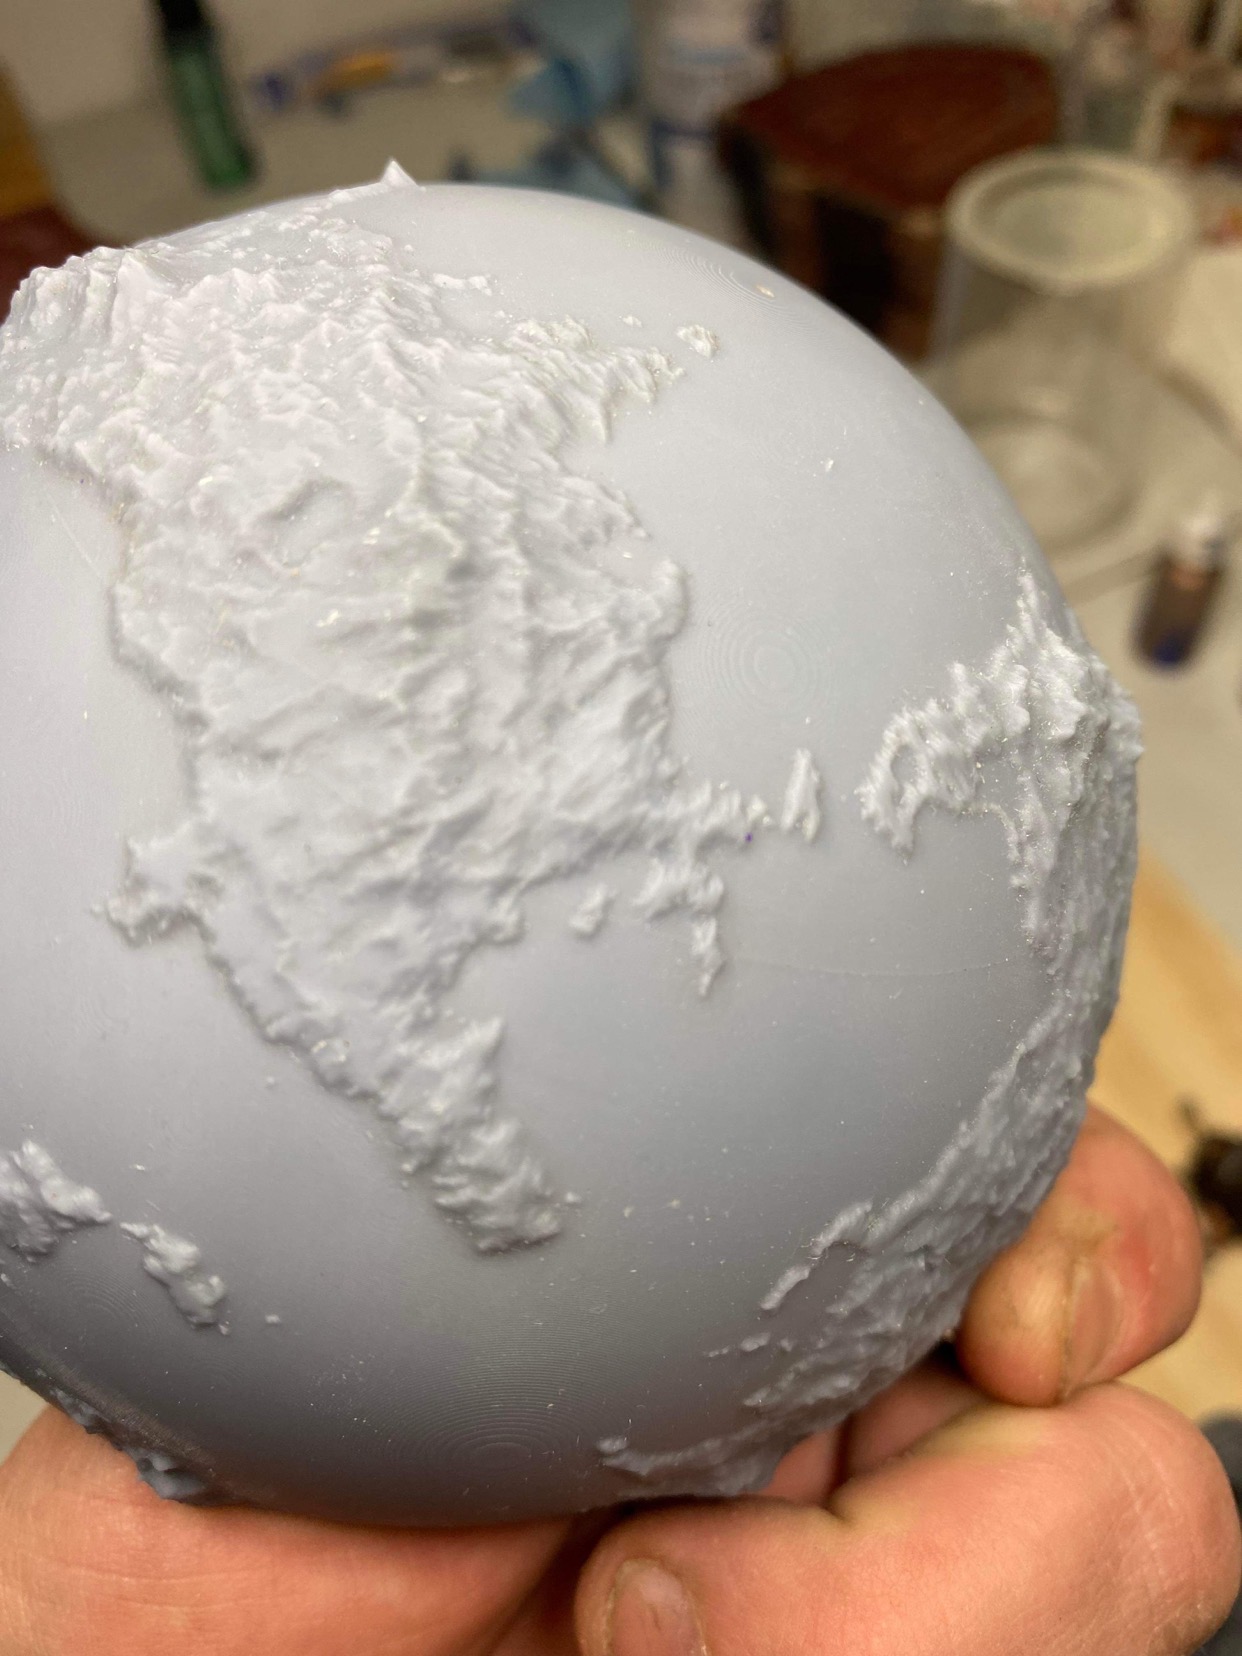
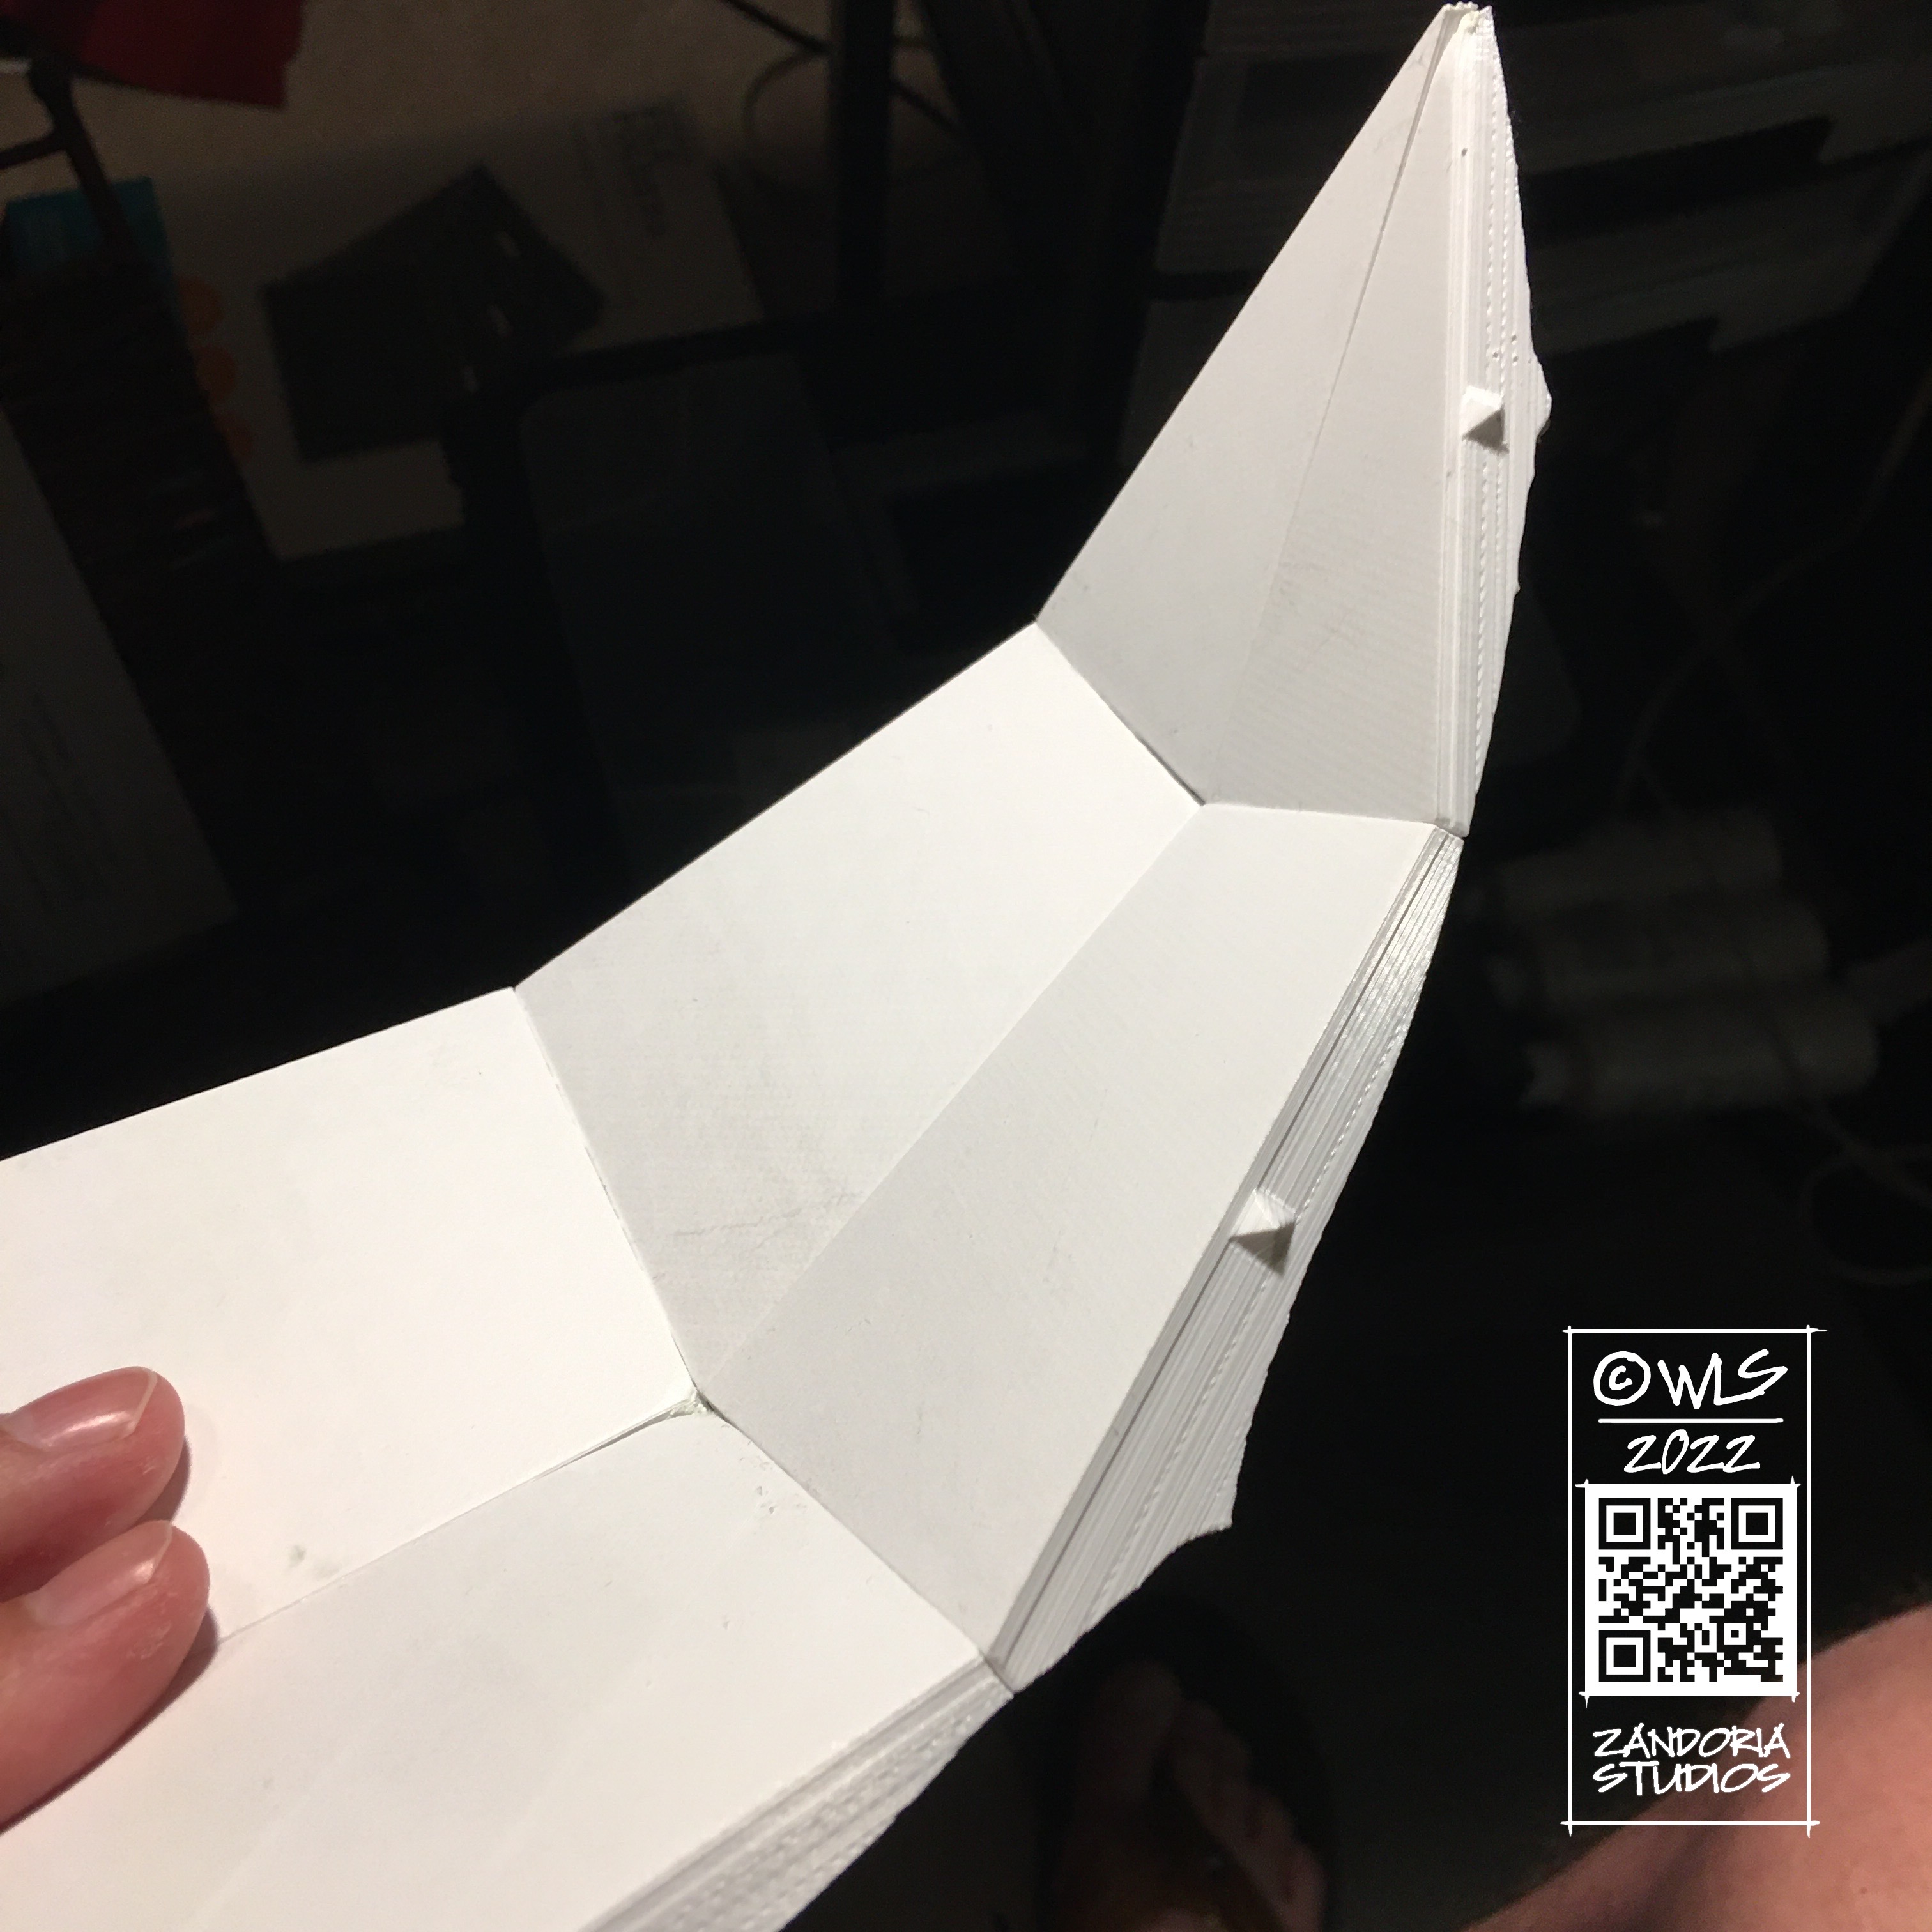
This globe project was to create a 3Dprintable world for Noble Dwarf, the publisher of a tabletop role-playing setting Legends of Calindria. It is not too difficult to generate terrain based on the clients map, but it also needed to be printed in sections and have keys for assembly.
I created a globe in CAD and split it into sections. then used ARRAY commands to position all of the interlocking keys. The surfaces of the sections were subdivided and projected against the terrain in ZBrush to get the final shape.
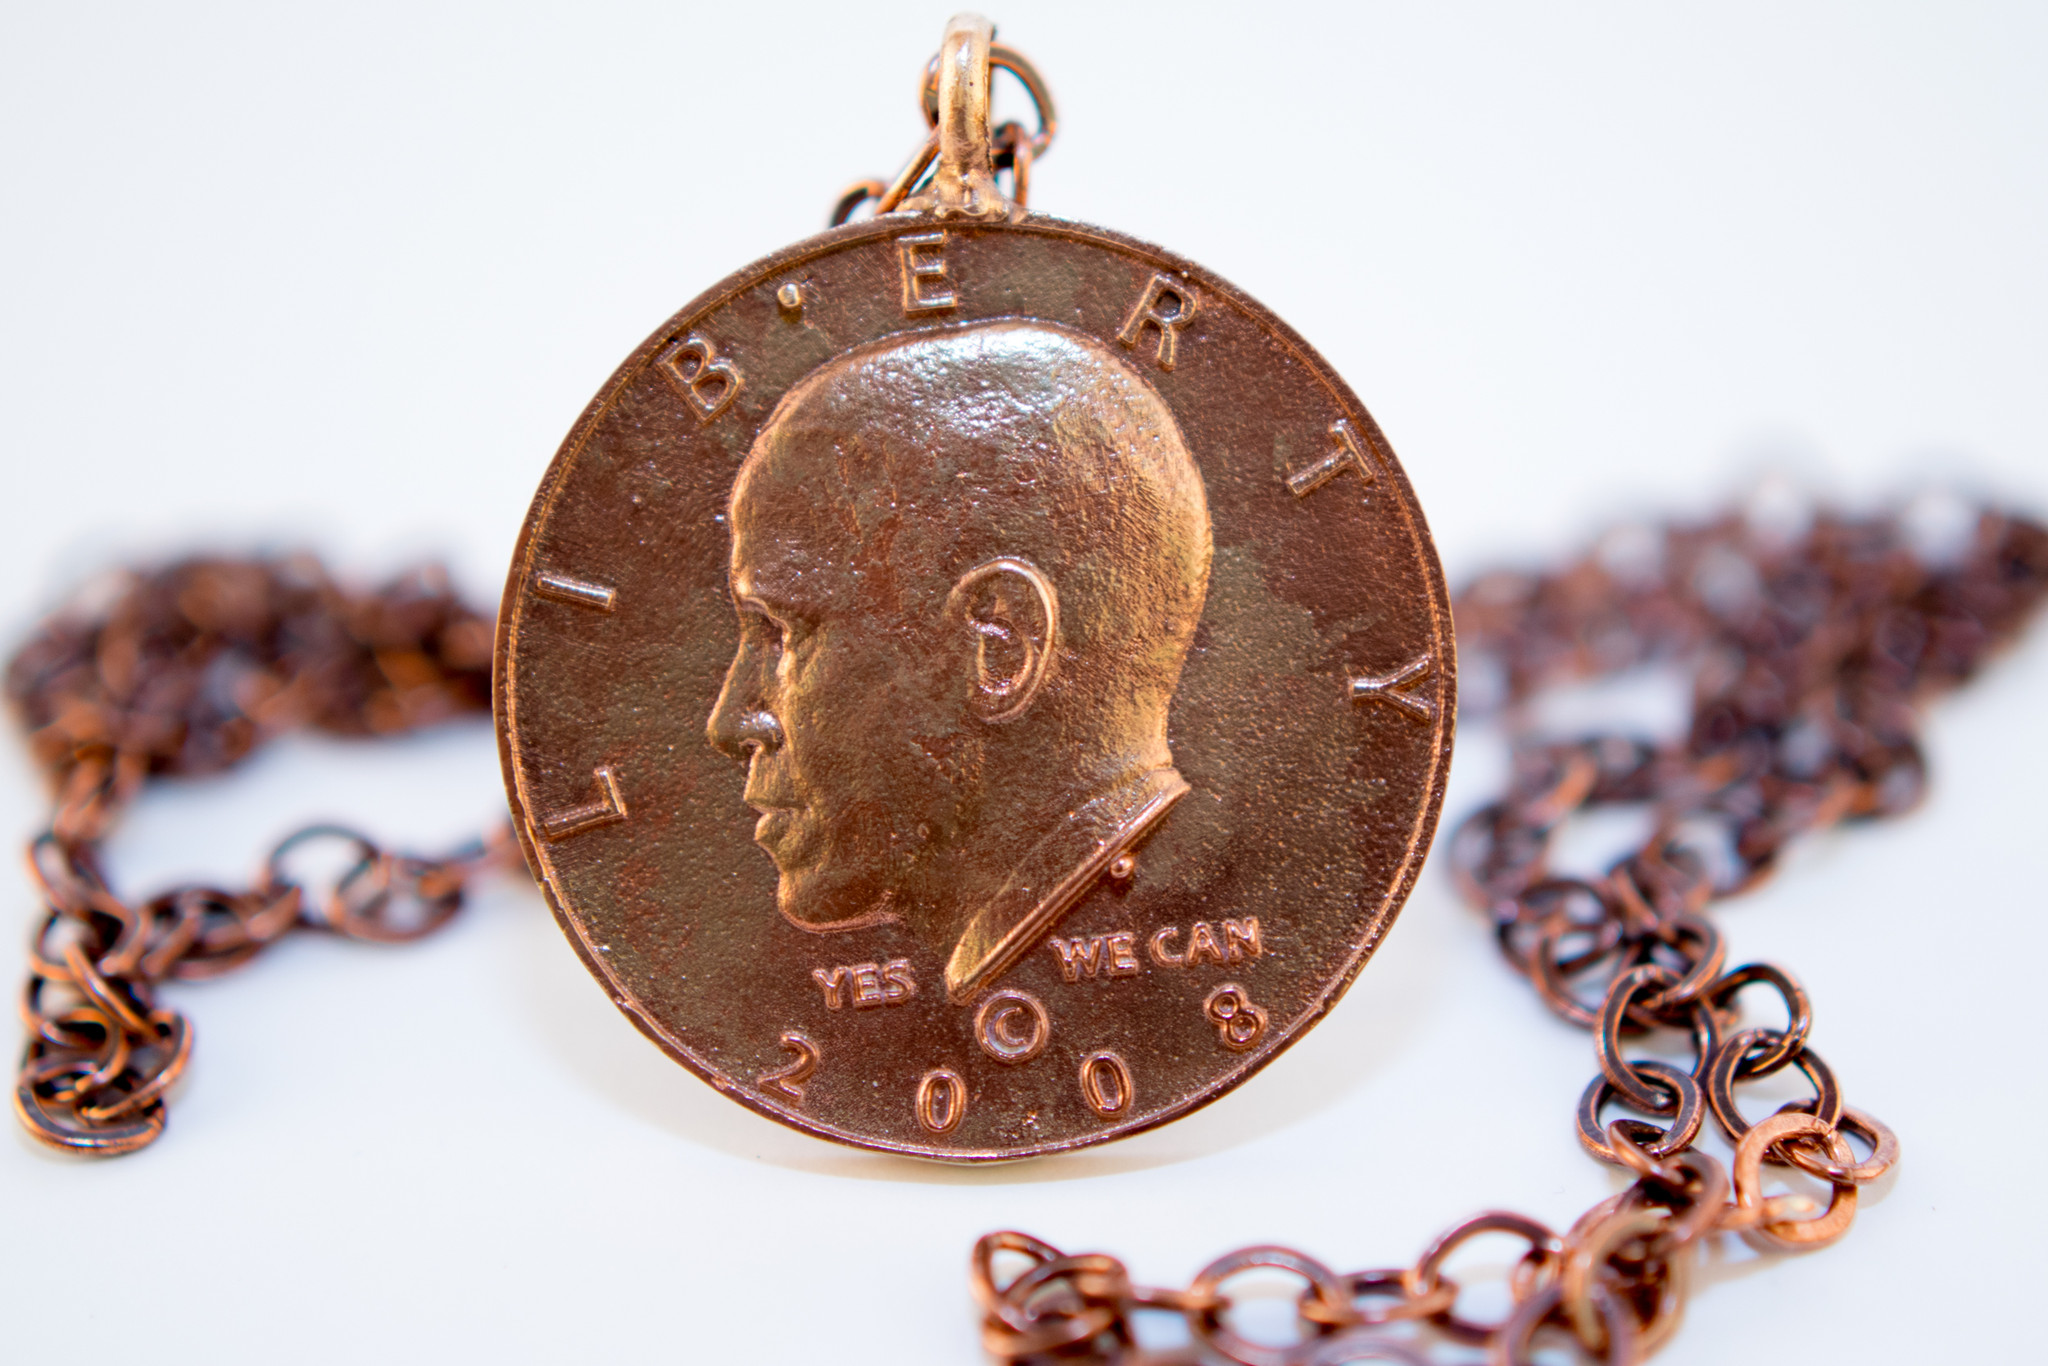
Jewelry is also something that is a good opportunity to mix sculpted elements with CAD. This set of cuff links and pendant for 44th Legacy combined a relief sculpture from ZBrush with elements modeled in Rhino. The final pieces were created in bronze with the lost-wax process.
cuff links and pendant for 44th Legacy
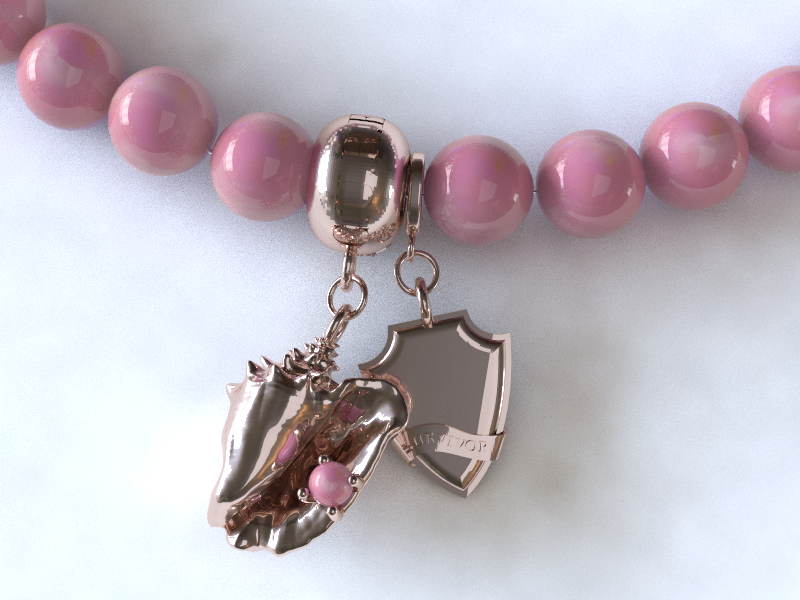
Another jewelry example combines a conch shell with other elements for a custom bracelet for BEACH BY JEWEL
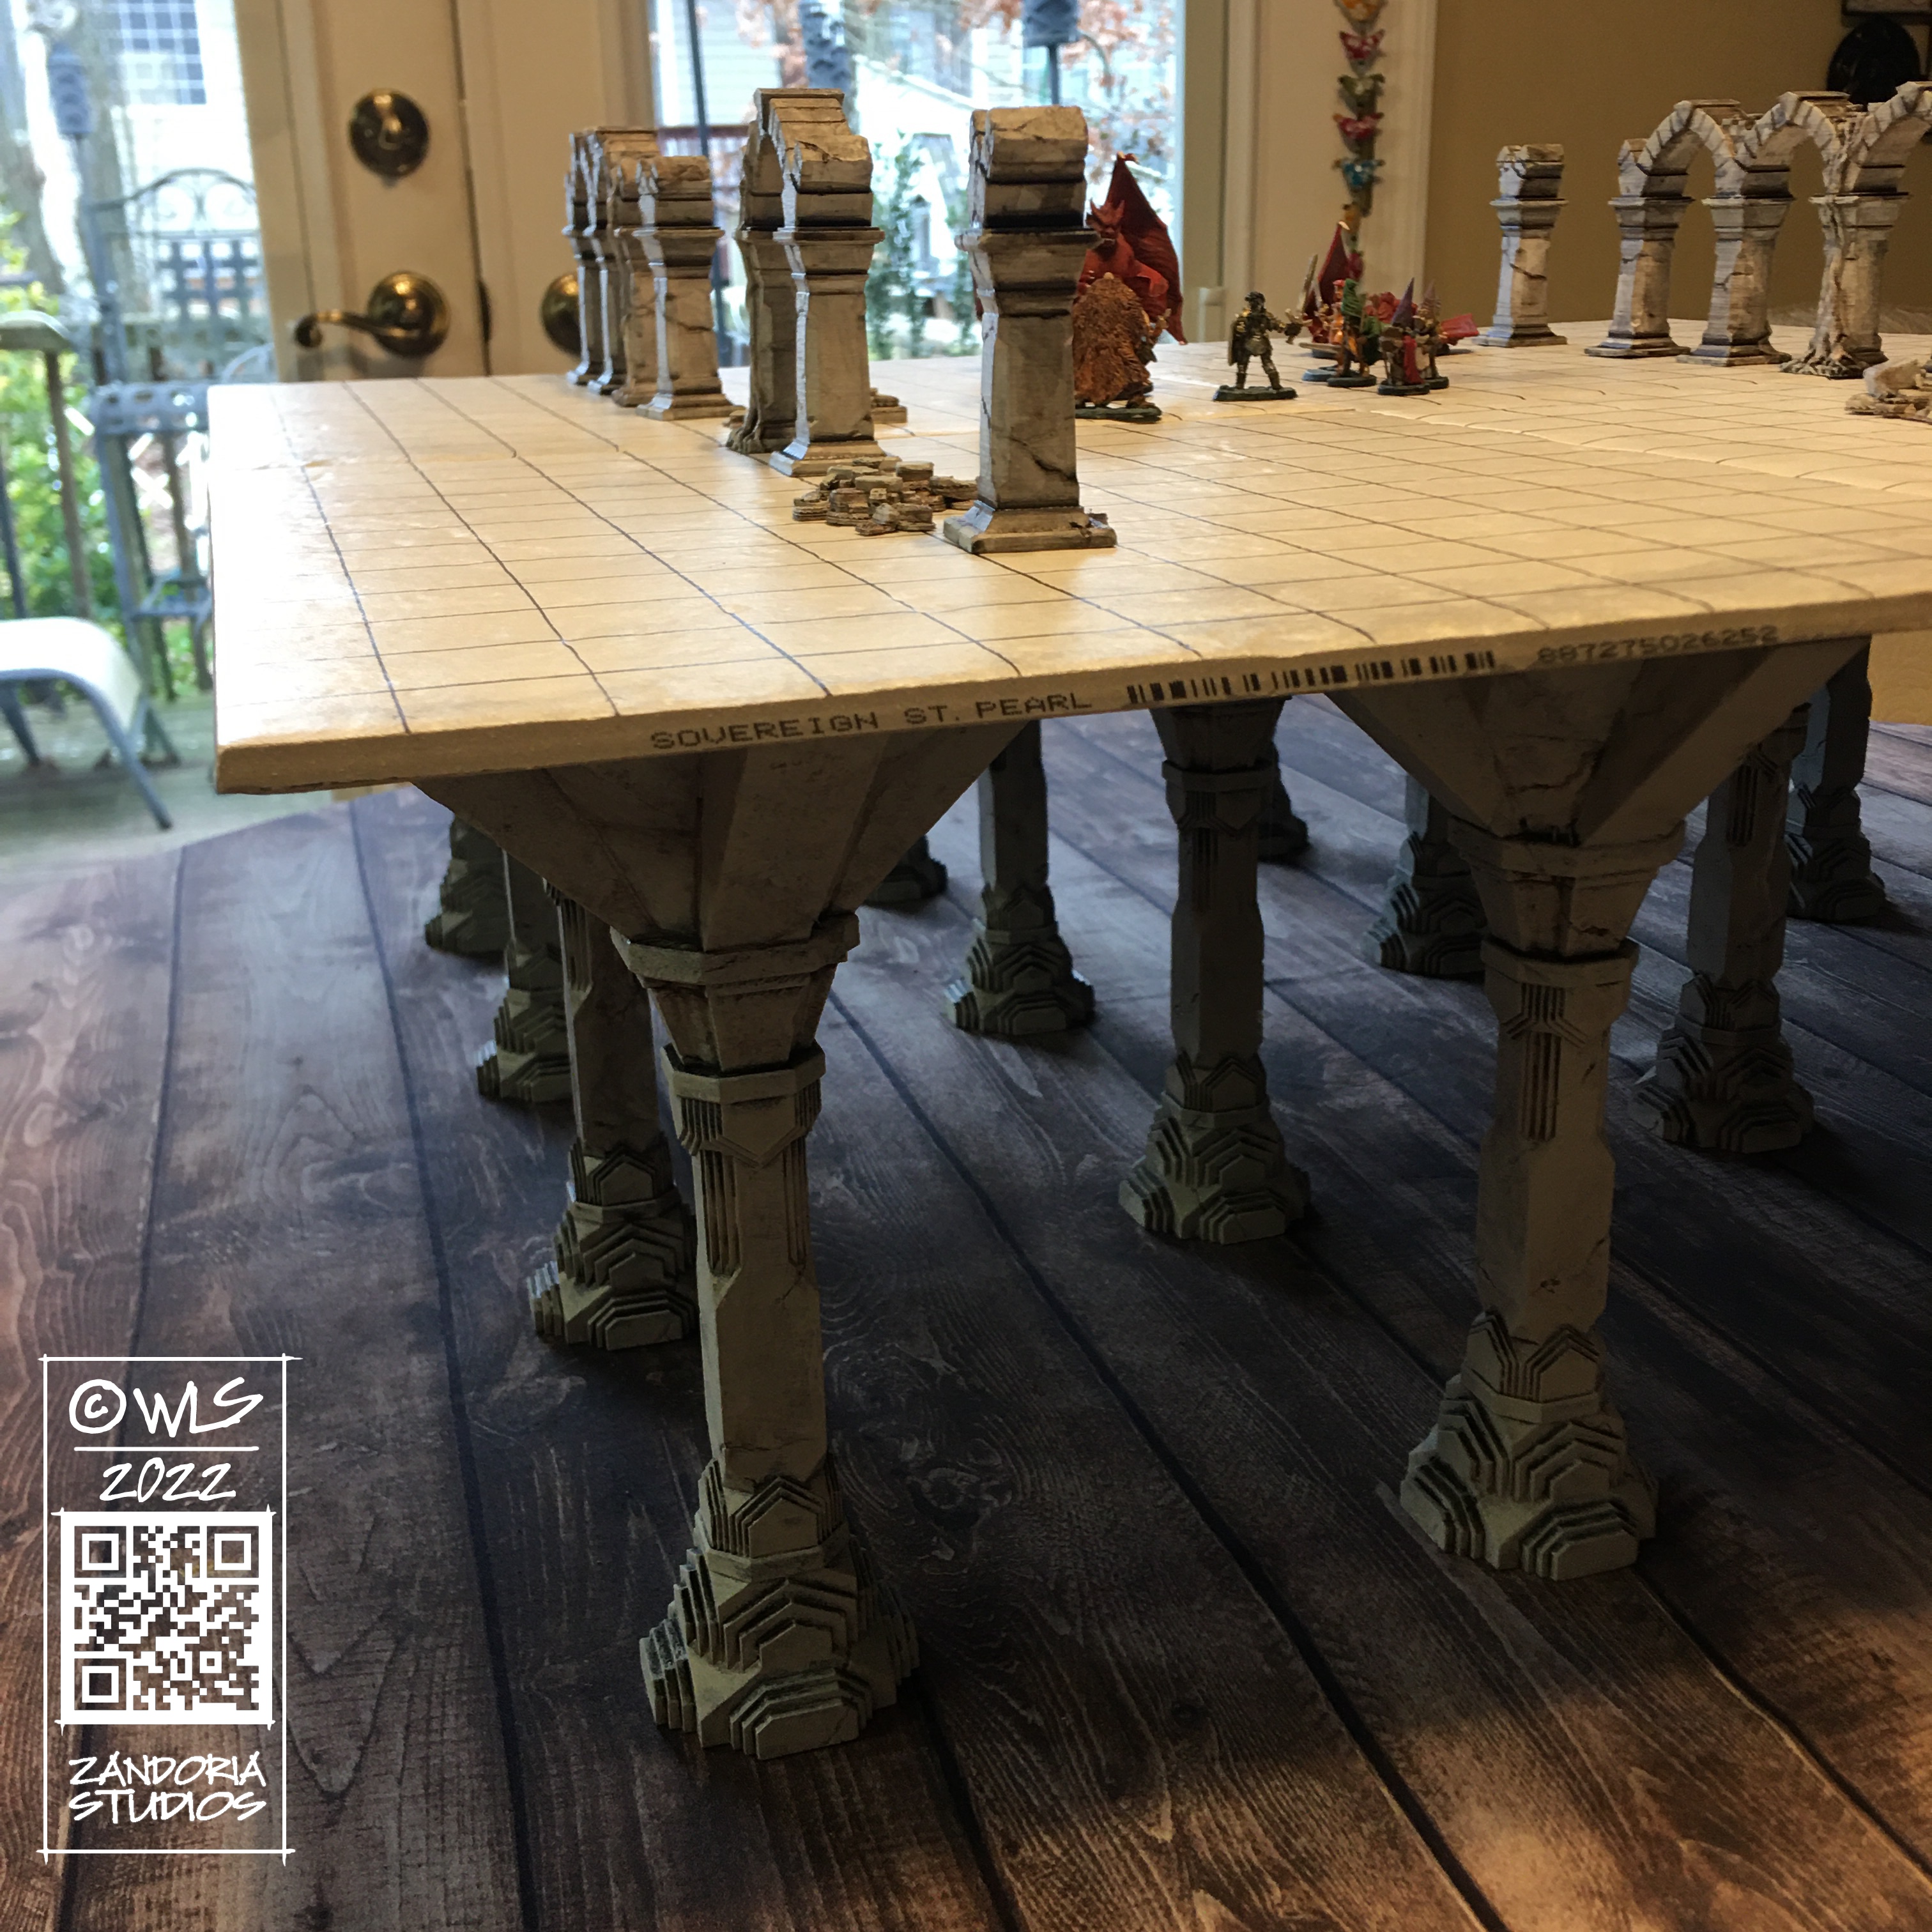
I have been seeing little game tables advertised on Facebook called Level-Up that cost $370 for what is essentially a modular table on skinny little legs… I felt that though the idea is a good one: elevate the map surface above the character sheets, dice towers, drinks and snacks–but the execution wasn’t very inspired….
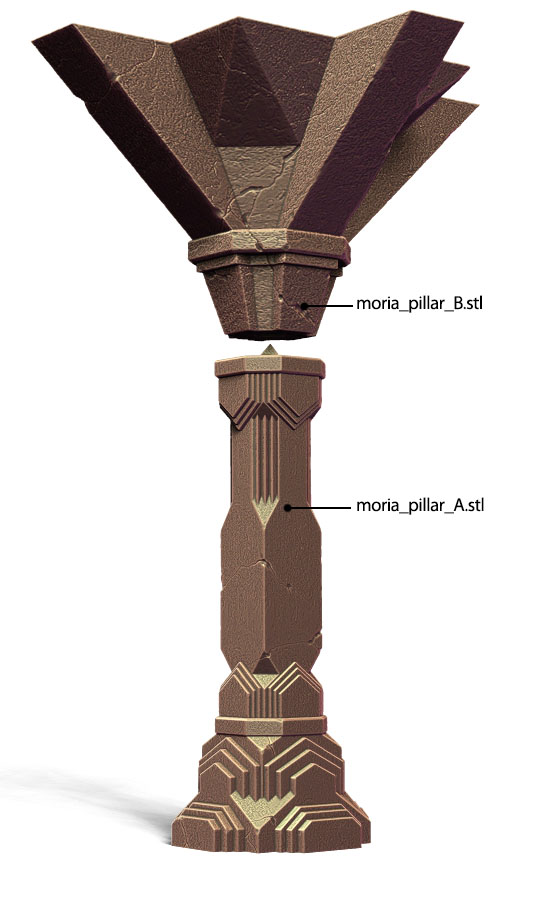
So I took a look at a model that I had originally created in Animation:Master for my Balrog model, and thought about how to modify it to make 3dprintable Moria pillars for table legs.
3dprintable pillars
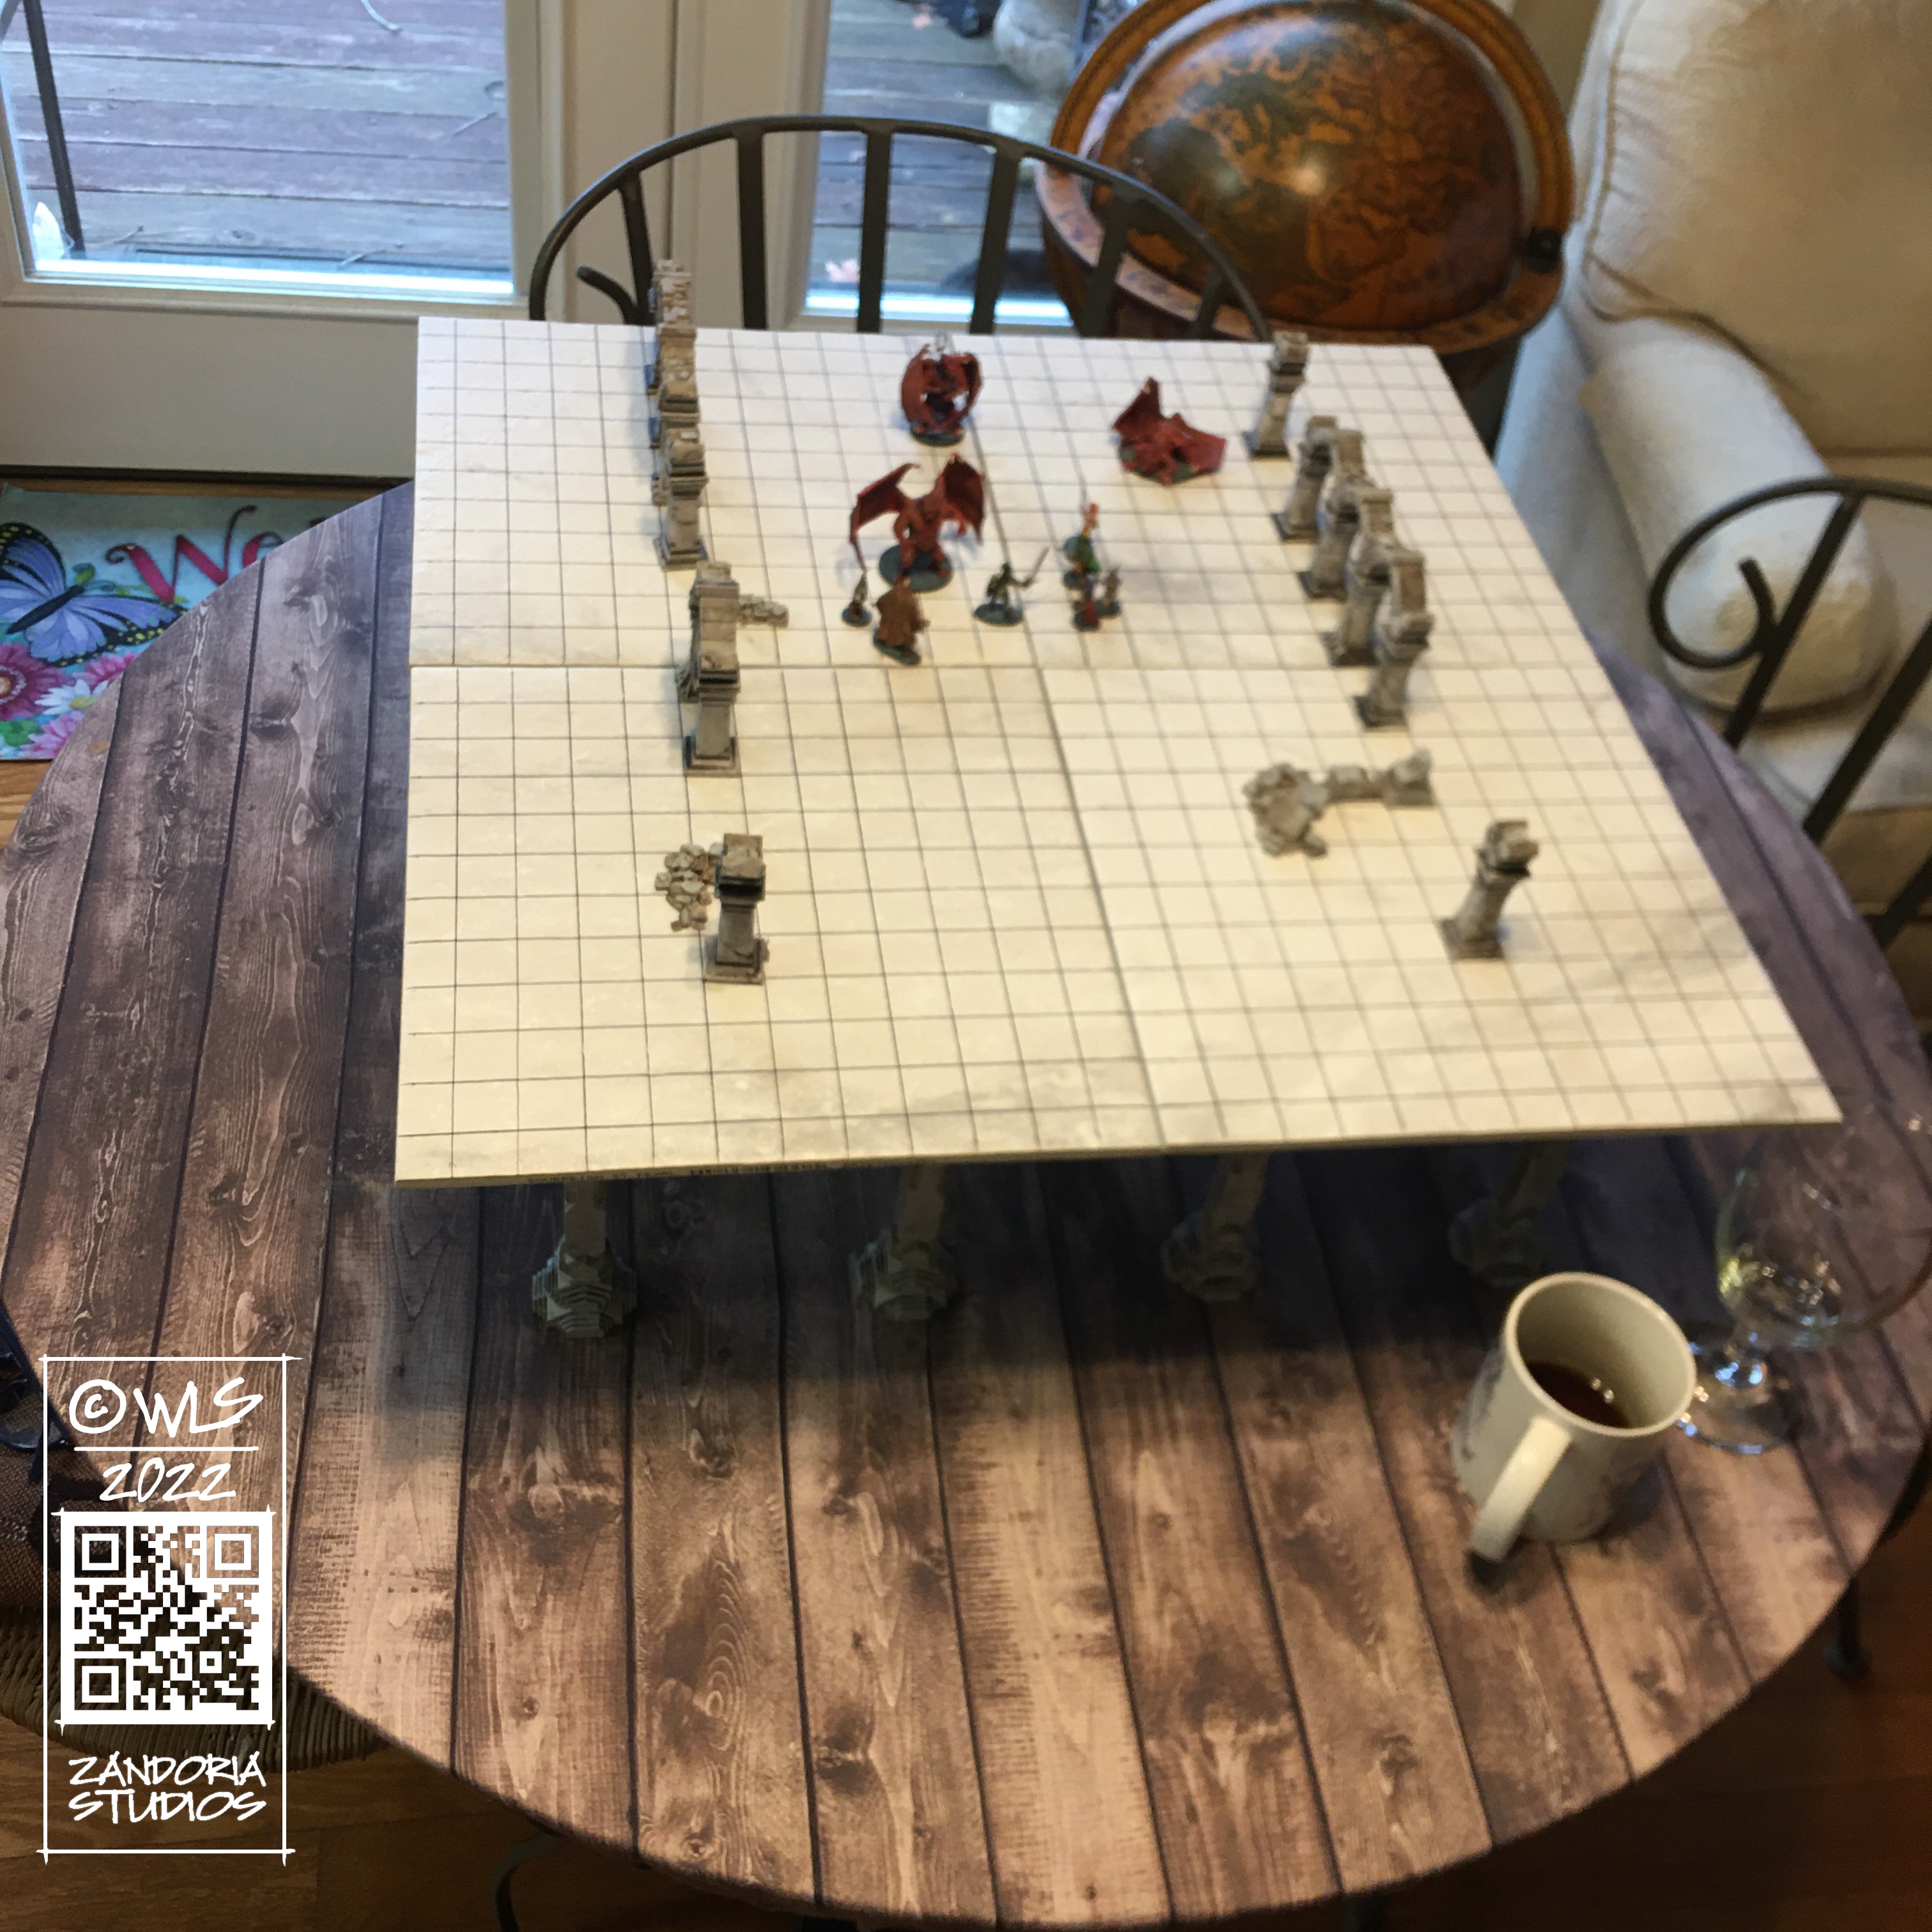
I decided to split the tabletop into 12″ squares with 4 legs. this will allow you to configure different size map tables, and designing the pillars to sit on 6″ centers will let the pattern continue underneath the game surface. I was going to use plywood for the table surface, but it was cheaper and looked nicer to use ceramic floor tiles!
2′ x 2′ tabletopthe table raises the game above the drinking glass!
The tabletop is about 7″ above the table, so it sits above the level of soft drinks and glasses. But is still low enough to give the players an unobstructed view of the game.
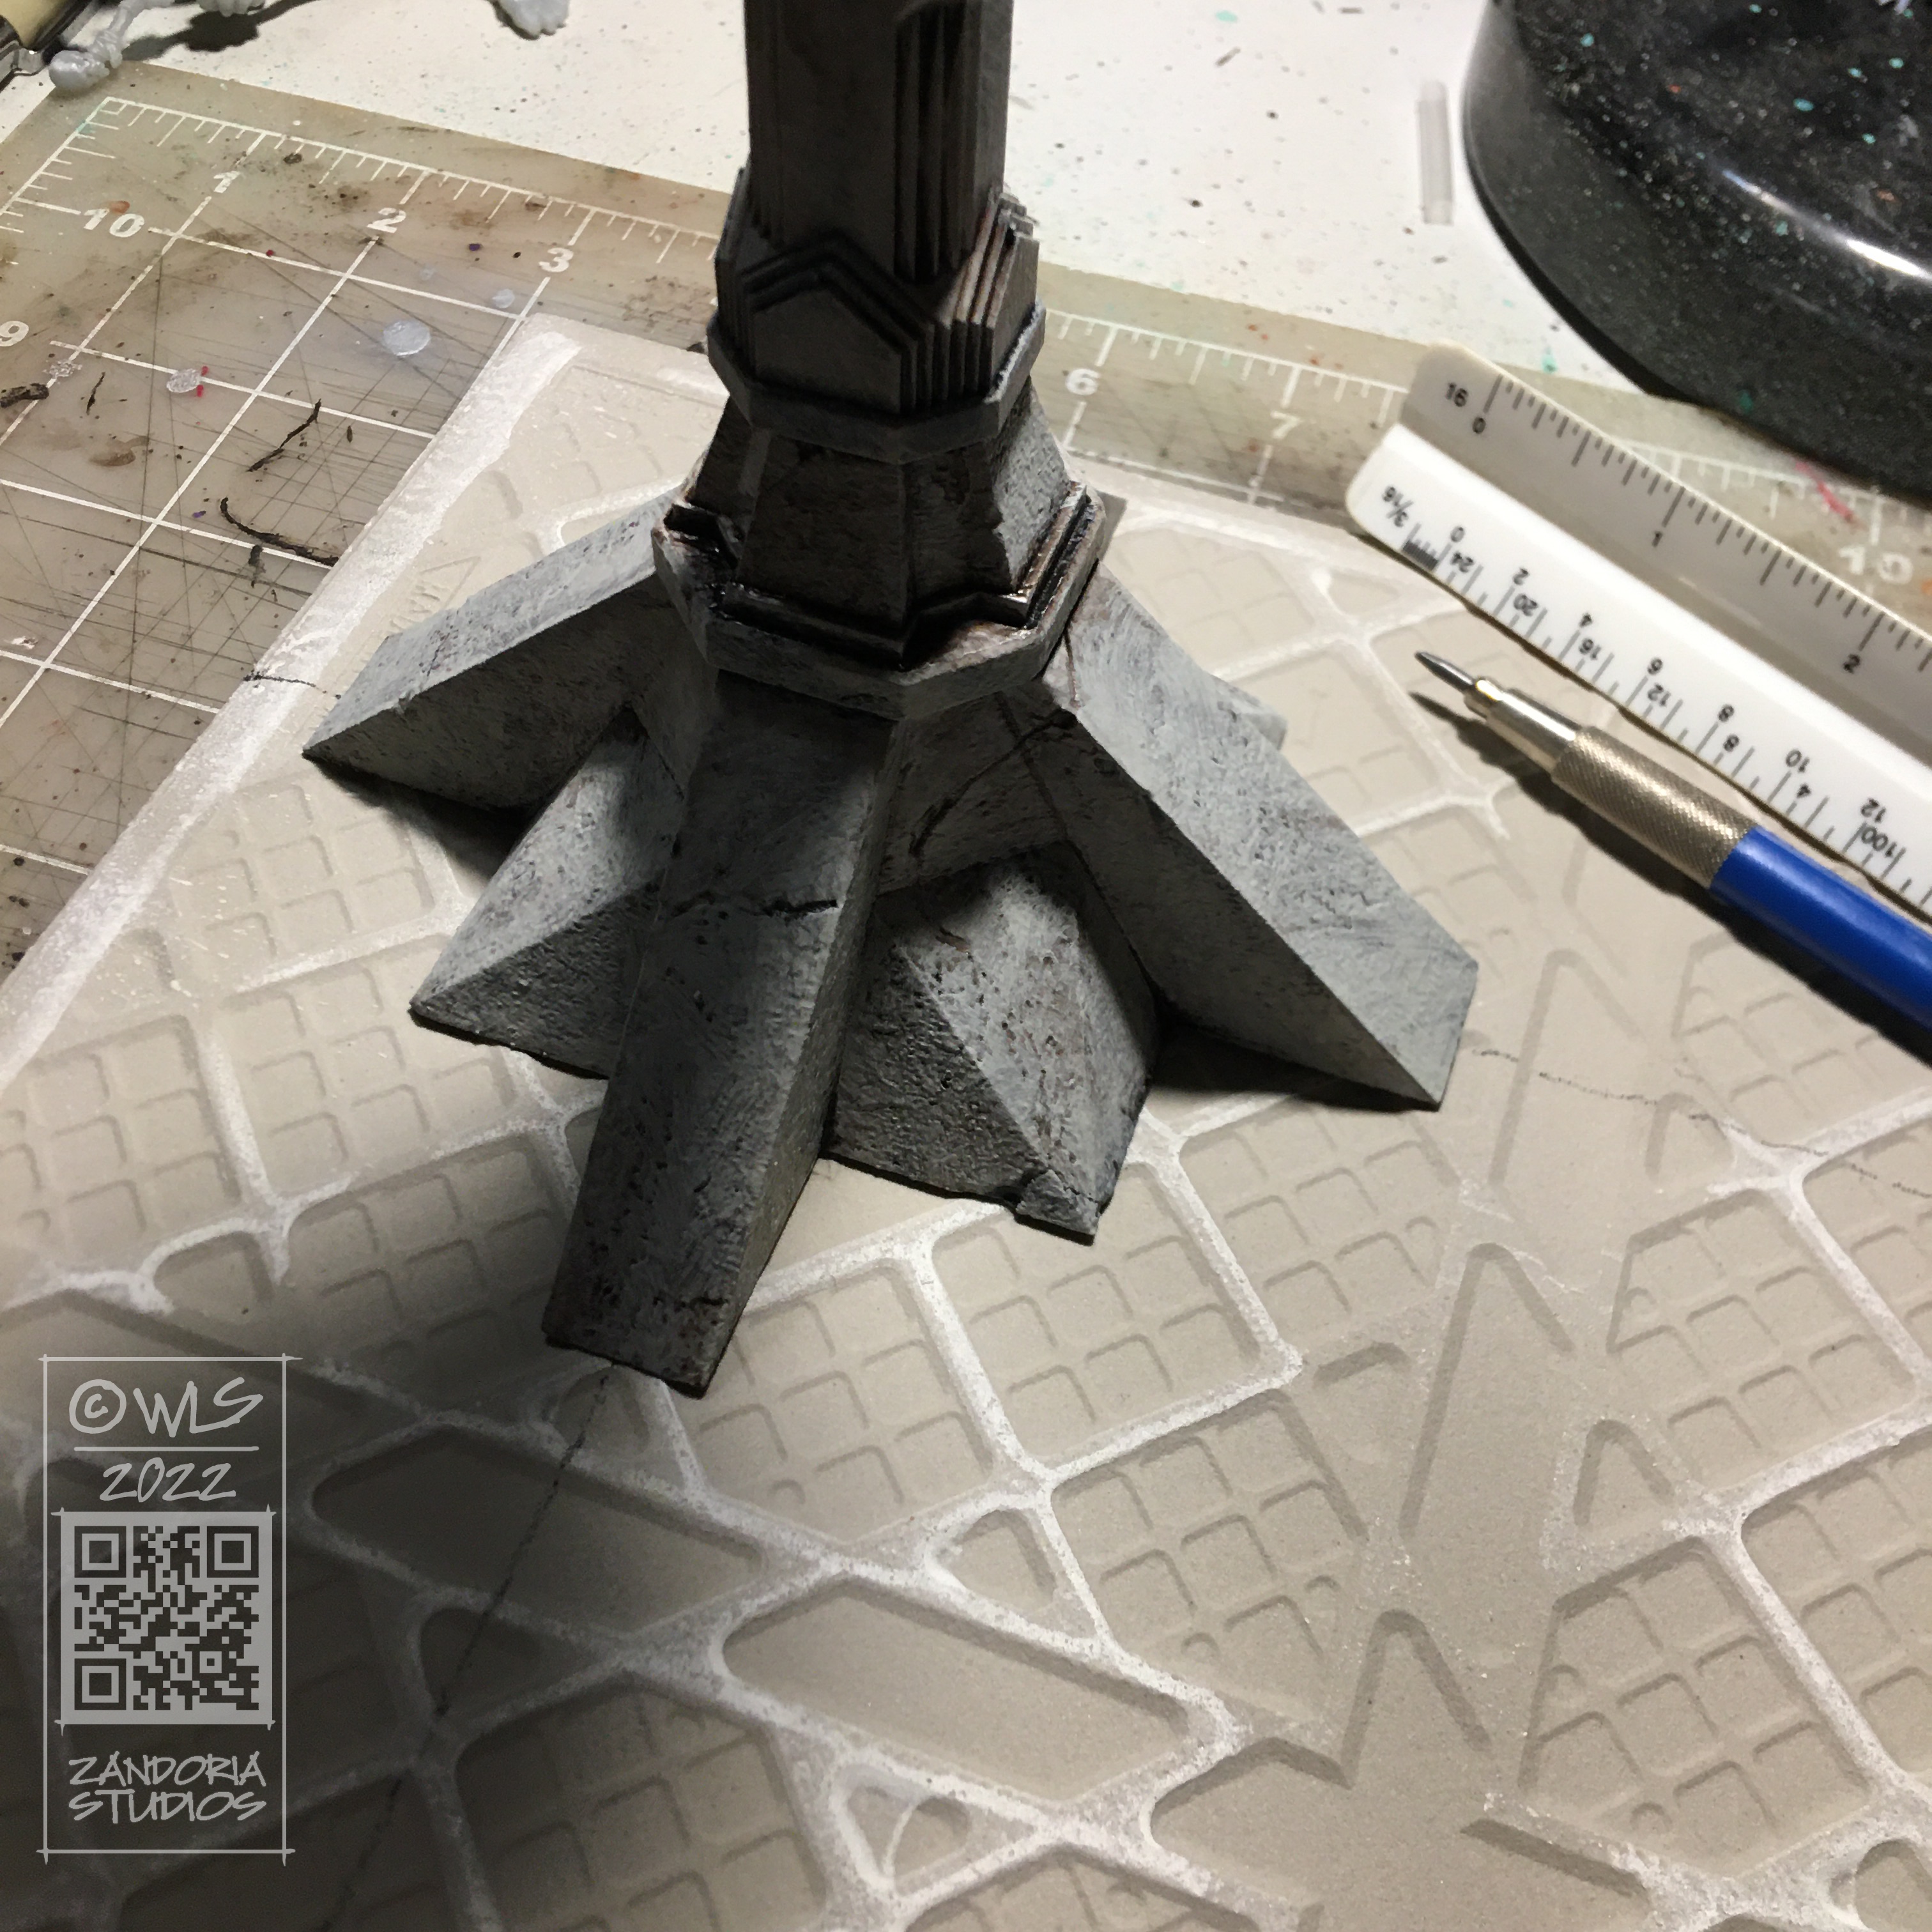
3Dprint the pillarsFor resin, use the hollow versionsPrime and paintmeasure the spacingHot glue the pillarsDone!Finished Moria Tabletop
I was really happy with how this turned out! The floor tiles were only $2 a piece at Lowe’s, and the grid was drawn with a Sharpie! The pillars for each table were about $10 worth of resin, but it was much faster than printing on my FDM printer (at fine resolution, my Ender3 took about 20 hours for 1 pillar, while the Mighty4K printed 6 of pillar A in about 10 hours)
If you like this project and would like to make your own, you can get all of the files for $12 at Cults3D.
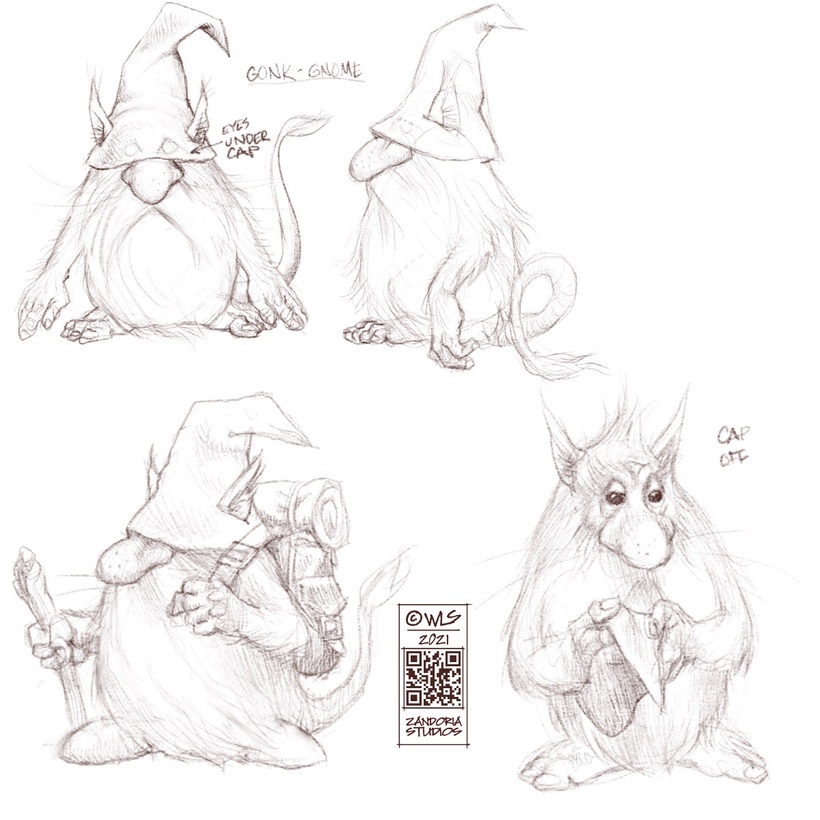
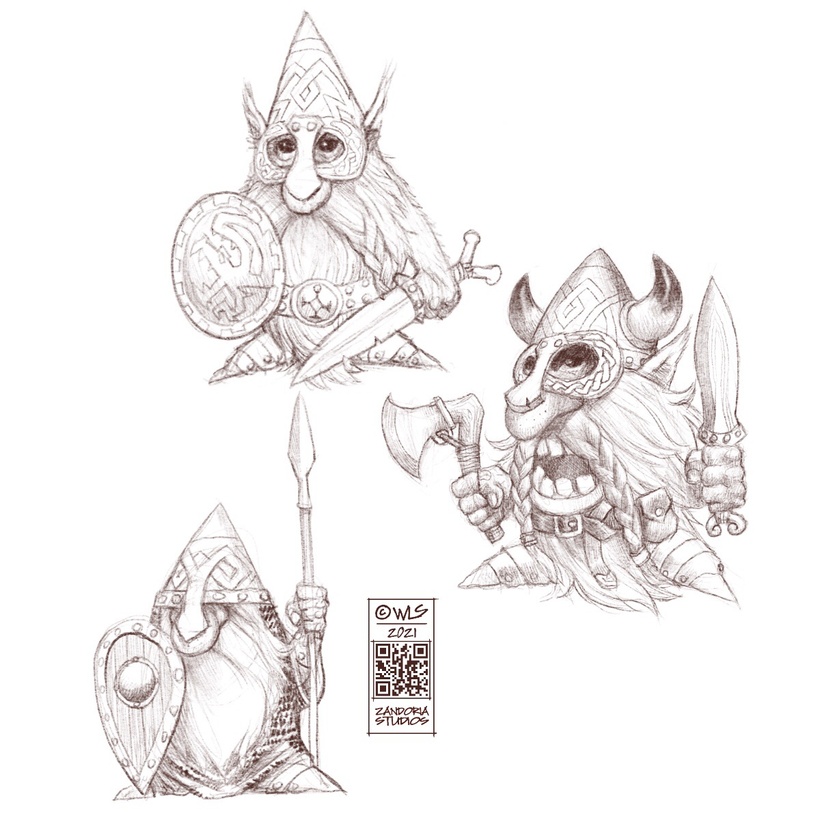
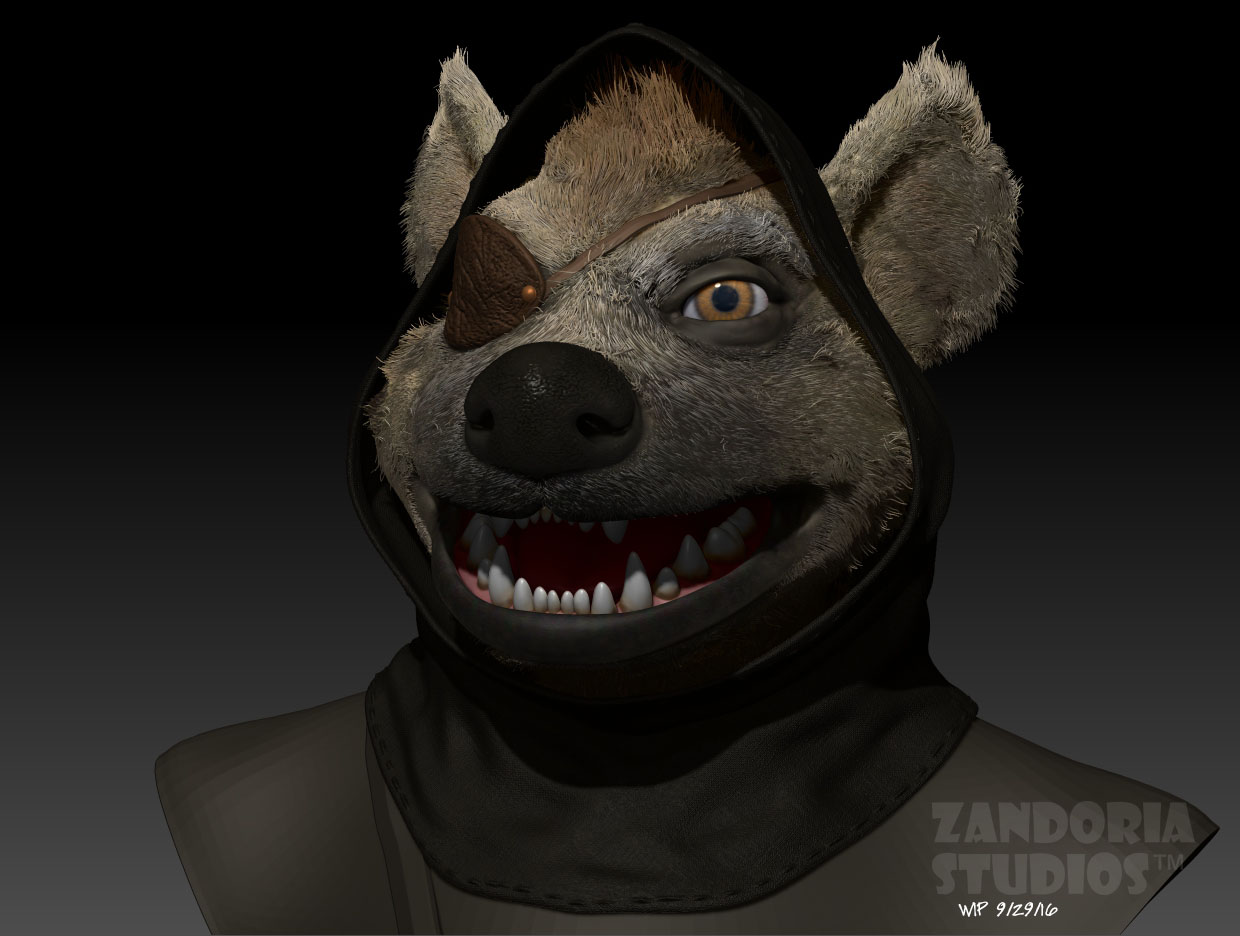
What do these gnomes look like without their caps? That was one of the questions that I asked myself when one of my Patreon Sponsors asked me to design some…
I thought this little guy looked adorable! I sculpted a lot of detail into him, so that he will make a great miniature or figurine. I plan on adding more of this style of gnome to my Patreon, Etsy, and Cults3D for you to enjoy!
This was a custom martini glass of 3 bear cubs climbing a pine tree. The client provided some photos for inspiration and specific volume requirements for the martini. Originally conceived as a 3D printed piece through Shapeways, I designed around the requirements for their process. However, because this was a luxury item, the client opted for using a traditional foundry and had the glasses cast in stainless steel.
Because of the need for precision for the glass, I modeled the basic form in Rhino. Then I exported that Geometry and brought it into ZBrush for the sculpted elements. I looked at a number of materials from porcelain to steel to give the client some options for materials, as each material has different specifications for minimum wall thickness.
The basic bear cub was modeled in ZBrush, and 3 different copies of it were posed on the stem of the martini glass
The details of tree bark, branches, and roots were sculpted on the geometry that I created in Rhino
The foundry used a 3D printed pattern to create traditional molds and then cast the final glasses in stainless steel.
I thought that this project was interesting because I was able to combine the precision of CAD, calculating the liquid volume, with the artistic freedom of digitally sculpting in ZBrush. I also liked how well it turned out, as an actual martini glass.
The client was also very pleased with the results. and says that the metal also serves as an excellent heat sink, keeping the martini cool!
I was thinking about sculpting miniatures for tabletop war games, as an opportunity for freelance work, and I made a list of all of the companies launching new games or miniatures on Kickstarter. There were dozens of successfully funded projects, and the money raised was significant–it looks like tabletop war gaming is booming.
But along the way I discovered that the companies producing these games and miniatures are not paying very much for the original sculpts used to mass-produce the figures. Maybe it is the high-cost of traditional tooling for injection-molding or spin casting that makes the business model so lean, or maybe something else… For the producer, the sculpt is just one of the expenses, along with molding, painting a sample for marketing, etc. ( They pay about as much for the custom paint job as for the sculpt!)
This kind of blows my mind, because the sculpture is the whole product! Without the sculpt, there is nothing to produce.
If you want to freelance for a miniature company, you will be offered only $350-$400 for all rights to your work, and your native ZBrush file… No royalties, just that small amount of cash. If you spent a whole week on a miniature, you would be working for slave wages….
So I had to sit down and rethink… clearly there is a demand for tabletop miniatures, but the traditional approach is not going to work for me. I can’t see how it works for anyone!
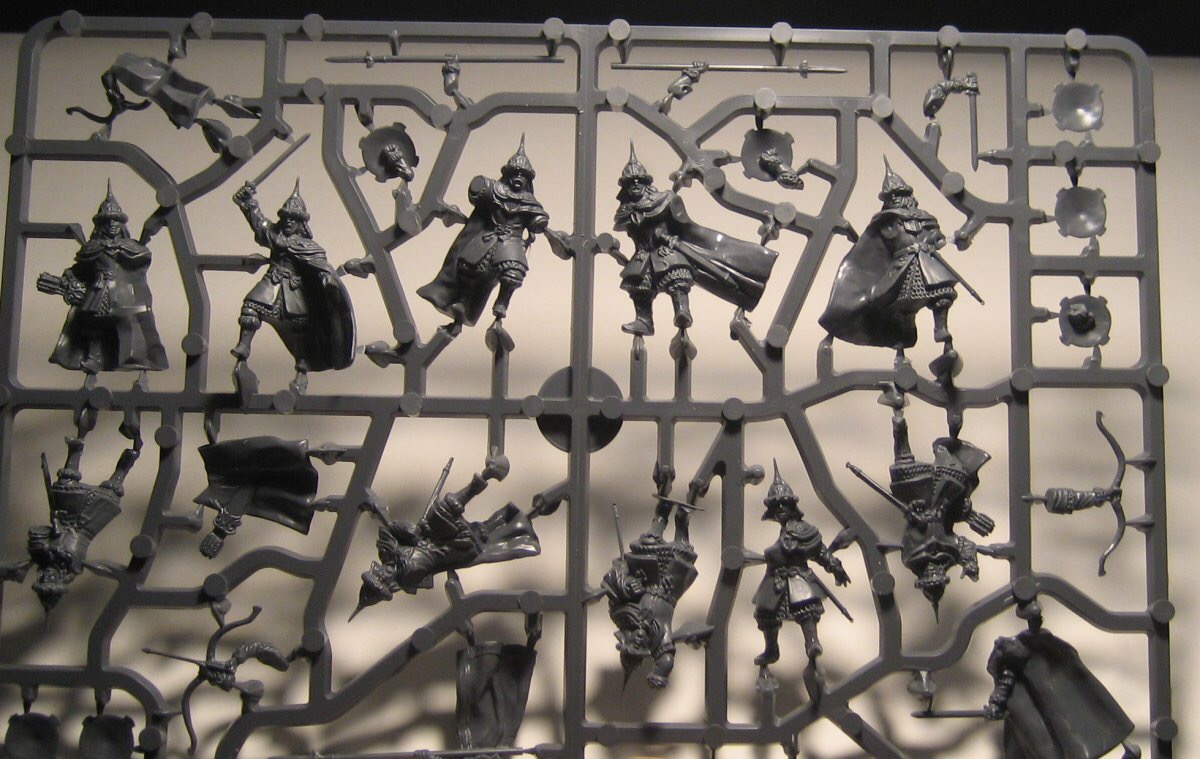
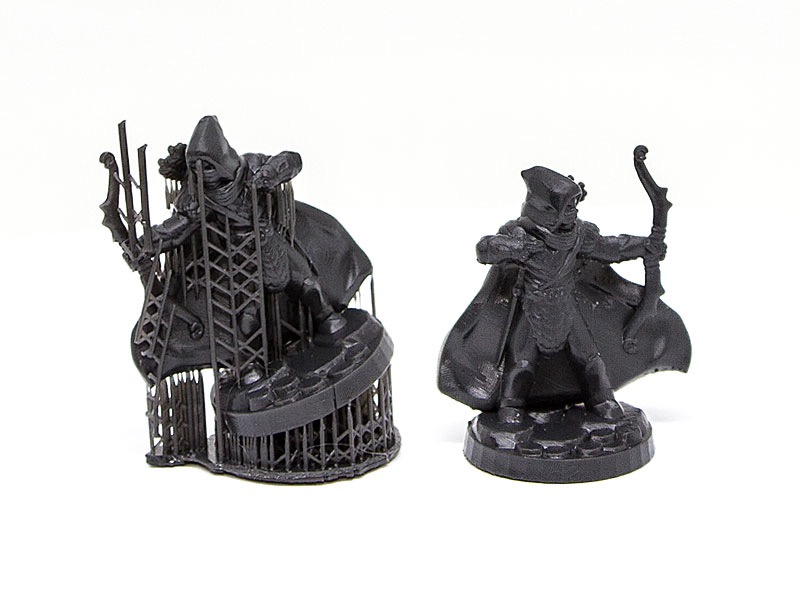
When a traditional company wants to manufacture a mini, they will use a high-resolution DLP 3D printer to build a master copy, that they will cut up and prepare for molding. Whether the miniature is manufactured with spin-casting or injection molding, the customer will have to clean up the parts ( seams, flashing, sprue marks) and assemble the final product like a tiny model kit.
But there is an alternative to the traditional model. With Shapeways, an artist has access to the same high-resolution 3D printer used to print the master copy. Instead of making a mold of that master, you can sell those 3D prints directly. An artist maintains all of the control of their copyrights, and has a product that is superior to what can be molded. There is no need to cut it up into pieces. With 3D printing, you don’t worry about undercuts, or assembly, or seams.
The customer will still do a little bit of cleanup. There is a support scaffolding that is generated when the sculpture is printed, that has to be removed, but this is easily accomplished with a few minutes with an exact-o knife. Most of this support is cleaned-off by Shapeways.
The same DLP 3D printer that is used to make the final product, as is used to create the “master” copy in the traditional process.
Shapeways calls their black resin “BHDA” for Black High Definition Acrylate. I think they could come up with something catchier like “Dark Matter”.. But whatever you call it, this is clearly the way forward for producing a line of miniatures as an independent artist.
I’ve done a few pieces as tests, so that I can confirm the quality for myself. I will be adding more to my Shapeways shop as I move forward. Now I just have to let people know about them (marketing…)