DECALING in Animation:Master
using the UV EDITOR


This tutorial will take you through the process of creating Decaling coordinates for a complex model such as the BALROG in Animation:Master.

On an intricate model like this, it is important that you organize yourself by using named groups. We will be hiding and unhiding different groups to stamp them with decals. If you experience a crash in the middle of this process, all you will have to do is select the group from the PWS and click the HIDE (H) button to continue. [If you ignore this bit of sage advice, you will spend a lot of time re-selecting the patches you want to work with]
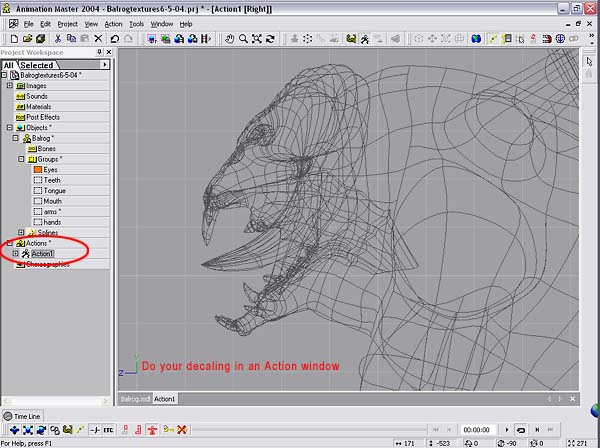
Create a new Action to do your decaling. You will be moving control points around and you need to do it where you can do no permanent change to your model. At any point you can CLEAR ACTION from the menu and go on. [Some long-time users prefer to do this in a Pose, so that their decaling pose is saved with the model in case they want to redo someting. Now that you can Edit your UV coordinates directly, that precaution is no longer necessary.]
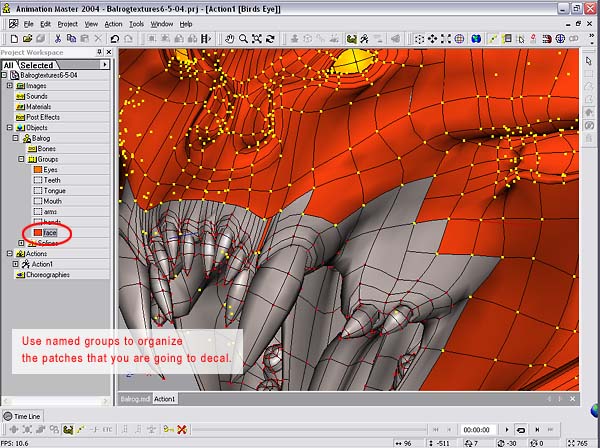
I find it helpful to temporarily assign a surface color to a group so that as I add patches to the group they change color, making it easier to see what I’m doing. Use the Patch-select tool to directly select a patch. Note: use SHIFT to add patches to the selected group and ALT to remove patches from the selected group. (Notice that I’m adding patches to the named group from within the action window–you will not be in the modeling window at all for this tutorial.)


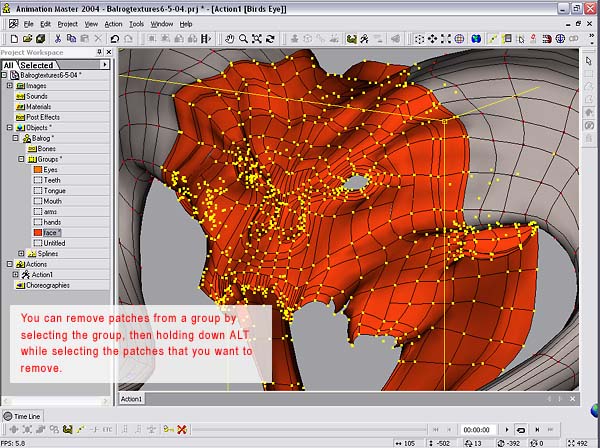
Once you have the named group selected, Hide (H) everything else. For this part of the model, I’ve decided to use FLATTEN to unwrap the face, because I want to be able to paint in a lot of detail and I don’t want to chance a seam or stretching in the face. [see page 171 in the A:M Technical Reference]

Create a “blank” image to use for all of your decaling. For this project I’ve made a 800x600pixel image, all white, named “blank.tga” It doesn’t matter about the resolution, you will replace it later with a high-resolution image.

Stamp this decal onto your patches. The position and size aren’t important, you will adjust all of your stamps position and scale in the UV EDITOR (also called Decal view).
 Right-click on the name of the decal in the project workspace (PWS). Choose EDIT from the context menu. This opens the decal view (UV Editor).
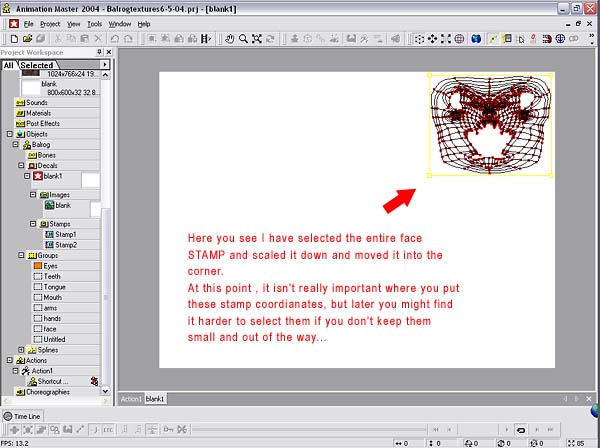
For now, I’ve moved the stamp out of the way on the side of the decal. If you are able to get all of the patches in one group stamped at once then it is easy to select and move it later, even if it is overlapping another stamp.
There are situations where you will have several applications of a stamp to get both sides of an object and you may need to move those stamps at the same time, so it will be easier if you don’t have them mixed up with another group. The horns represent this type of situation:
 Assigning a temporary surface color to the “horns” group makes it easy to see if I’ve got all of my patches.

In this situation, I need my texture to wrap from front to back. I’ve decided to stamp it twice from the same direction to get the front and back patches. A patch can be stamped from any direction because it has no thickness. Because of the nature of creature’s surface appearance, I will use this same technique for the torso, arms and legs [This would also be a good method for creatures such as fish, were both sides are the same].
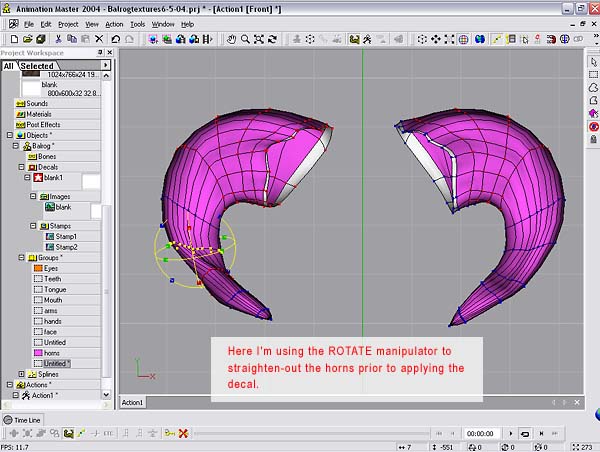
Before stamping these patches with the decal, I make some adjustments to the mesh so that the patches are relatively flat in the direction I’m facing them. The scale manipulator is useful for this–sometimes referred to as “manual flattening”.
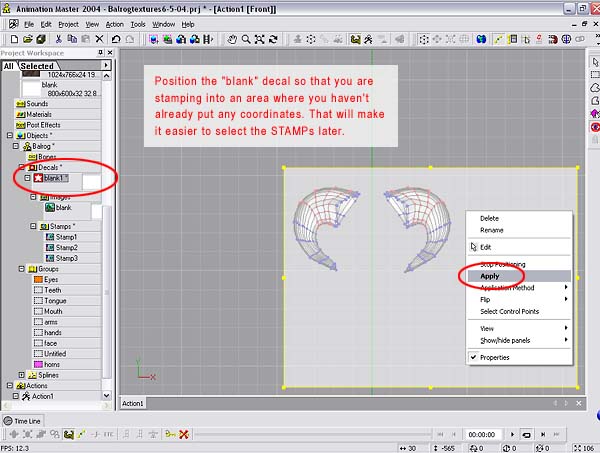
I position the decal in an area that I know isn’t going to overlap any other stamps. this will be trickier as the decal gets full, in that case scale the decal up so that your stamp will take up a smaller space, then readjust later as I will show you next:

The first application of the decal on the horns is going to miss the patches on the back side. Select the missed patches by right-clicking on decals in the PWS and choosing GROUP UNDECALED CONTROL POINTS from the context menu. Now Hide the rest. [NOTE: 5 point patches share control points with other patches, because of this one or more of the control points of the 5 point patch may be part of a decaled patch. In which case the 5 point patch will be hidden unless you specifically select it with the patch-select tool before hiding.]

After hiding, you can see the patches that were missed with the first stamp. Apply the decal again, leaving it’s position unchanged.

You may have noticed that all of your stamps are named “stamp1, stamp2,etc”. This will get very confusing quickly unless you rename the stamps to correspond to the parts of the model they contain.
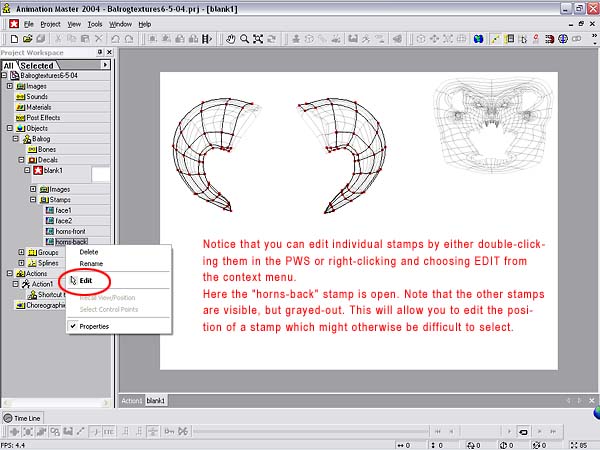
If you double-click on a stamp name (or choose EDIT from the context menu), it will open in the Decal view (UV editor). The other stamps are visible but grayed-out. This will let you reposition the stamp even if it is overlapping another one.

I’ve moved the location of the face and horn stamps to maximize space. You can use the transform, scale and rotate manipulators as well as group select. to move points. [If hash adds a “lasso” tool it would be great–where I have nested the stamps of the horns would be very difficult to select again]
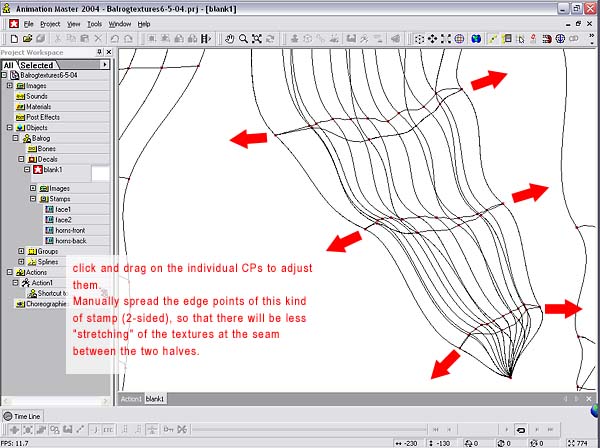
To create a little bit of canvas to paint textures on, I am pulling the edges of the horns outwards. this will prevent “stretching” as the texture goes around the seam.
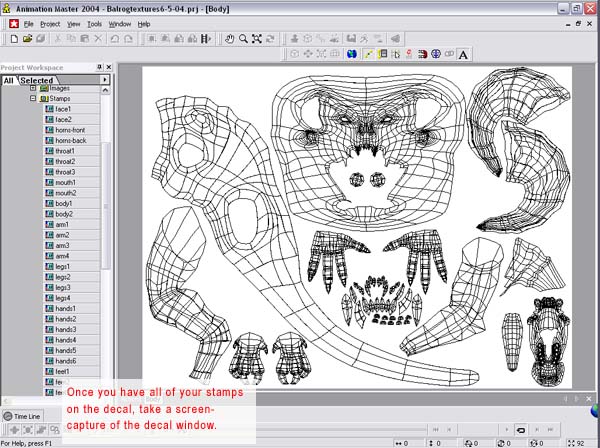
After you get all of your stamps applied, take a screen-capture of the decal view. In Windows, use the Print Screen keystroke to capture the screen to the clip board.
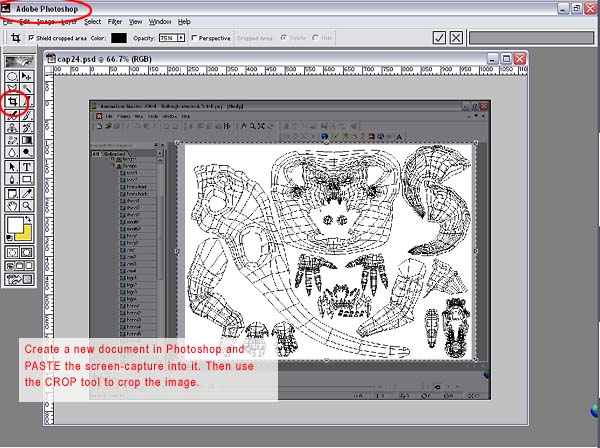
Paste the screencapture into a new document in Photoshop. Then crop it to the edges of the decal.

Alternatively you could just crop into the background color and then use the TRIM command to crop the image based on the pixel color, cutting off the background.

Resize the image to a high-enough resolution to be suitable for your model. What is appropriate is dependent on the medium that your final renderings are intended for–don’t go overboard 😉
Save this as a template for painting all of your textures for the model. Put paint color, bump, specularity, displacement, etc. on different layers. Save these layers as .TGAs with an appropriate name such as “body_color.tga”.
On the Images container in your decal, right-click and choose ADD IMAGE from the context menu. Set the image type for the image. Delete “blank.tga” from the decal, it is no longer needed.
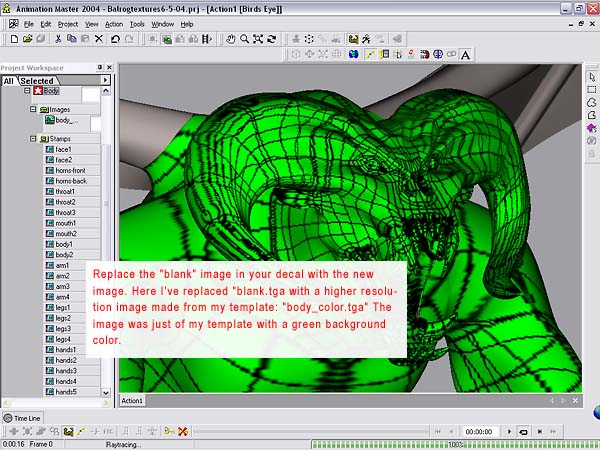
Now that you have all of your mapping assigned, it is time to go paint some maps!

Thanks for visiting! If you have found this tutorial valuable to you, please consider making a contribution!


Hi Will,
Really great and helpfull tutorial!
HavenT you been working on a Tut regarding a workpipeline from AM to Zbrush and back?
Is this still in the making or do you have found this not workable?
All the best
Jake
LikeLike
Thanx a lot for the tut, very helpful
LikeLike
Great tut! A classic.
LikeLike
Hi Will – thanks again for this wonderful tutorial. What’s nice about tutes like this is that when I mess something up I have no trepidation about tossing it out and starting from scratch. It enables the learning process!
LikeLike
Fuchur just linked to this tutorial in the A:M Forum and I am reminded why. This is a great tutorial that everyone should refer to for decaling their models. As always, thanks!
LikeLike